Now Reading: 5 DIY Greeting Card Ideas
-
01
5 DIY Greeting Card Ideas
Here are 5 DIY greeting card ideas, perfect for any occasion!
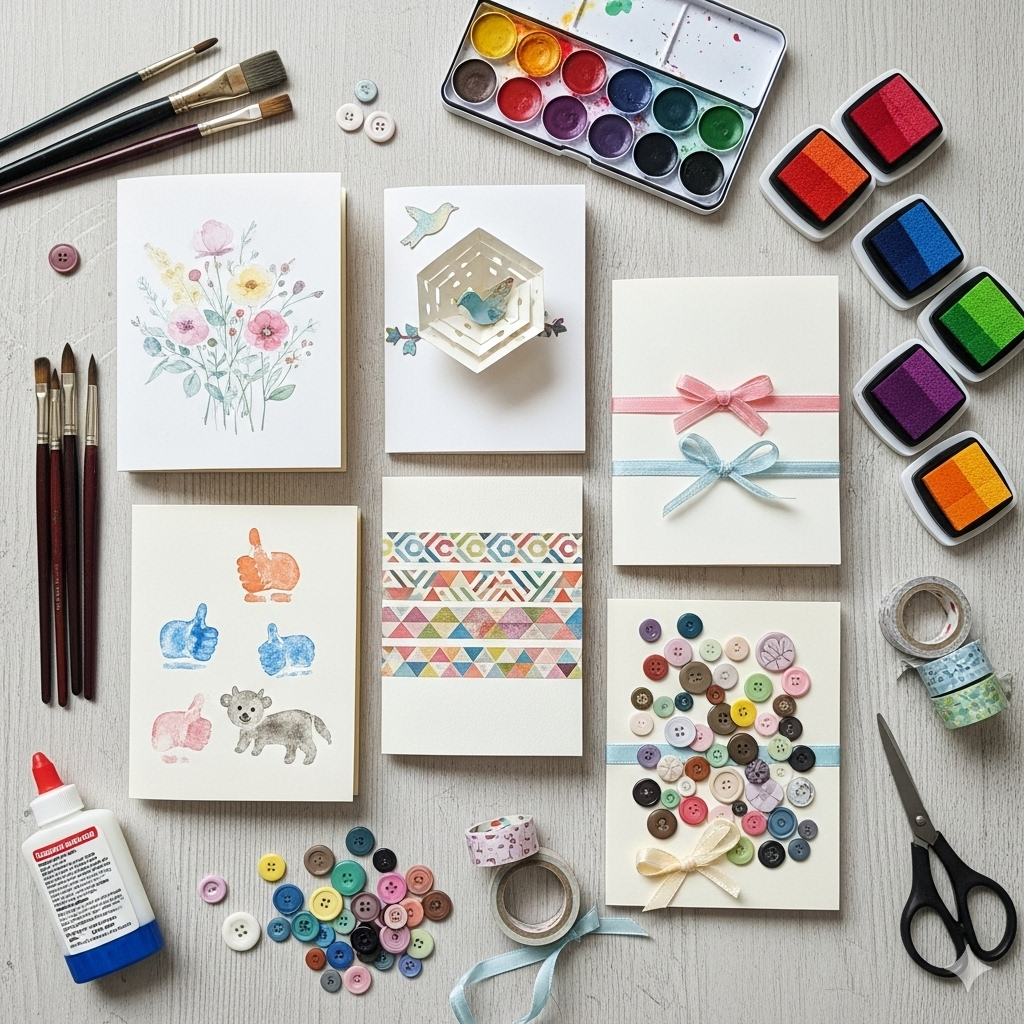
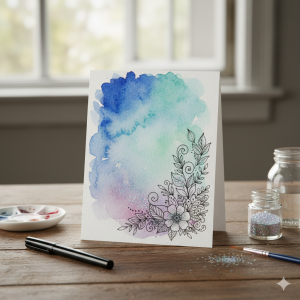
1. The Elegant Watercolor Card
This card is simple yet sophisticated, perfect for birthdays, thank you notes, or just because.
Materials:
- Watercolor paper or thick cardstock
- Watercolor paints
- Paintbrush
- Water
- Fine-tip black pen or marker
- Optional: Glitter or embossing powder for extra sparkle
Instructions:
Part 1: The Wash Dip your paintbrush in water, then pick up some watercolor paint. Apply a light wash of color across a section of your cardstock. You can blend a few colors together for an ombre effect. Let it dry completely.
Part 2: Adding Details Once the watercolor is dry, use your fine-tip black pen to draw a simple design over the painted area. This could be a floral pattern, abstract shapes, or even a simple border. The contrast between the soft watercolor and the crisp black lines creates a beautiful effect.
Part 3: Finishing Touches Fold your card and write your message inside. You can add a touch of glitter glue or use embossing powder on your drawn details for an extra special touch.
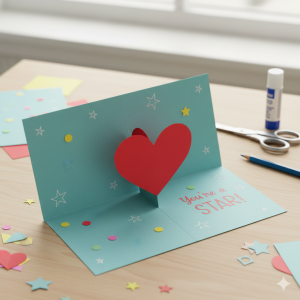
2. The Pop-Up Surprise Card
Delight your recipient with a fun pop-up element when they open this card.
Materials:
- Two pieces of contrasting cardstock (one for the card base, one for the pop-up)
- Scissors or craft knife
- Ruler
- Pencil
- Glue stick or double-sided tape
- Decorations: Stickers, smaller cut-out shapes, markers
Instructions:
Part 1: Preparing the Base Take one piece of cardstock and fold it in half to create your card base.
Part 2: Creating the Pop-Up Mechanism On the folded edge of the card base, measure and mark two parallel lines about 1-2 inches apart, centered along the crease. Cut along these lines from the folded edge, but only about 1-1.5 inches deep. Now, gently push the cut flap inwards so it pops out when the card is opened. Crease it well.
Part 3: Decorating and Assembling Cut out a shape (a heart, star, or even a small drawing) from your contrasting cardstock. Glue or tape this shape onto the front of the pop-up flap you just created. Decorate the rest of the card as desired. When opened, your chosen shape will “pop up”!
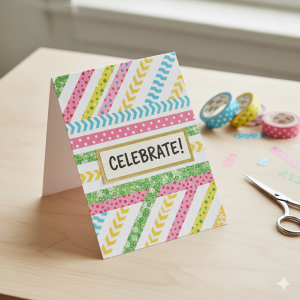
3. The Washi Tape Wonder Card
This card is incredibly easy and versatile, allowing for endless creative patterns using colorful washi tape.
Materials:
- Plain cardstock (any color)
- Assorted rolls of washi tape
- Scissors or craft knife
Instructions:
Part 1: Choosing Your Design Decide on a pattern or shape you want to create with your washi tape. You can go for stripes, a geometric design, or even create a simple picture like a candle or a balloon.
Part 2: Applying the Tape Start applying strips of washi tape to the front of your cardstock. You can lay them straight, diagonally, or criss-cross them. Overlap colors and patterns for an interesting effect. Trim the edges neatly with scissors or a craft knife once you’re happy with your design.
Part 3: Final Touches Fold your card and add a handwritten message. The simplicity of the washi tape design often speaks for itself, but you can always add a small sticker or a sentiment written with a metallic pen if desired.
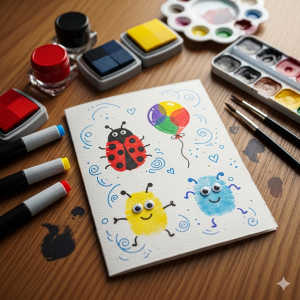
4. The Thumbprint Character Card
This is a fun and personal card to make, perfect for kids or anyone who loves a touch of whimsy.
Materials:
- Cardstock
- Washable ink pad or tempera paint
- Fine-tip black marker or pen
- Optional: Colored pencils or glitter
Instructions:
Part 1: Making the Thumbprints Press your thumb firmly onto the ink pad or dip it in a small amount of paint. Gently press your thumb down onto the cardstock to leave a print. Repeat this to create as many “characters” as you’d like. Let the prints dry completely.
Part 2: Bringing the Characters to Life Once the thumbprints are dry, use your fine-tip marker to add details. For a ladybug, draw a line down the middle and add spots and antennae. For balloons, draw a small knot and a string leading from the bottom of the print. You can even turn them into cartoon animals or flowers.
Part 3: Adding a Message Write a sweet message that complements your design, such as “You’re the best!” for a thumbprint flower, or “Thinking of you” for a cluster of balloon characters.
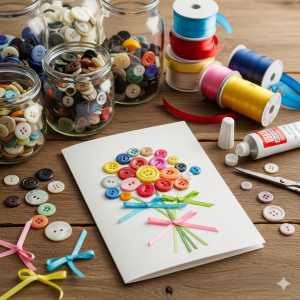
5. The Button and Ribbon Card
Create a tactile and beautiful card with this simple technique that results in a lovely 3D effect.
Materials:
- Cardstock
- Assorted buttons of different sizes and colors
- Ribbon or twine
- Strong craft glue or hot glue gun
- Scissors
Instructions:
Part 1: Creating the Stems Decide on your design. You can make a bouquet, a single flower, or even a line of balloons. Cut lengths of ribbon or twine and glue them down onto the cardstock to create the “stems” or “strings” of your design. Let the glue dry completely.
Part 2: Adding the Buttons Once the ribbon is securely in place, glue your buttons onto the top of each ribbon “stem.” Overlap a few to create a fuller look. Mix and match button colors and sizes for a more dynamic and playful effect.
Part 3: Finishing the Card Allow the buttons to dry completely. Fold your card and add your personal message inside. The three-dimensional design of this card makes it truly special and memorable for any occasion.