Now Reading: 5 DIY Origami Projects for Beginners
-
01
5 DIY Origami Projects for Beginners

Origami, the ancient Japanese art of paper folding, is a fantastic hobby that’s both relaxing and rewarding. It requires only a few basic materials – primarily paper! This guide will walk you through five simple origami projects perfect for beginners, complete with step-by-step instructions and helpful images.
Project 1: The Classic Paper Crane
The paper crane is perhaps the most iconic origami creation, symbolizing hope and peace. While it might look intricate, it’s quite manageable with a bit of patience.
Materials: A square piece of origami paper (15cm x 15cm works well)
Instructions:
- Start with your paper colored side up. Fold the paper in half diagonally in both directions, creasing well, then unfold.
- Flip the paper over to the white side. Fold the paper in half horizontally and vertically, creasing well, then unfold.
- Bring the top corner down to the center crease. Now, bring the left and right corners to meet the bottom corner. This will naturally form a square. Flatten it down, creating a “square base.”
- With the open end facing you, take the top layer of paper and fold the bottom edges inward towards the center crease.
- Fold the top point down to meet the edge of the previous folds, creasing well, then unfold.
- Now, carefully “petal fold” the top layer. Gently pull the top point upwards, using the creases you just made as guides, flattening the sides outwards.
- Flip the paper over and repeat steps 4-6 on the other side.
- You should now have a kite-like shape. Fold the left and right sides of the top layer inward along the center line, creating the crane’s neck and tail.
- Flip it over and repeat on the other side.
- Fold one of the pointed ends down to create the head.
- Finally, fold the wings down on both sides. Gently pull the neck and tail out a bit to give the crane its final shape.

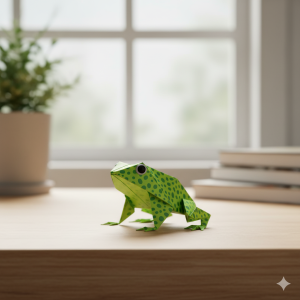
Project 2: The Jumping Frog
This playful frog not only looks cute but can actually jump! It’s a great project for learning some basic squash folds.
Materials: A rectangular piece of paper (e.g., A4 or US letter cut in half lengthwise)
Instructions:
- Start with your paper lengthwise in front of you. Fold the top right corner down to the left edge, creasing well, then unfold. Repeat with the top left corner to the right edge. You should have an ‘X’ crease at the top.
- Fold the top edge down to meet the intersection of the ‘X’ creases, then unfold.
- Now, push the side edges inward along the diagonal creases you made in step 1. This will flatten the top section into a triangle. This is called a “water bomb base.”
- Take the bottom corners of the triangle and fold them up to meet the top point of the triangle.
- Fold the bottom edge of the paper up to meet the bottom of the triangle you just formed.
- Fold the bottom right and left corners of this new rectangle inwards to the center line.
- Fold the entire bottom section upwards, bringing the previous folds with it.
- Now, create the frog’s legs. Take the two points you folded inward in step 6 and fold them outwards, creating a zig-zag shape.
- Flip the frog over. Fold the bottom edge up about halfway, creasing well.
- Fold that section back down again, creating a small zig-zag “spring” at the bottom. This is what makes the frog jump!
Project 3: The Simple Heart
A sweet and easy origami heart is perfect for cards, gifts, or just to brighten someone’s day.
Materials: A square piece of origami paper
Instructions:
- Start with your paper colored side up. Fold the paper in half horizontally, creasing well, then unfold.
- Fold the top edge down to the center crease you just made.
- Flip the paper over.
- Fold the bottom edge up to meet the top edge.
- Fold the paper in half vertically, creasing well, then unfold.
- Open up the top layer of the right side and squash it flat, aligning the crease with the center line. Repeat on the left side. You should now have two triangles at the top.
- Fold the top right and left corners of these triangles down to meet the center line, forming smaller triangles.
- Fold the top points of the two small triangles downwards, rounding off the top corners of the heart.
- Flip the paper over, and you have your origami heart!

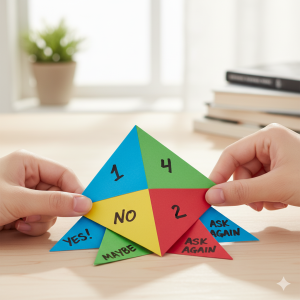
Project 4: The Fortune Teller (Cootie Catcher)
This nostalgic project is a classic for a reason. It’s a fun, interactive toy that’s easy to make and customize.
Materials: A square piece of paper
Instructions:
- Start with your paper colored side down. Fold the paper in half diagonally in both directions, creasing well, then unfold.
- Fold all four corners into the center, so their points meet at the intersection of your creases. This creates a smaller square.
- Flip the paper over.
- Fold all four new corners into the center again.
- Fold the entire square in half, either horizontally or vertically, and then unfold.
- To form the “pockets” for your fingers, slip your thumbs and index fingers under the flaps on the inside.
- As you do this, the paper will naturally fold and push the top and bottom edges inwards.
- With your fingers in the pockets, you can now open and close the fortune teller to play!
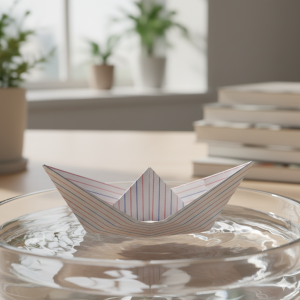
Project 5: The Origami Boat
A simple and sturdy boat that actually floats (for a little while!) is a classic and satisfying origami project.
Materials: A rectangular piece of paper (e.g., A4 or US letter)
Instructions:
- Start with your paper lengthwise in front of you. Fold the paper in half horizontally, creasing well.
- With the folded edge towards the top, fold the paper in half again vertically, creasing well, then unfold. This marks the center line.
- Take the top-right and top-left corners of the upper layer and fold them down to meet the center crease, forming two triangles at the top. Ensure the bottom edge of these triangles aligns.
- You will have a rectangular strip of paper remaining at the bottom. Take the bottom-most layer of this strip and fold it upwards over the base of the two triangles. Crease well.
- Flip the paper over.
- Fold the remaining bottom strip upwards on this side, just like you did on the first side. Now you should have a triangular shape, essentially a “hat.”
- Take the two bottom corners of this triangle and fold them inwards towards the center.
- Open up the bottom of the “hat” and flatten it into a square. You’ll see a diamond shape now.
- Take the bottom point of the top layer of this diamond and fold it upwards to meet the top point.
- Flip the paper over and repeat step 9 on the other side. You should now have a smaller triangle.
- Again, open up the bottom of this smaller triangle and flatten it into a square.
- Gently pull the two opposite points of the top layer outwards. The boat will start to form! Flatten the bottom to create the hull.