Perfect Cricut projects beginners can tackle immediately.
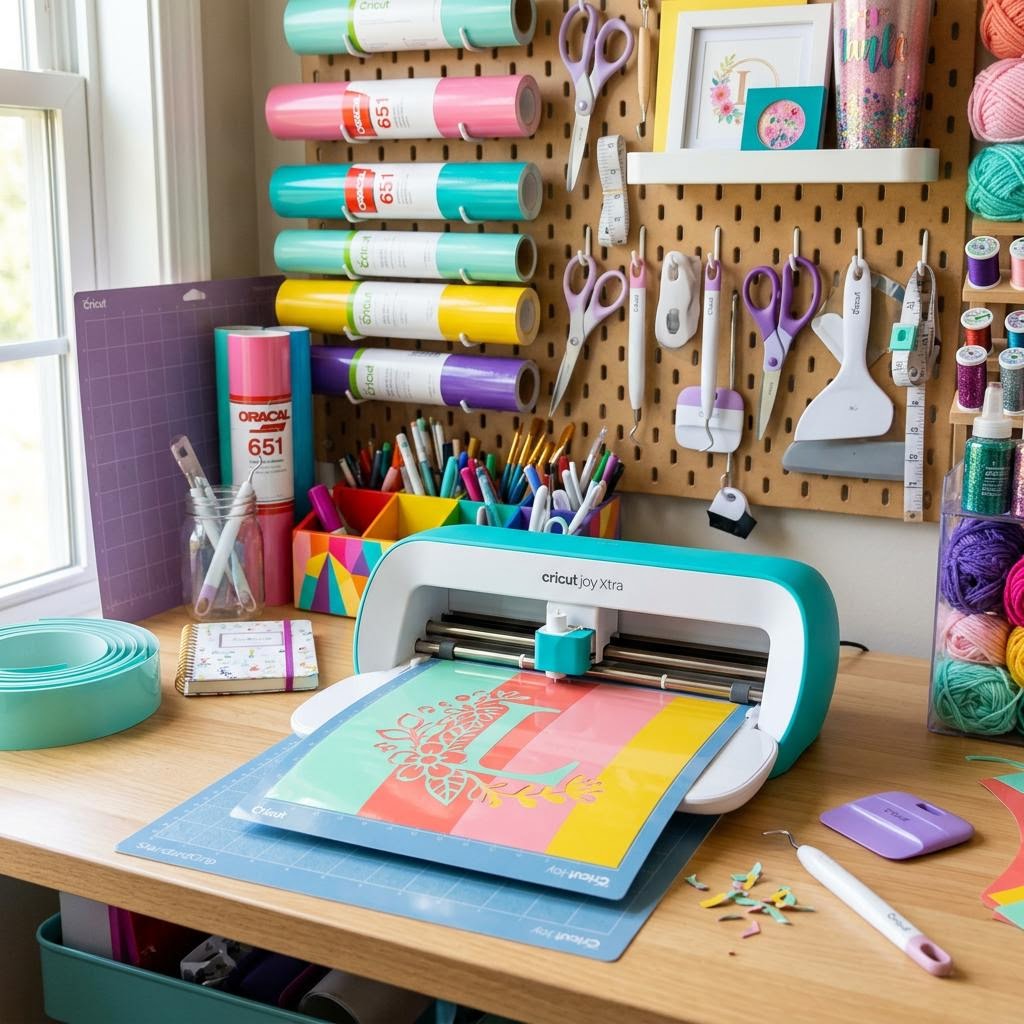
Cricut machines are programmable cutting machines — essentially a very precise robotic cutter that can cut, score, engrave, or deboss dozens of materials with far more precision and repeatability than any human hand. The Cricut Explore Air series cuts paper, vinyl, iron-on transfer material, cardstock, and thin fabrics. The Cricut Maker adds a rotary blade and a knife blade that handle felt, thick leather, balsa wood, and chipboard. Both machines are controlled through the same software (Cricut Design Space) and use the same mat-and-blade system.
The machine's value proposition is precision and repeatability. A human hand cutting a vinyl decal with scissors or a craft knife introduces small errors — slightly crooked lines, imprecise curves, cuts that are 1mm off — that compound across a design. The Cricut makes the same cut identically every time, to within 0.1mm. This matters enormously for text (which needs clean, precise letter edges), for matched pairs of shapes, and for any design you want to repeat across multiple items. The machine does not make you more creative, but it reliably executes designs that would be tedious or impossible to cut by hand.
Design Space is the limiting factor that beginners underestimate. The software has a steep learning curve despite a friendly interface — concepts like flattening layers, ungrouping elements, using the contour tool, and understanding why certain designs need to be 'sliced' before cutting take time to learn and are not always well-explained in beginner tutorials. The most common beginner frustration is spending twenty minutes on a design, clicking 'Make It', and discovering the machine is about to cut something completely different from what was expected because layers were not properly configured. Understanding the software deeply is more valuable than any technique with the machine itself.
Material settings are critical and are an area where beginners often cut incorrectly. Cutting with the wrong setting — too much pressure, wrong blade type, wrong speed — produces results ranging from incomplete cuts to torn materials to a blade that cuts through the mat. Vinyl in particular has many sub-types (permanent adhesive, removable adhesive, heat transfer vinyl, glitter vinyl, holographic vinyl) each with different thickness and different cutting requirements. Using the exact material setting in Design Space for the specific vinyl brand and type you are cutting gives the machine the right parameters. 'Custom' settings for unfamiliar materials should be tested on a small swatch before cutting the full piece.
The mat is a consumable that beginners often replace too rarely. Cricut mats have a sticky surface that holds the material flat during cutting. As the mat loses its stickiness (from use, lint accumulation, and oils from handling), materials shift during cutting and the cuts become imprecise — this looks like the blade is drifting or missing the design. Clean mats with a soft-bristle brush and cool water after each use, and replace them when the stickiness is clearly gone rather than trying to extend their life with re-sticking products, which can cause unpredictable adhesion.
The beginner project progression that builds skills logically: start with a single-color vinyl decal on a smooth hard surface (water bottle, laptop, mug). Then try a multi-color vinyl project (requires layering and alignment). Then try iron-on transfer on fabric (requires a heat press or iron and careful application technique). Then try a more complex cut material like cardstock for 3D paper structures. Each step introduces one or two new concepts without overwhelming. Jumping directly to a complex multi-layer iron-on design as a first project is the path to frustration and wasted materials.
Materials You'll Need
- Cricut machine (Maker or Explore)
- StandardGrip machine mat
- Permanent adhesive vinyl
- Transfer tape
- Weeding tool
- Scraper tool
- A blank item (mug, tumbler, or notebook)
Step-by-Step
Designing in Design Space
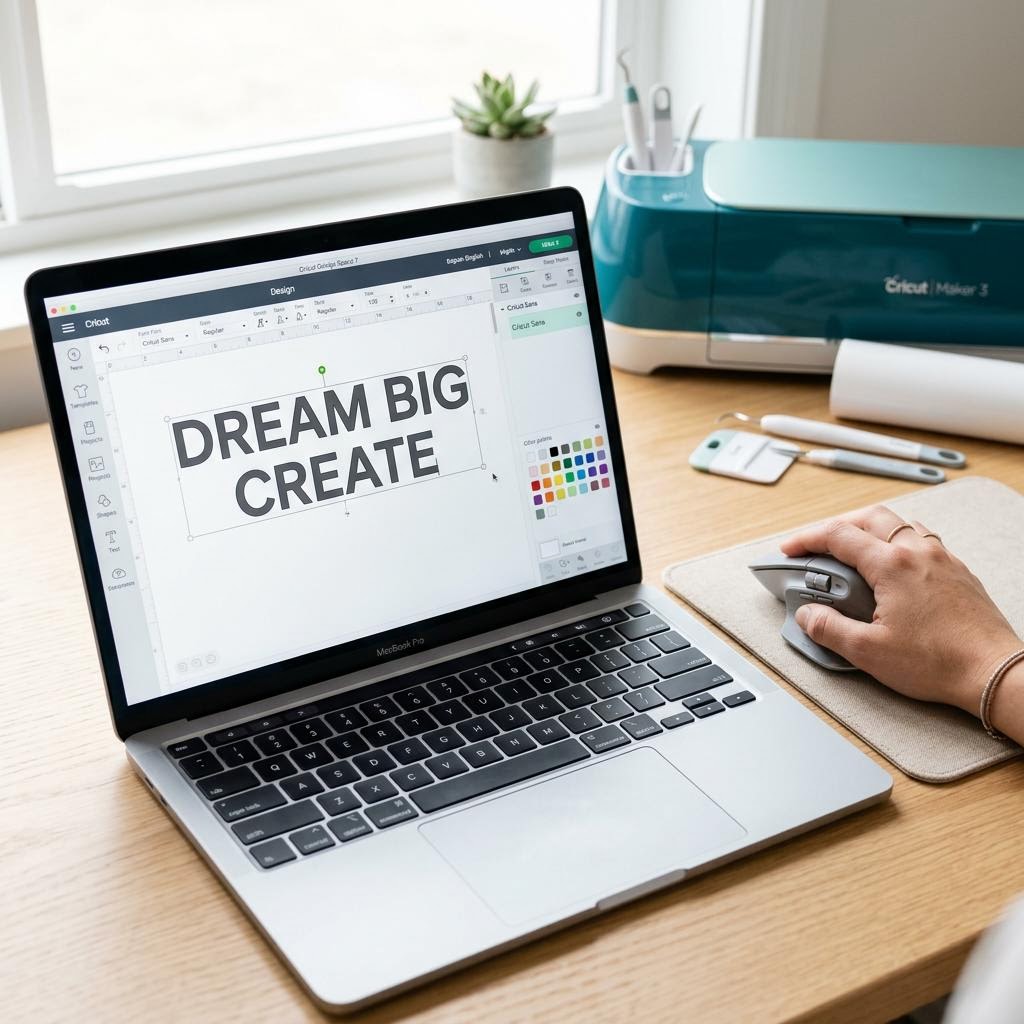
Cricut Design Space is the browser-based (or app-based) design software that communicates with the Cricut machine. It works with uploaded images, built-in design elements, and text. For vinyl cutting, you primarily work with SVG files (vector graphics that scale without losing quality) or simple text. Import an SVG by clicking 'Upload', choosing the file, and setting it as a 'Cut Image'. The software displays the file and lets you resize, position, and arrange it on a virtual 'mat' that represents your cutting mat. For text designs, use the Text tool to type your phrase, choose from the extensive font library (including uploaded fonts from your computer), and adjust size and letter spacing. For beginners, start with vinyl text on a simple surface — a mug, a water bottle, or a tote bag — rather than an intricate multi-layer image. Single-layer vinyl cuts are more forgiving and teach you the machine's behavior before you invest time in complex projects. When your design is ready, click 'Make It' and the software previews the mat layout — this is your last chance to check placement before cutting.
Cutting the Vinyl
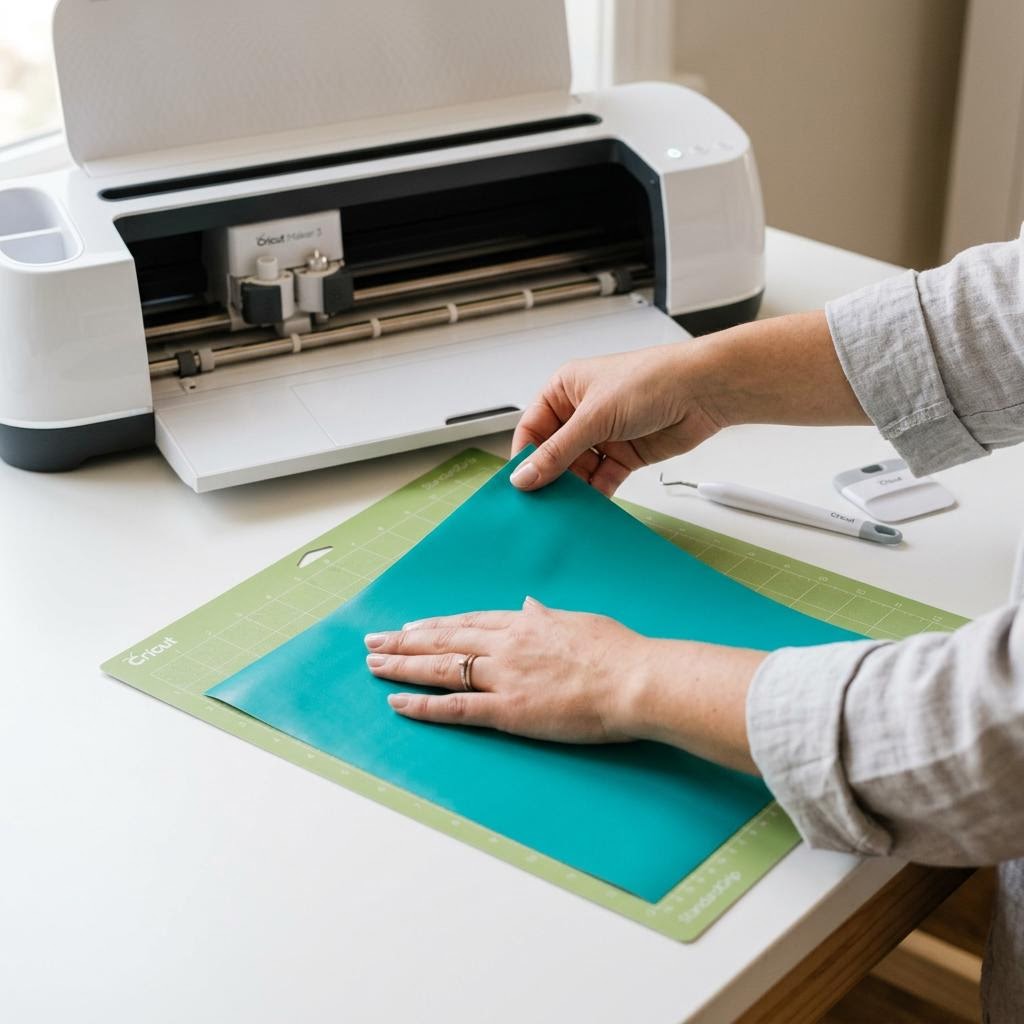
Load a piece of adhesive vinyl (shiny side down) onto the cutting mat, aligning it with the top-left corner grid markings. Press the vinyl firmly onto the mat — especially the edges, which can lift if the mat is losing its stickiness. Blue standard-grip mats work well for most vinyl; for lightweight or delicate vinyl, use a light-grip mat. Set the material type in Design Space to the vinyl brand and type you are using — the correct setting controls blade pressure and cut speed. Load the mat into the machine by aligning it with the guide arrows and pressing the mat firmly against the rollers, then press 'Load Mat'. Press the Cricut button (the C button on most models) to begin cutting. The machine will cut around your design, leaving the background vinyl intact. Do not remove the mat until the machine finishes cutting and the lights stop — removing mid-cut damages the design. Once done, press 'Unload Mat' using the button, and bring the mat to a flat surface for weeding.
The Weeding Process
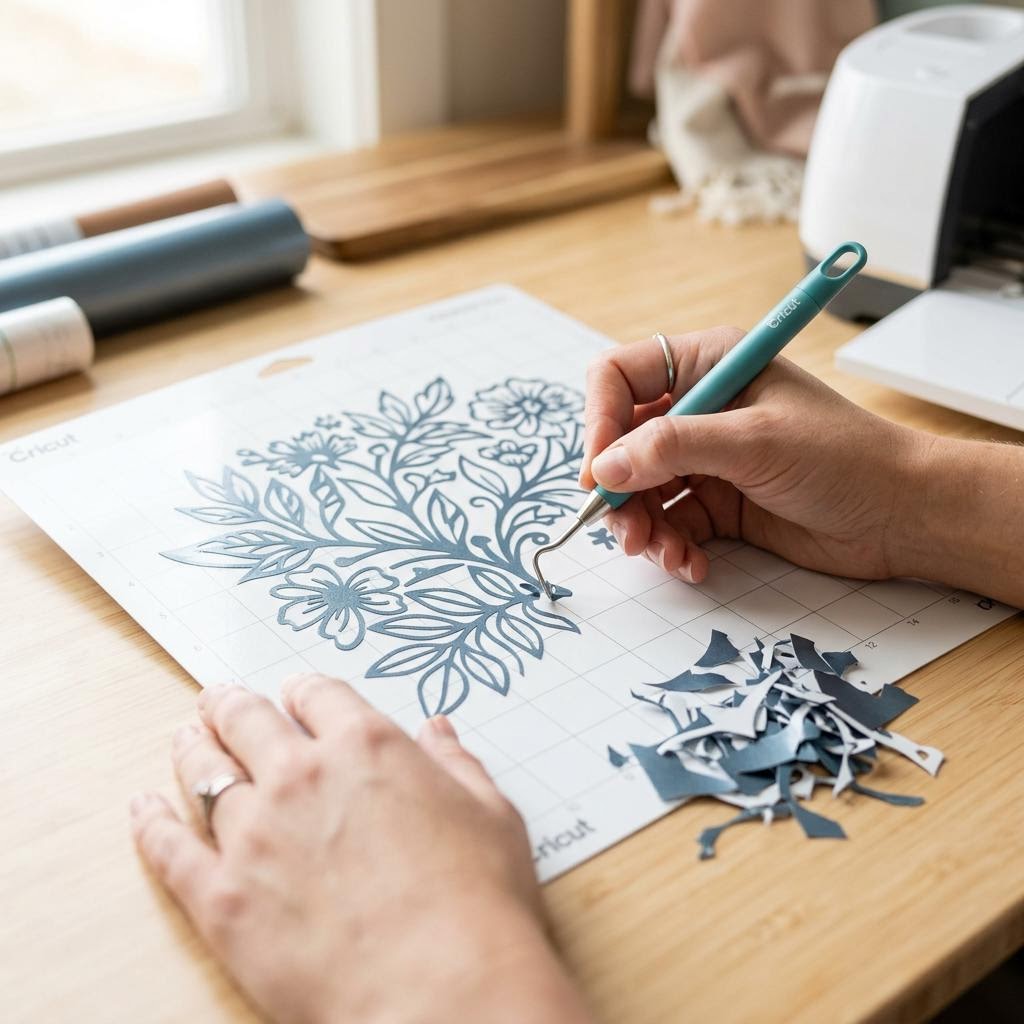
Weeding is the process of removing the vinyl that should NOT be on the final design — the negative space, the holes inside letters, and the background around your image. Use a weeding hook (a pointed metal tool that comes with most Cricut starter kits) to catch the edge of the unwanted vinyl and peel it away. Work from the edge of the vinyl sheet inward, removing large sections first, then going back for small pieces inside letters and details. Good light is essential for weeding — it is hard to see the cut lines in shadow. A lightbox or bright table lamp helps enormously. Work slowly in fine-detail areas; rushing causes you to accidentally grab vinyl you want to keep. If a piece you want to keep starts to lift with a piece you are removing, hold the keeper down with your finger while pulling away the waste. For intricate designs, heat the vinyl gently with a heat gun for 3–5 seconds before weeding — warm vinyl peels more cleanly and is less likely to tear. After weeding, hold the design up to light: any missed interior pieces (inside letters, between elements) will be obvious as covered sections.
Applying with Transfer Tape
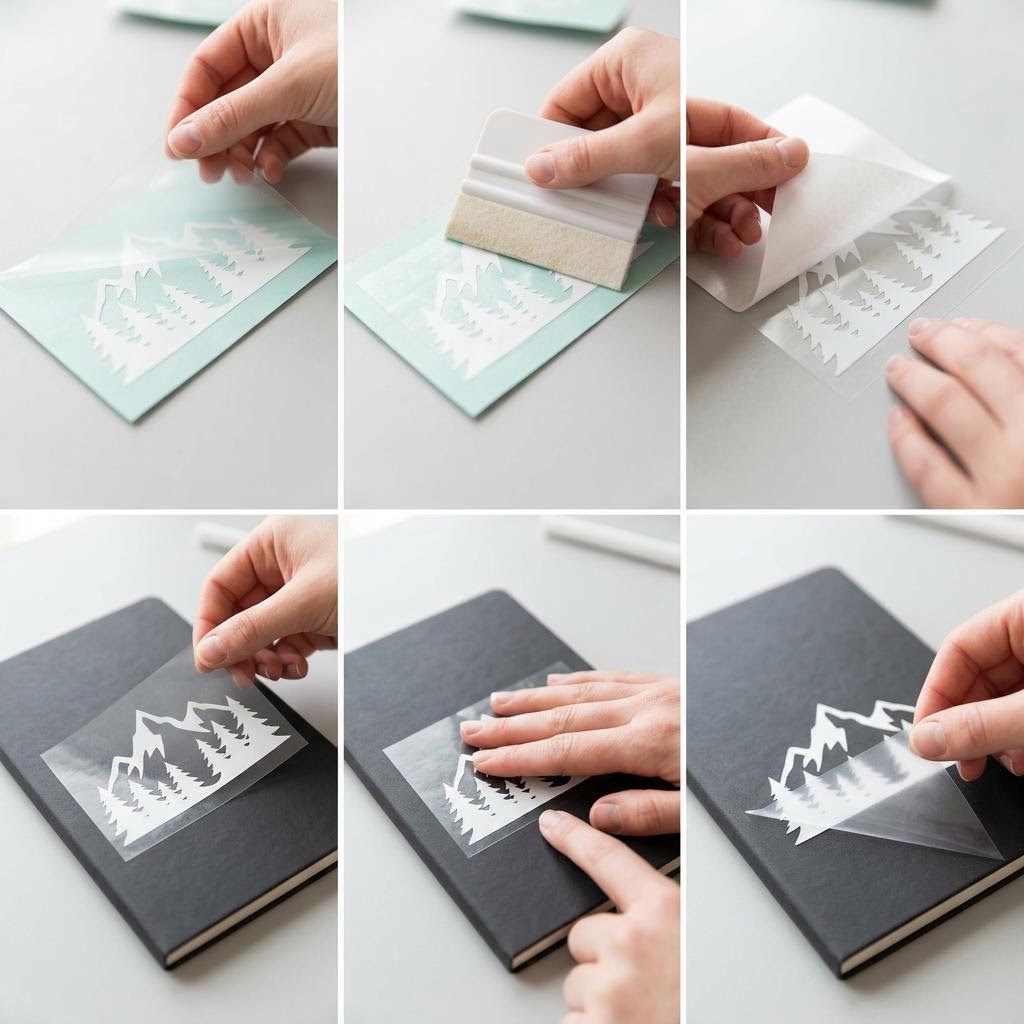
Transfer tape is a clear adhesive film that lifts your weeded vinyl design from its backing and lets you position and apply it to your surface as one piece — without this, individual letters and elements would shift apart during application. Cut a piece of transfer tape the same size as your design, peel the backing, and lay it onto the weeded vinyl, sticky side down. Smooth firmly with a squeegee or credit card to ensure the transfer tape bonds to all elements of the design. Clean your application surface with rubbing alcohol and let it dry — any oils, dust, or moisture will prevent the vinyl from adhering properly. Peel the backing from the vinyl design (the transfer tape now holds the design) and position the design on the surface. When happy with placement, press from the center outward to avoid bubbles, working with firm squeegee pressure. Rub firmly over every element of the design. Now peel the transfer tape away slowly at a low angle — if the vinyl starts to lift with the tape, smooth it back and apply more pressure before peeling again. Once the tape is removed, run your finger over every edge of the design to ensure full adhesion.
Written by

Maya Suzuki
Japanese Craft & Washi Art Expert
Maya bridges Japanese craft heritage and contemporary design. She specializes in washi paper art, shibori dyeing, and traditional Japanese textile techniques.