DIY Paper Flowers: 10 Beautiful Designs Anyone Can Make
DIY paper flowers start with the petals. Create crepe paper flowers and other paper craft ideas.
Paper flowers have a long and underrated history. Long before silk and plastic alternatives existed, skilled artisans in China, Japan, and medieval Europe were fashioning flowers from paper for celebrations, altars, and mourning rituals. Today the craft sits somewhere between origami and sculpture — you are not just folding flat shapes but coaxing paper into three-dimensional, naturalistic forms. The best paper flowers genuinely fool people at a glance, and making them is surprisingly meditative once you get the rhythm of cutting, shaping, and assembling.
Crepe paper is the material of choice for realistic-looking flowers, and understanding how it behaves is most of the skill. The key property is that crepe paper stretches along its grain — the tiny ridges you can feel running in one direction across the roll. When you cup a petal between your thumbs and pull outward along the grain, the paper domes and curves exactly the way a real petal does. Cut against the grain and the paper tears rather than stretches. This one insight — always cutting petals with the grain running base to tip — is what separates flat, stiff paper flowers from convincing ones.
Tissue paper is easier to source but far less forgiving: it tears rather than stretches, and it wrinkles when wet glue touches it. Cardstock produces graphic, geometric flowers rather than naturalistic ones — they look intentionally stylized rather than lifelike. For your first realistic flower, use crepe paper in 60g weight. Heavier Italian crepe (180% stretch) is used by professional flower makers for museum-quality pieces but is harder to control as a beginner and more expensive.
Hot glue is the standard adhesive for paper flowers, but it must be used quickly and sparingly. Too much glue soaks through the paper, creating visible wet spots that dry darker than the surrounding crepe. Apply a small bead to the petal base, press it firmly, and count to five — the glue sets in about eight seconds. If you make a mistake, wait for the glue to cool fully before peeling the petal away; pulling it while warm stretches and tears the paper and creates a worse problem than the original one.
Petal count determines whether a flower looks full and realistic or sparse and flat. A convincing paper rose needs at least fifteen petals arranged in at least four rings of increasing size. Most beginner tutorials call for fewer petals in the interest of simplicity, and the result always looks noticeably artificial. The extra petals take ten additional minutes and the result looks dramatically different. A real garden rose has thirty to fifty petals — you do not need to match that, but building toward fifteen to twenty petals makes an enormous visual difference that you will see immediately.
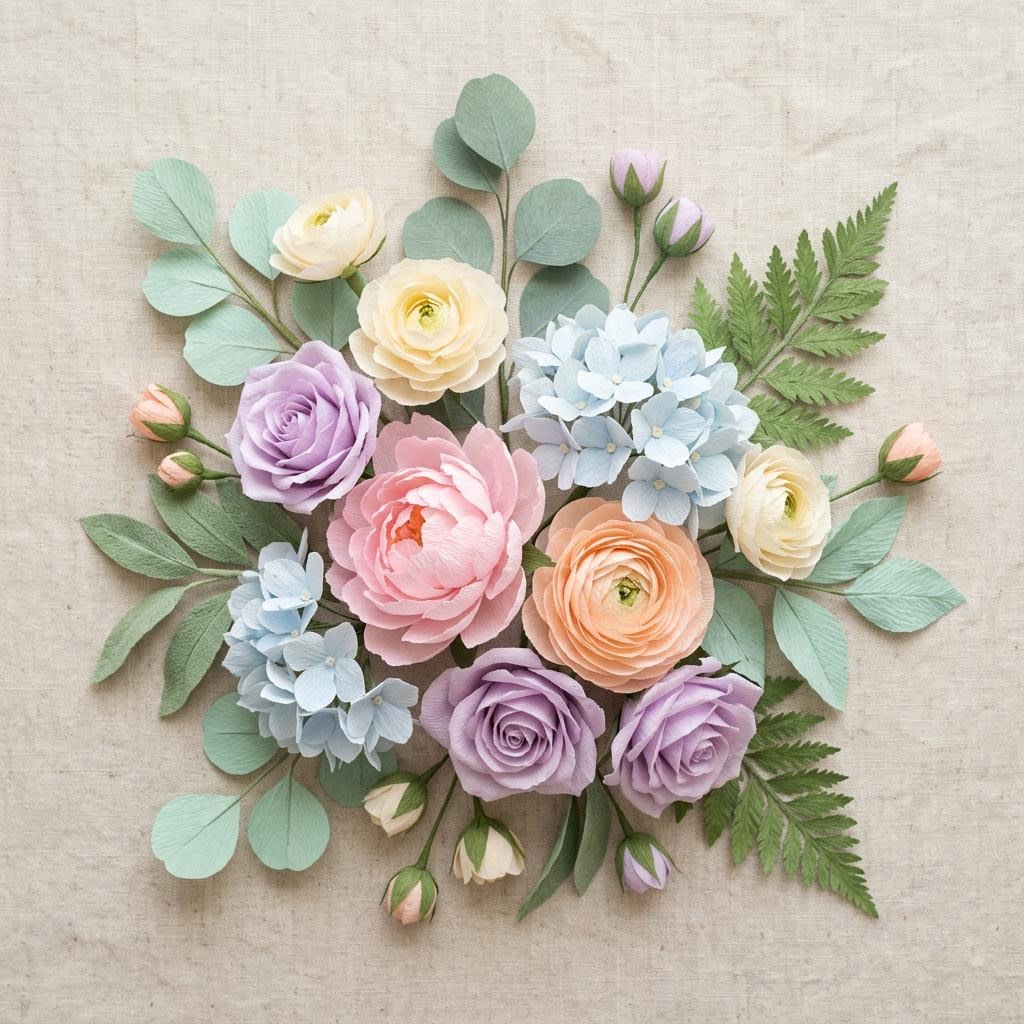
Once you have made a single rose, the same technique with different petal shapes produces peonies (rounder, ruffled petals), anemones (flat petals with a dark center), ranunculus (many small tightly packed petals), and dahlias (geometric pointed petals). Each flower has its own petal geometry and assembly order, but all use the same core skills: cut with the grain, stretch to shape, build from center outward, wrap the stem with floral tape. A bouquet of paper flowers lasts indefinitely when kept away from direct sunlight, and many people find the finished arrangement more satisfying than real flowers precisely because it never wilts.
Materials You'll Need
- Crepe paper rolls (various colors)
- Scissors
- Floral wire (26 gauge)
- Floral tape (green)
- Hot glue gun
- Pencil for curling petals
Step-by-Step
Cut Your Petals
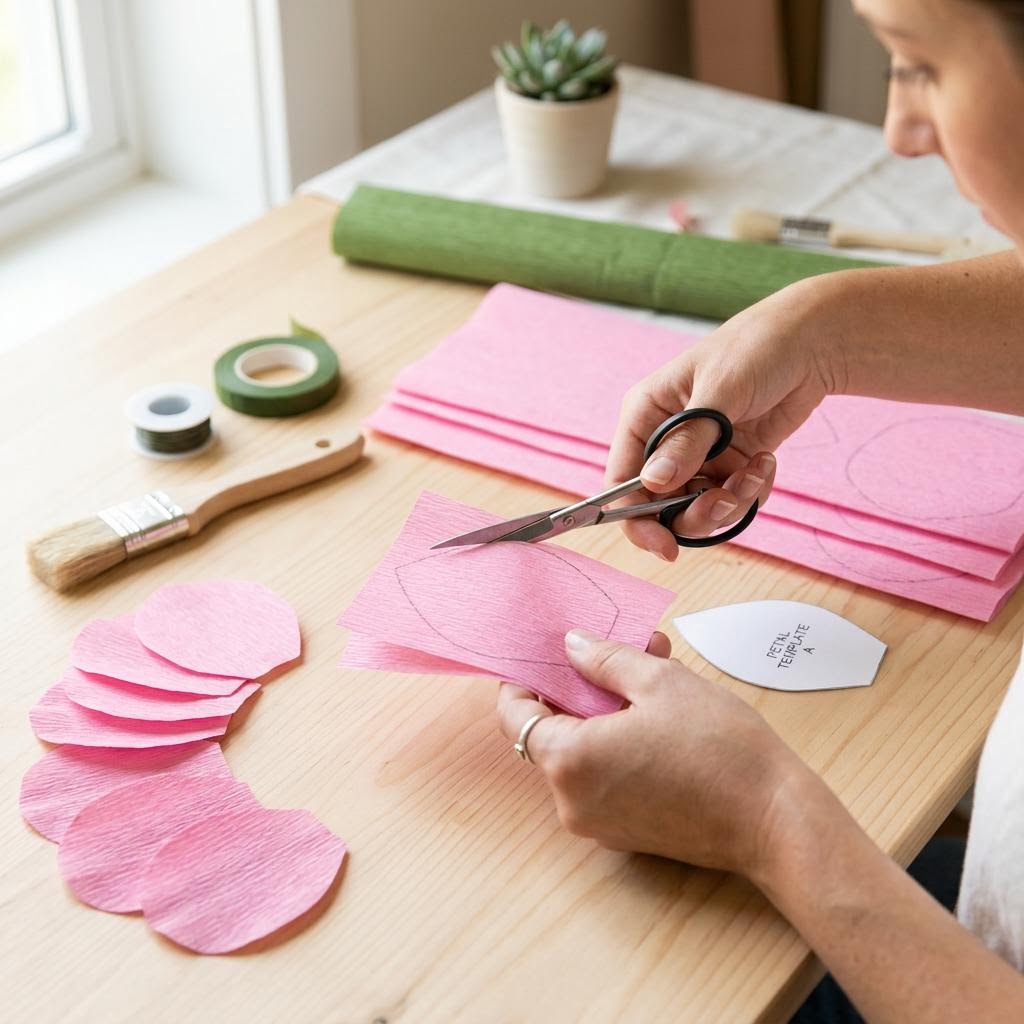
Crepe paper has a grain direction — the tiny ridges run perpendicular to the roll. Always cut petals with the grain running from the base to the tip of the petal. This matters because crepe paper stretches along the grain: when you cup and stretch the petal later, the grain direction determines which way it curves and how much dimension you can create. Cutting against the grain makes petals that tear when you try to shape them. Stack four to six layers of crepe paper before cutting to save time — they cut cleanly with sharp scissors. A standard rose petal is roughly 5cm wide and 7cm tall with a gently rounded top. Cut the base slightly narrower than the top and leave a small notch at the very base where it will attach to the wire stem. Make at least 12–15 petals per flower for a full, lush result. Beginner flowers often look flat because they use too few petals — more layers create the density that makes paper flowers look convincingly real.
Shape and Curl the Petals
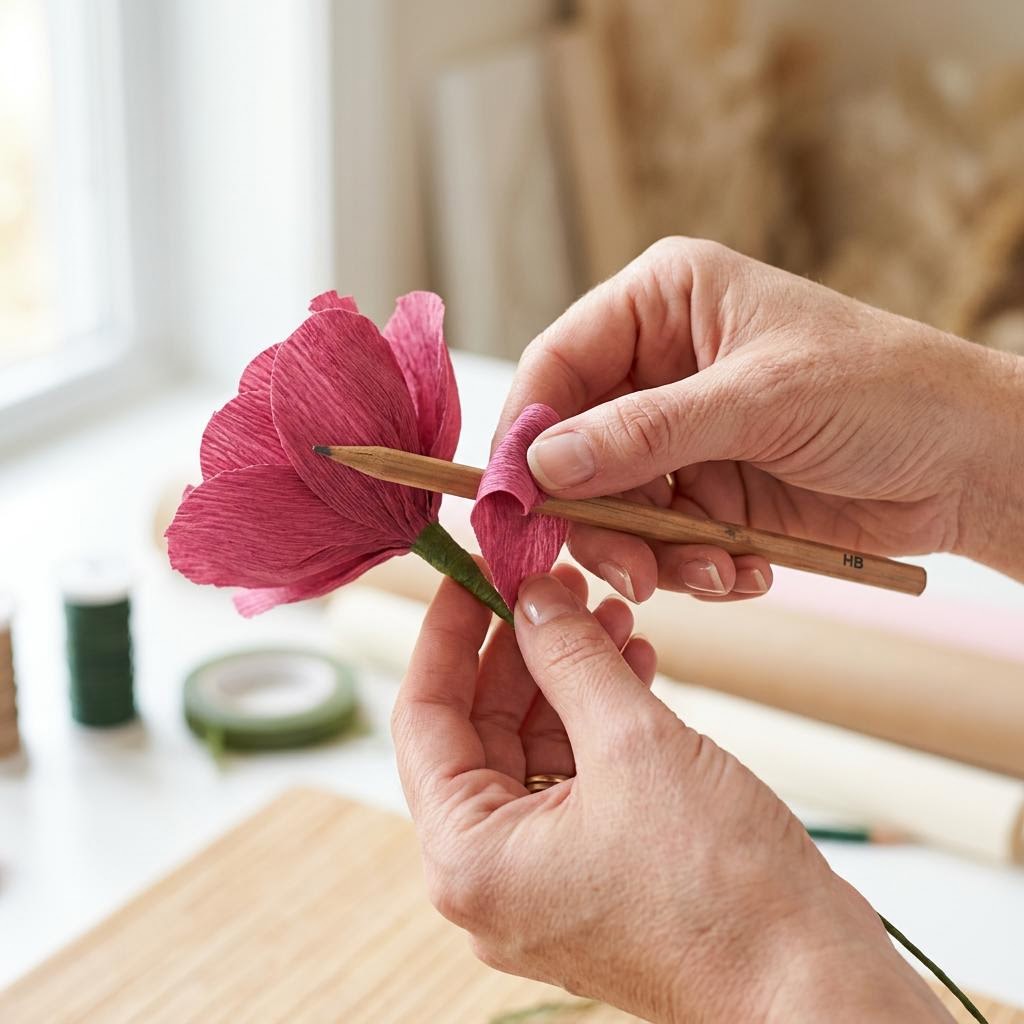
Hold a petal between both thumbs at the center and gently pull outward while pushing upward with your thumbs — this cups and domes the paper, creating the three-dimensional bowl shape that makes each petal look like it belongs on a real flower. Work from the center out toward the edges, stretching a little at a time. Crepe paper is remarkably forgiving and can stretch 30–40% before tearing if you work slowly. To curl the tip of the petal backward (like a rose petal opening), wrap the top edge around a pencil and hold for a few seconds. The crepe paper develops a natural memory and holds the curl when you release it. For petals that flare outward like a poppy or anemone, skip the curl and stretch the top edge wider instead. Shape all your petals before you start assembling — it is much harder to add dimension once petals are glued in place.
Build the Flower Center
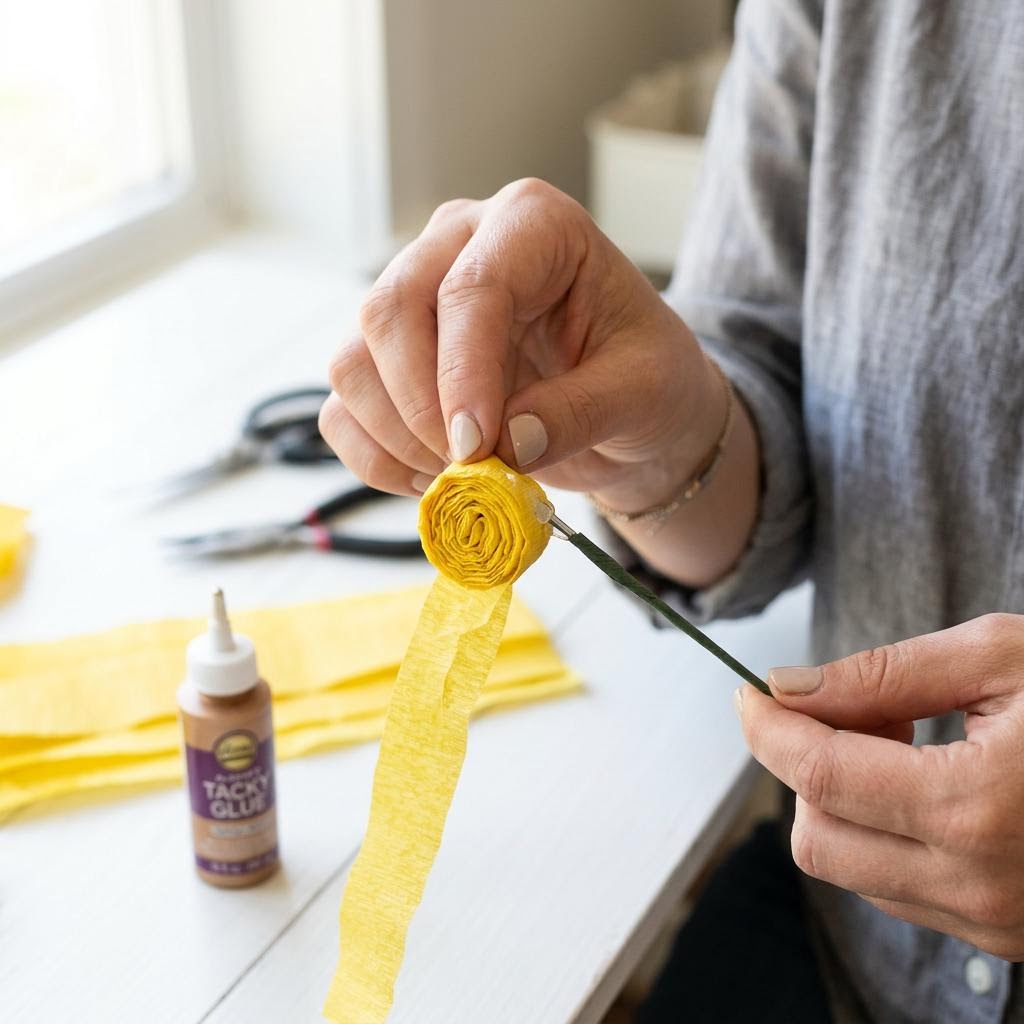
A tightly rolled center gives your flower its focal point and anchors the first ring of inner petals. Cut a strip of crepe paper about 15cm long and 4cm wide, fringe the top third with scissors (cutting vertical strips that stop before the base), then roll it tightly around the top of a floral wire, securing with a small dab of hot glue at the base. Fluff the fringe outward with your fingertip once glued — this creates the stamens or inner bud visible at the heart of the flower. For a tighter rose-style bud with no visible center, skip the fringe and simply spiral one inner petal tightly around the wire top before adding subsequent petals in rings. The tightness of this first wrap sets the overall shape — a very tight spiral makes a closed bud, a looser spiral opens the bloom. Neither is wrong; they just produce different looks. Secure each petal at the base with hot glue applied quickly to avoid the paper soaking up too much heat.
Assemble and Tape the Stem
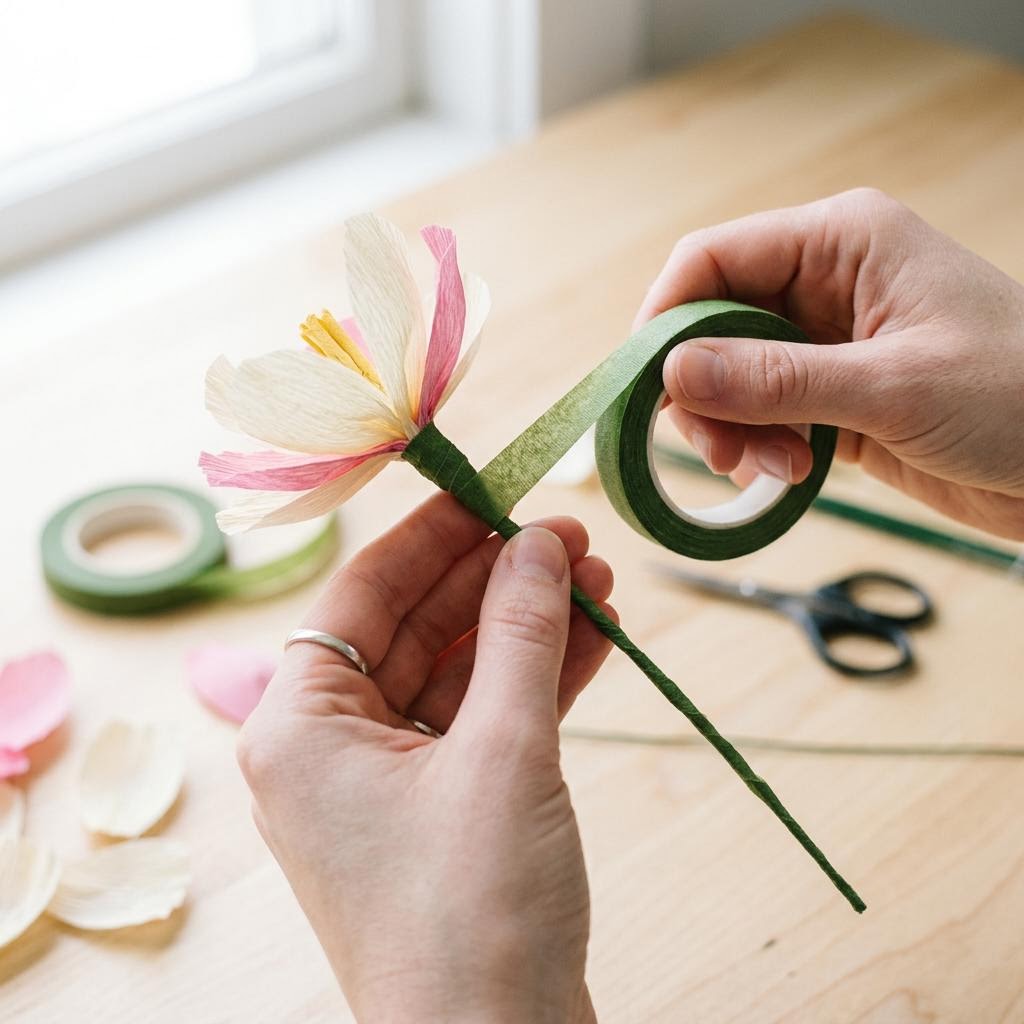
Add petals in rings working from the center outward — three to four inner petals, then five to six mid petals, then four to five outer petals. Each ring should be slightly larger than the last and positioned slightly lower on the stem so petals fan outward naturally. Use a small amount of hot glue at the very base of each petal and press firmly for five seconds. Keep petals evenly spaced around the circumference; bunching them on one side makes the flower look lopsided from above. Wrap the base of the flower and the full length of the floral wire with green floral tape, stretching the tape slightly as you spiral downward — the stretch activates the tape's adhesive and creates a smooth, stem-like finish. Add artificial or paper leaves by laying them against the stem and continuing to wrap over their base with floral tape. Bend the wire gently at the neck of the flower to give it a natural droop. Store finished flowers away from direct sunlight — crepe paper fades noticeably within weeks of UV exposure.
Written by

Clara Jensen
Scandinavian Home Craft & Candle Maker
Clara brings Nordic simplicity and warmth to home crafting. She specializes in soy candles, beeswax wraps, and hygge-inspired home accessories.