DIY Yarn Wall Hanging: An Easy Project for Leftover Skeins
Use yarn, a stick, and a little patience to make a soft wall hanging with plenty of room for improvisation.
A yarn wall hanging is exactly the kind of project that can soak up an entire evening without demanding your full concentration. Put on a podcast, dig through the half-used skeins in your basket, and see what wants to go together. This DIY yarn wall hanging is deliberately forgiving — the charm really comes from the differences between the yarns, not in spite of them.
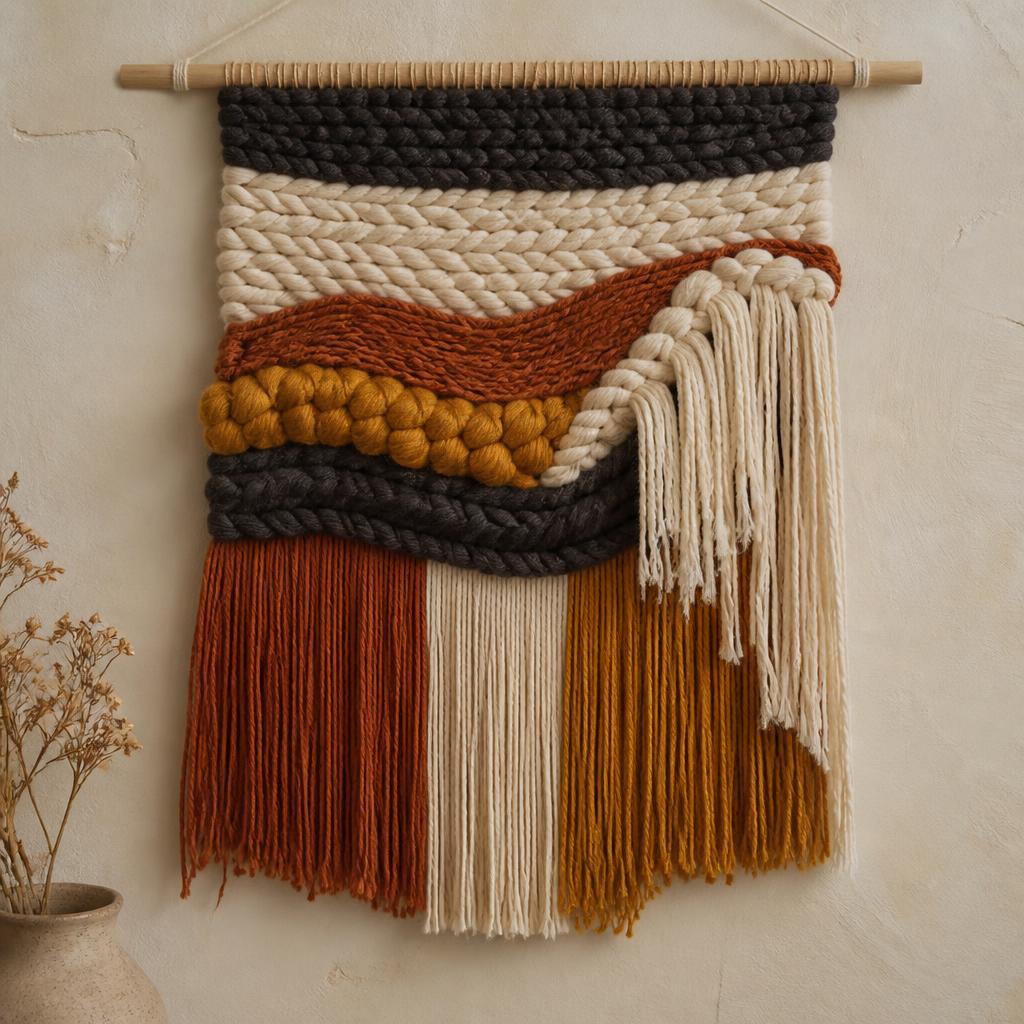
Start with colors you actually like looking at, not whatever happens to be bundled together in a craft kit. For an easy yarn wall hanging, a quiet palette of cream, rust, and brown can end up more interesting than throwing every bright color in at once. Add one unexpected shade if the whole thing starts to feel flat.
The stick matters more than you'd think. A branch with a gentle bend can look lovely, but a really crooked one leaves the yarn hanging unevenly. Lay it flat on a table and check that it doesn't wobble. A plain wooden dowel works perfectly well too, especially if you're after something cleaner and more modern.
This yarn wall hanging tutorial is mostly just cutting and looping, so don't rush the measuring part. Wrap yarn around a paperback book or a piece of cardboard to make a bundle, cut at one end, fold it over the stick, and pull the loose ends through the loop. Mix short and long bundles rather than aiming for a perfectly ruler-straight fringe.
There's no rule saying you have to trim the bottom all in one go. Hang the piece up, walk away, and come back to look at it later. Cut one section into a soft point, braid another, and leave the thickest yarn exactly as it is. A DIY yarn wall hanging should have a little movement to it when someone walks past.
A good yarn wall hanging tutorial leaves room for you to change your mind halfway through. This DIY yarn wall hanging can end up shorter, fuller, or scruffier than whatever's in the photo — that's fine. An easy yarn wall hanging doesn't need matching skeins, just colors you genuinely like together. Try this yarn wall hanging tutorial with scraps first, then make a second version once you've got a feel for the shape you actually prefer. An easy yarn wall hanging can be changed in ten minutes flat with a fresh trim or one braided strand.
Texture is what keeps this from looking like a row of tassels. Combine smooth cotton with fuzzy wool, a thin shiny strand, or a yarn that shifts color as it goes. You don't need much of the unusual stuff — one or two bundles is often enough to give the piece a focal point. If a yarn sheds heavily, keep it toward the bottom where it's easy to trim, rather than up against a pale wall.
Before you go cutting dozens of lengths, make one test bundle and hold it against the dowel first. That tells you how much the yarn actually stretches and roughly how long the finished fringe will look. Slippery yarn tends to spring shorter once released, while chunky wool takes up more visual space than its actual length suggests. A cardboard guide helps, but it's not gospel — small variations in length are exactly what make the edge feel soft.
You can add a small woven section without owning anything close to a loom. Tie a few horizontal strands between two neighboring bundles and weave a long piece over and under them with your fingers. A strip of fabric, a ribbon, or a row of wooden beads can sit right in among the yarn too. Keep additions light so the dowel doesn't bow — the whole thing should sway a little when the door opens, not tug the hook out of the wall.
If the piece looks too sparse, resist the urge to just make every bundle thicker. Add a second row behind the first instead, or knot a few strands together near the bottom. If it looks too heavy, pull one bundle from each side and see whether the extra negative space helps. Photographing it from a distance is oddly useful — the camera will catch a lopsided edge your eyes had quietly accepted while you were sitting close to it.
Dust settles into the fibers eventually. A cool hairdryer on its lowest setting lifts loose dust just fine, and a clean comb restores a brushed section. Don't soak the hanging unless you're confident about the yarn fibers and dyes involved. For a rental or a dorm room, use a light dowel and a hook rated for more weight than the finished piece actually is. A small, thoughtfully made hanging can warm up a blank wall without taking it over.
The dowel's finish can be as simple as a coat of clear wax, or as playful as a painted bar echoing one of the yarn colors. Sand rough ends before finishing, and let everything dry completely before tying the first bundle. A smooth dowel lets knots slide into place easily, while a rough one can catch delicate fibers. If you're using a found branch, brush off loose bark and give it a once-over for insects before it comes indoors.
Mark the center of the dowel in pencil so the design grows evenly out from both sides — you can erase the mark later. Lay your bundles out on the table in the order you plan to use them, then step back every few minutes as you work. Yarn colors can look surprisingly different once they're hanging vertically, especially under warm lamplight.
A simple top loop is fine for a small piece. For something heavier, tie two loops or run a cord behind the dowel to share the load, and hide the joining knot behind the yarn if you can. Before it goes on the wall, hold it by the loop for a minute and give it a gentle shake — loose strands will show themselves now, while they're still easy to retie.
Once the shape feels right, finish the lower edge with sharp fabric scissors and save the trimmings for another small project. Leave the yarn blunt, cut a shallow curve, or make two longer points near the center — there's no need to force symmetry. A little difference between the two sides makes the whole thing look relaxed rather than engineered. If it's a gift, jot the yarn colors on a little card, since that small bit of context often makes handmade decor feel especially considered.
Materials You'll Need
- Wooden dowel or straight branch
- Yarn in several colors and textures
- Scissors
- Cardboard for measuring
- Comb
- Hanging cord
Step-by-Step
Choose the palette and stick.
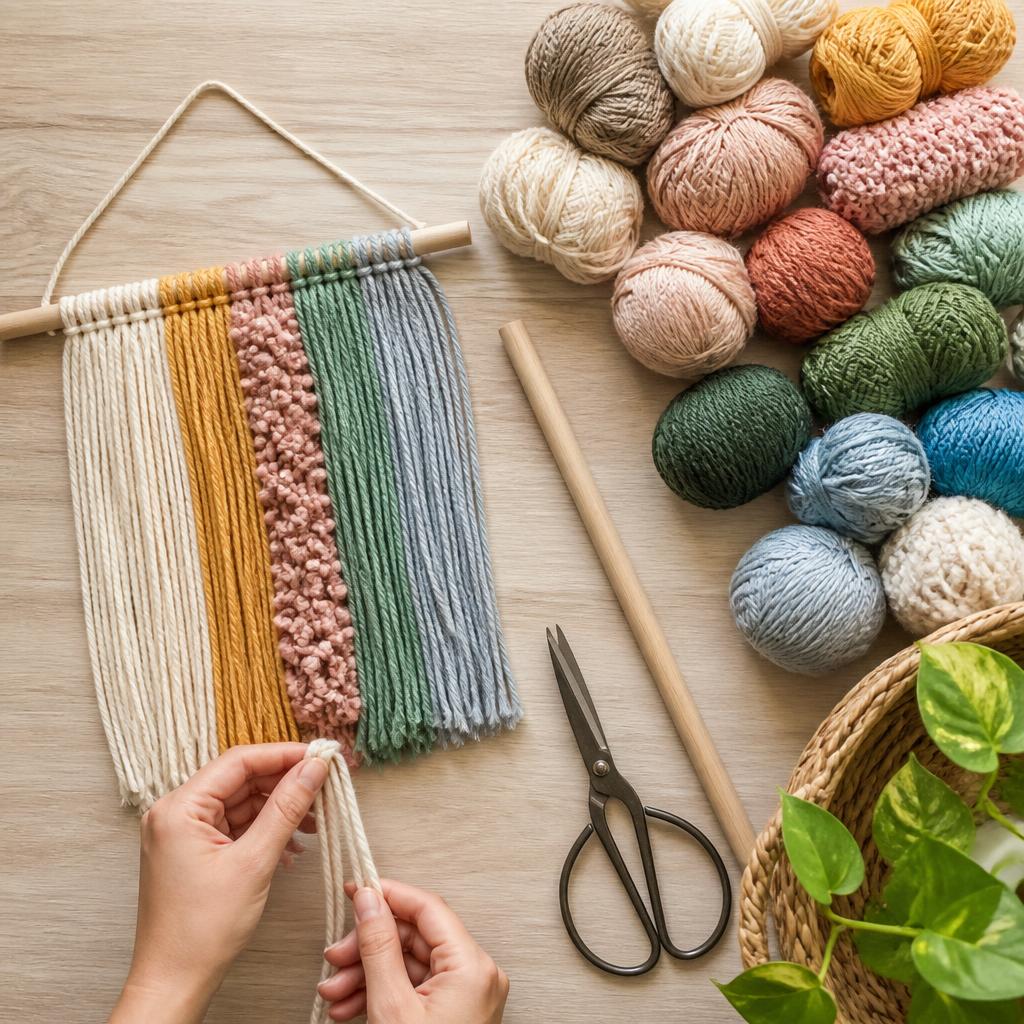
Sort your yarn by color, thickness, and texture, make one sample bundle, and measure its finished length once it's hanging — stretchy yarn can shorten more than you'd expect. Cut a few extra strands of your main color so you can fill a gap later without throwing off the balance.
Cut and attach the yarn.
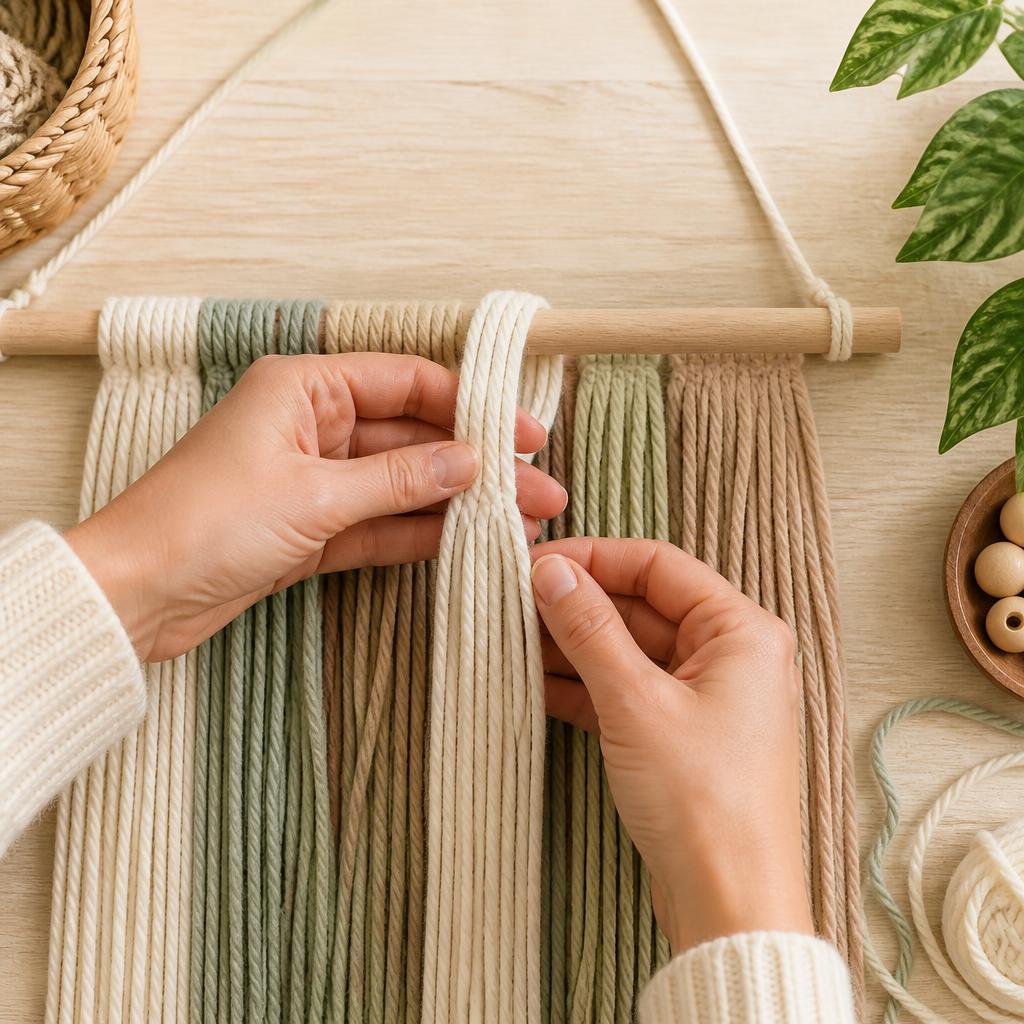
Fold each strand exactly in half over the dowel and pull the loose ends through the loop, keeping knots snug but not tight enough to bend the dowel. Work from the center outward, or alternate sides, checking that the spacing feels consistent without forcing every bundle to match exactly.
Add texture and shape.
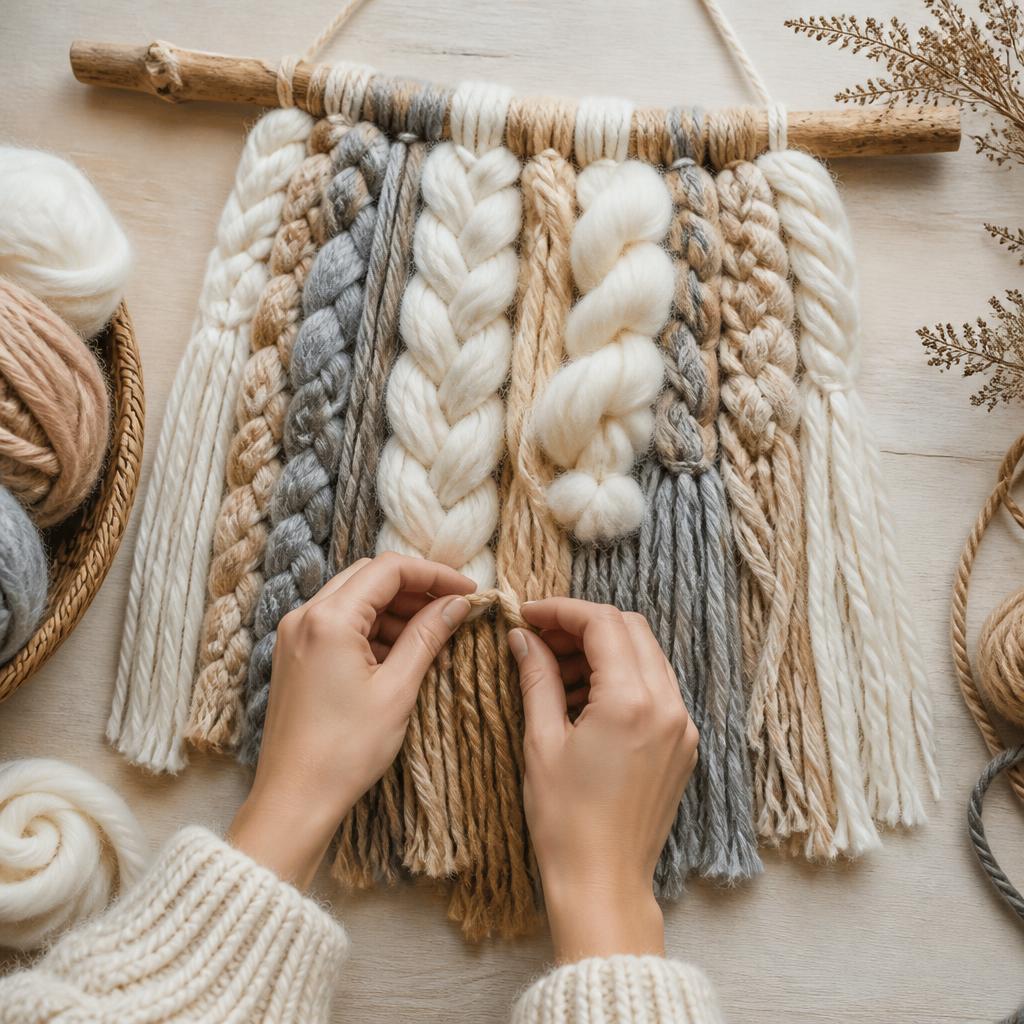
Use your fingers, a wide comb, or a blunt knitting needle to separate the fibers, and step back often as you shape the edge — a design that looks balanced up close can feel lopsided from across the room. Only trim once the hanging has been suspended temporarily.
Hang and finish.
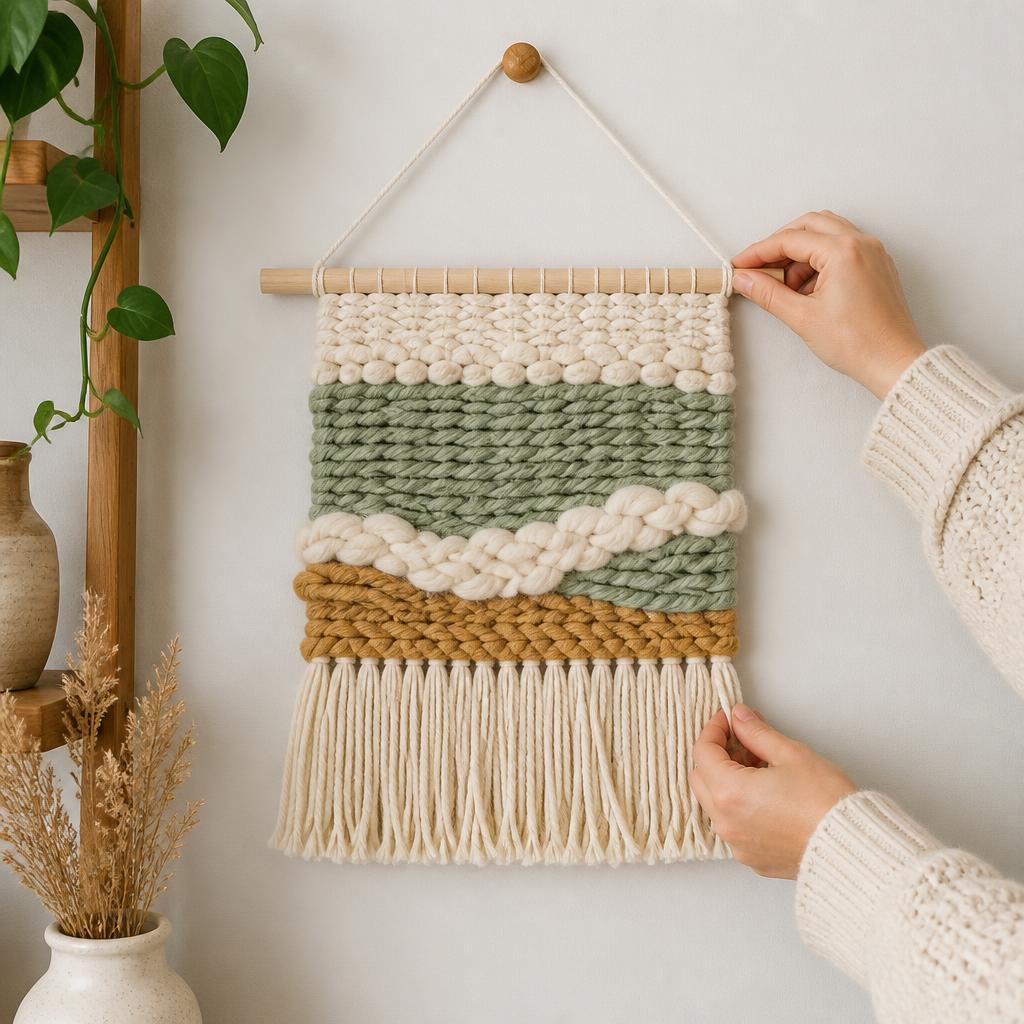
Tie the hanging loop securely and test it over a table before it goes anywhere near the wall. Pick a hook rated above the project's actual weight, keep it away from heaters or open flame, and give it one last gentle shake so loose strands show themselves before it goes on display.
Written by

Sarah Mitchell
Fiber Arts & Macramé Expert
Sarah has been knotting, weaving, and stitching for over a decade. Her work blends traditional fiber techniques with modern minimalist aesthetics.