A Calm First Sculpture: Needle Felting From Wool
Build a small wool sculpture with patient poking, clear shapes, and simple habits that protect both your hands and your needle.
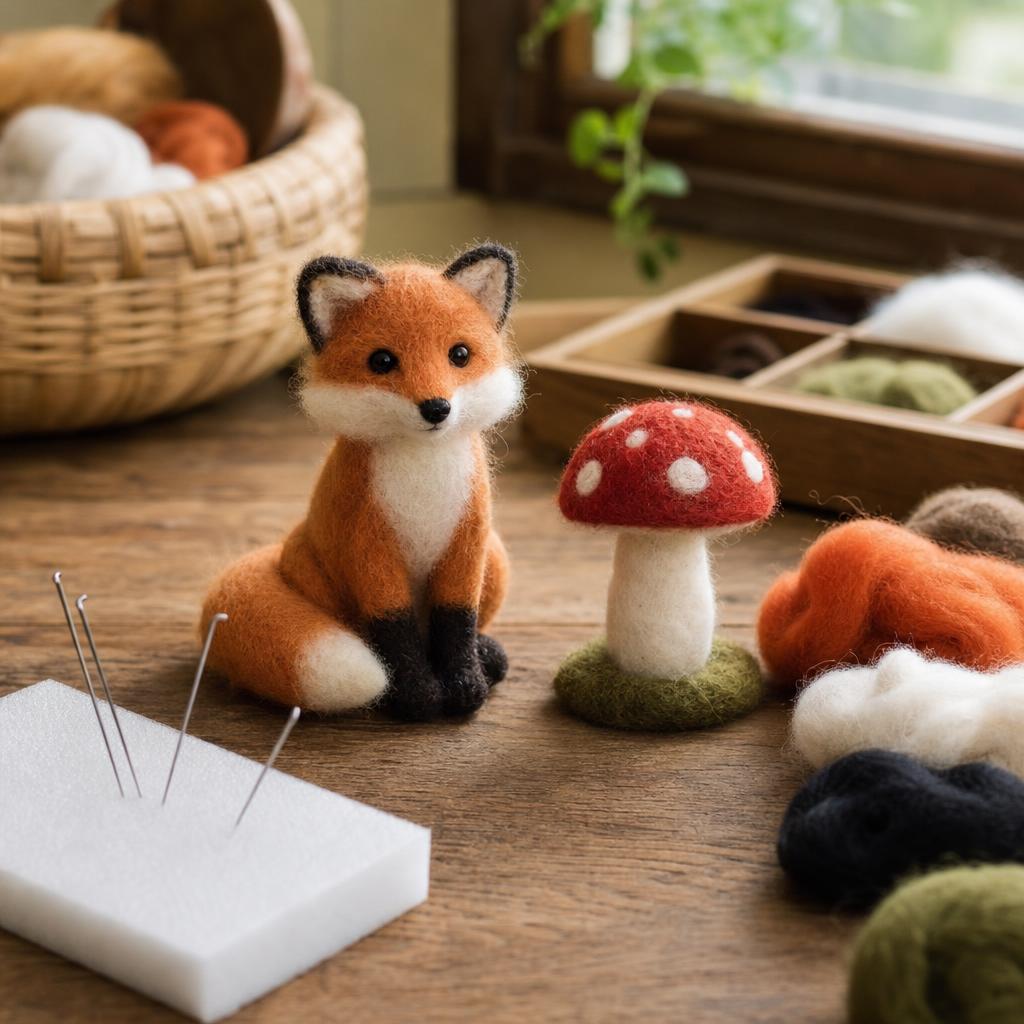
The first time I made a wool animal, I expected the wool to tell me what it wanted to become. Instead, it looked like a lumpy cloud for quite a while. That is normal. Repeatedly drawing the barbed needle through loose fibers tangles them into a stable fabric, and the change happens gradually. This approach to needle felting for beginners keeps the project small: make a rounded woodland creature, a pebble-shaped bird, or a tiny mushroom before attempting a large figure. With needle felting for beginners, a small form gives every decision a chance to teach you something. My notes on needle felting for beginners always begin with choosing a shape that can be held comfortably.
Choose a comfortable chair and a bright lamp that does not cast your hand into shadow. A good wool felting tutorial begins with the work surface because the needle is extremely sharp. Keep the point aimed down, never hold the wool in your palm, and use a finger guard if you are still learning depth control. The habits called felting needle safety are not fussy studio rules; they let you relax and concentrate on the shape. Put the unused needles in a tin, not loose on the table. Keep this wool felting tutorial beside your supplies until the setup feels automatic. Clear, quiet movements are the heart of felting needle safety. This wool felting tutorial also favors frequent breaks over finishing in one sitting.
For an easy needle felting project, use a forgiving form with a large body and only a few features. A sleeping fox, round chick, acorn, or little mushroom gives you clear proportions without requiring a wire armature. Carded wool catches more evenly than silky locks. Separate colors before you begin, and save a little of every shade for repairs. Natural wool can have a lanolin scent, so ventilate the room if that bothers you and wash your hands when you finish. This easy needle felting project is deliberately modest, so you can stop before your hands become tired. An easy needle felting project should leave enough time for a careful final inspection.
## Step 1: Prepare the tools and make a plan
Place a dense foam felting pad in front of you. The pad should support the wool while allowing the needle to travel through it without striking a hard tabletop. A foam felting pad that is too thin will compress quickly and let the point hit the table; replace it when it develops a deep crater. I sketch a side view and front view on scrap paper, noting the total height, width, and where the eyes will sit. Keep the foam felting pad centered so your wrist does not reach across an unsafe angle.
Set out one coarse needle for building, one medium needle for shaping, and a fine needle for the surface. Needles vary by manufacturer, so treat gauge numbers as a starting point rather than a promise. Pull apart a small cloud of core fiber and keep the rest in a bag. When you needle felting wool, work with wispy layers instead of thick ropes; thin layers fold and tangle with fewer empty pockets. Good needle felting wool should separate easily when teased, without crumbling into dust. Keep a little extra needle felting wool in a covered dish for later repairs.
Checkpoint: before touching the wool, practice a dozen slow vertical strokes into a scrap. The needle should enter and leave along the same path. If you angle it sideways, it can bend; if you force it through dense felt, it can snap. This rehearsal is the easiest way to avoid felting needle breaks later. Keep a plaster or bandage nearby, even though careful positioning should keep your fingers well away from the point. To avoid felting needle breaks, change direction by rotating the wool rather than twisting the needle. You also avoid felting needle breaks by lifting the needle completely before turning the form.
## Step 2: Form and compact the core
Pull the core fiber into a soft rectangle, fold the long edges inward, and roll it into a loose ball. Pinch the ends together without squeezing it rock-hard. Begin poking through the center, lifting the needle out fully between strokes. Rotate the bundle every few seconds so the fibers tangle from all directions. At this stage, the aim is to shape wool roving into a rough volume, not to create a polished surface. Continue to shape wool roving with light pressure until the bundle holds together on its own. I shape wool roving in several small passes so its outline stays round.
If you are making a body and head, create each as a separate form and join them with a wrapped band of fiber. A separate core wool shape is easier to weigh and resize than a complicated bundle. Compare it with your sketch often: a few minutes of early compression can shrink the form noticeably. Add fiber to a small area, poke its edges first, then work inward so the new material blends rather than making a visible collar. Test the core wool shape against the head before joining it, since a few extra pokes can change its proportions. Keep the core wool shape slightly smaller than the planned surface, which leaves room for color.
Use the coarse needle to establish planes, then switch to a medium needle as the shape firms. Press the wool against the pad and make shallow passes along the surface. Deep stabs create density quickly but can leave a tunnel or divot. If a lump develops, do not pull it apart; wrap a thin veil of fiber around it and redistribute the pokes. The fibers can be coaxed into an even oval with patient rotations.
Checkpoint: squeeze the form gently with two fingers. It should spring slightly and hold its silhouette when set down. A loose form will collapse when details are added, while an overly hard center is difficult to correct. Look at it from above, below, and both sides. Symmetry is easiest to fix now, before you attach ears or a tail.
## Step 3: Layer color and features
Tear a thin tuft of the main surface color, spread it like a translucent blanket, and wrap it around one section at a time. Anchor the center with a few shallow pokes, then secure the perimeter. To blend wool colors, overlap wisps of two shades and alternate your needle strokes across the boundary. A small amount of the underlying color showing through gives a lively, hand-painted quality; a thick new layer can hide the form. I blend wool colors most successfully when each tuft is thinner than I think I need. To blend wool colors without stripes, change the overlap point on each pass.
Plan facial features with removable wisps before committing. Two equal dark dots placed on the same horizontal line usually look more convincing than two carefully detailed eyes at different heights. For a needle felting animal, add cheeks, a muzzle, paws, or a tail as small pre-felted pieces. Taper each attachment, lay it against the body, and poke through the join from several angles. Never use the needle as a lever to push a feature sideways. A needle felting animal becomes expressive through spacing, so pause before adding another mark. Photograph the needle felting animal from the side as well as the front to check its balance.
Now add felted details with the fine needle: a tiny nose, folded ear, stripe, or light catch in an eye. Make shallow, close stitches at first and step back often. If you want a mouth line, use a narrow cord of wool rather than drawing a deep trench. A feature that feels too large can be softened by surrounding it with the body color. Keep a few loose fibers aside because small repairs are easier when the shade matches. Add felted details gradually and photograph the face before deciding whether it needs more. A few add felted details can say more than an elaborate surface.
Checkpoint: place the sculpture at eye level and check that its expression reads from a short distance. Confirm that attached pieces do not wobble when touched lightly. If an ear leans, add a small wedge of wool behind the join and reinforce it instead of yanking it off. Take a photo at this stage; comparing the picture with your sketch often reveals a crooked axis that your hands have stopped noticing.
## Step 4: Refine and finish the sculpture
Switch to the fine needle and use short, shallow passes over the entire surface. Work slowly around curves, turning the piece after every few pokes. This is where you create a firm felted sculpture with a neat skin, but do not chase every hair. Some soft halo is attractive and can be trimmed later. If you see a hole, place a pinpoint of matching fiber over it and felt its edges into the surrounding wool. A firm felted sculpture should feel compact but never brittle when you press it gently. Rotate the firm felted sculpture under the lamp to find thin spots that need one more veil.
Inspect the underside and all joins. When you finish needle felt, stray locks can be snipped with sharp scissors held parallel to the surface. Do not shave aggressively; cutting too close can expose the core or flatten an intentional texture. For a particularly fuzzy area, lay a very thin veil of surface wool over it and use the fine needle just enough to catch the veil. Never glue loose wool as a substitute for felting, because glue makes later repairs difficult. I finish needle felt surfaces with a final turn in my hand, checking that no patch feels loose. To finish needle felt work for display, keep the trim restrained and let the fiber texture show. Check felting needle safety one last time by running your eyes, not fingers, over every join.
Add a wire support only if your design truly needs one, and bury every end completely inside wool. If you used glass eyes, check that they are secure and avoid making small detachable pieces for a toy intended for a child. Store the sculpture in a dry cabinet away from direct heat, damp bathrooms, moths, and curious pets. A breathable box with a cedar-free paper layer is preferable to a sealed plastic bag for long storage.
The final checkpoint is tactile: the piece should keep its shape, have no exposed needle point or wire, and feel evenly compact except where you deliberately left fluff. A beginner wool craft becomes more satisfying when the tiny irregularities remain visible; they show where your hand made decisions. I keep my first uneven creature on a shelf as a reminder that the real skill is not poking faster. It is noticing proportion, changing direction gently, and giving loose fibers enough time to become something that can be held. That beginner wool craft taught me to value a steady rhythm over a perfectly smooth surface. This beginner wool craft is ready when it feels pleasant to hold and safe to display.
Materials You'll Need
- Carded wool roving in core and surface colors
- 36-, 38-, and 40-gauge felting needles
- Dense foam pad or wool felting mat
- Small sharp scissors
- Finger guards or leather thimble
- Optional glass eyes and craft wire
- Bandages and a small storage tin
Step-by-Step
Set up a safe wool station
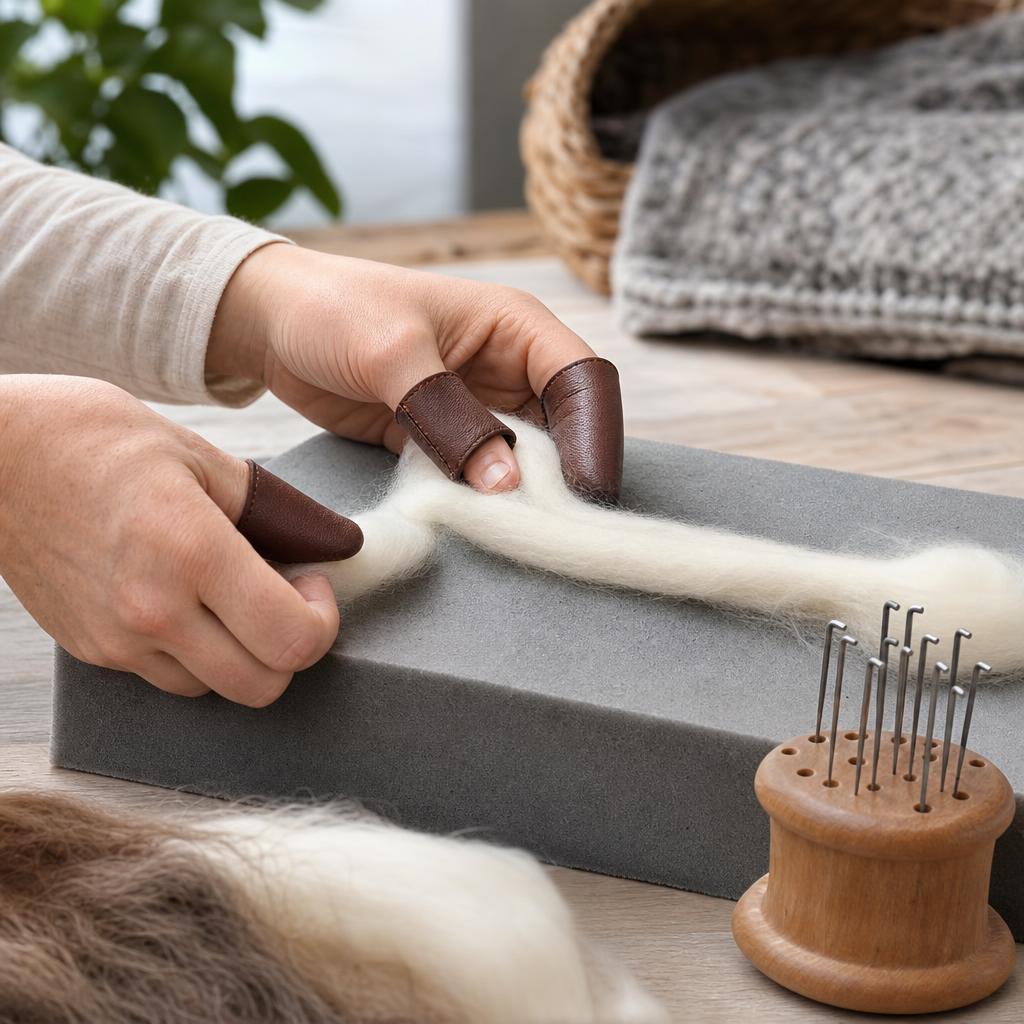
Choose a bright, comfortable seat and place a dense foam pad or wool mat on a stable table; it must be thick enough that the needle will not strike the tabletop. Gather core and surface wool, coarse, medium, and fine needles, small scissors, finger guards, bandages, and a tin for unused needles. Clear away cups, loose tools, and distractions, and keep pets and children out of the work area. Sketch the intended front and side views, noting the approximate height, width, and feature positions before you start. Pull out only a small cloud of wool and keep the remainder covered so fibers stay clean. Practice a dozen slow vertical strokes in scrap wool: the needle should enter and leave along the same path, never lever sideways. Keep the wool on the pad, not in your palm, and use a leather thimble or finger guard while learning depth control. Work with the point aimed straight down, lifting it fully before rotating the form. A bent needle, deep crater in the pad, or tired eyes is a stopping signal, not something to push through. Replace a compressed or thin pad, and put every spare needle point-down in its tin. Take regular breaks, check your lighting and posture, and keep a bandage nearby without letting that replace careful hand placement.
Build and compact the core
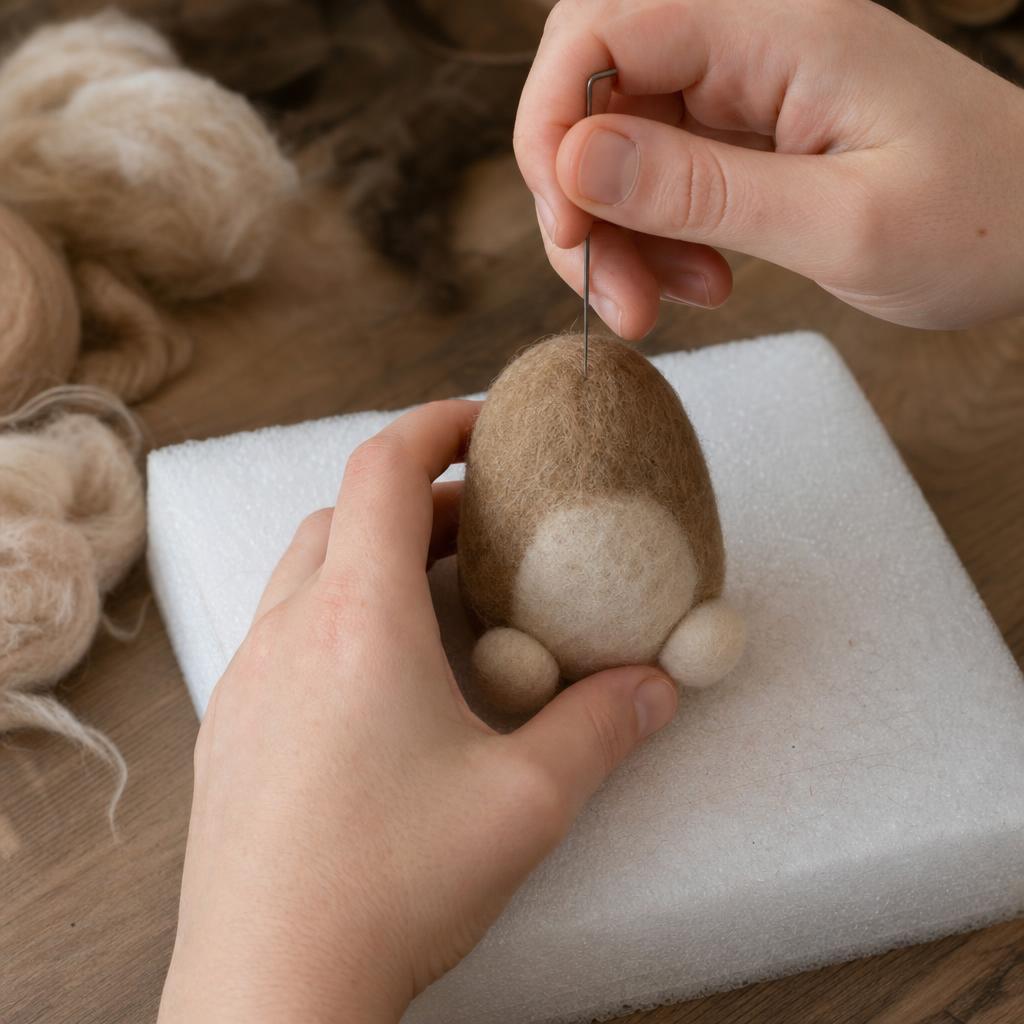
Tease a small cloud of core wool into a soft rectangle, fold the long edges inward, and roll it into a loose ball or oval. Pinch the seam closed without squeezing the bundle rock-hard. Place it on the pad and make short, straight stabs through the center, lifting the needle completely between strokes. Rotate the bundle every few seconds so fibers tangle from the top, sides, and ends rather than forming one dense tunnel. Work from broad volume toward the silhouette: first establish the body, then flatten or round specific planes with a coarse needle. If making a head and body, build them separately so each can be weighed against your sketch, then join them with a wrapped band of fiber. Add material by laying a thin veil around the edges of a small area and poking inward; this avoids a raised collar. Switch to a medium needle once the form holds together, using shallow surface passes to even it. The core should become firm enough to keep its outline when set down but still spring slightly under two fingers. If a hard lump appears, do not yank it apart; wrap a thin layer over it and redistribute the pokes while rotating. Check the shape from above, below, front, and side before adding details. Stop if the needle meets unusual resistance, and never twist it inside dense felt, since that can bend or break the point.
Add color and recognizable features
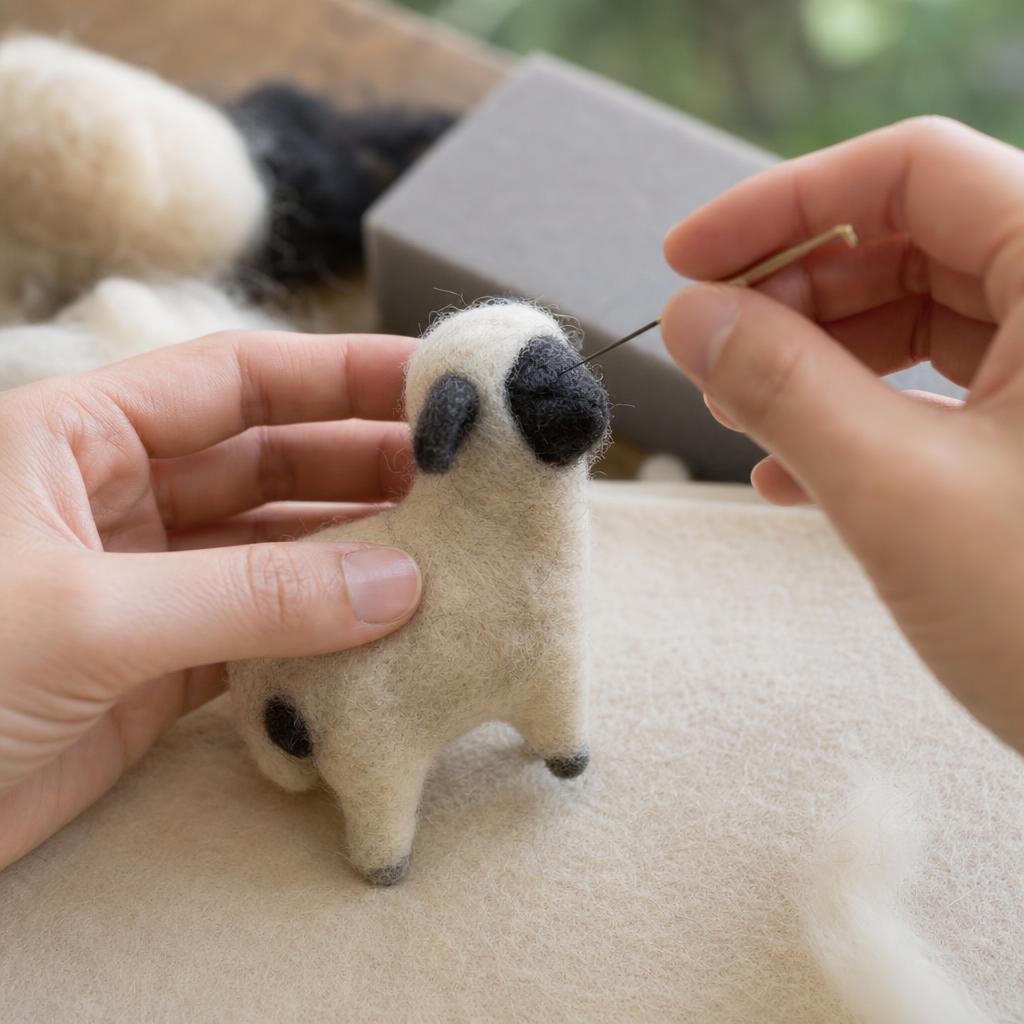
Tear a thin, translucent tuft of surface wool and spread it over one section of the compact core, following the body’s curve instead of wrapping on a thick rope. Anchor the center with a few shallow pokes, then secure the perimeter while turning the sculpture. For blended color, overlap wisps of two shades and alternate strokes across the boundary; change the overlap point on each pass so you do not create a stripe. Leave a little base color showing if you want depth, and save matching fibers for repairs. Plan eyes, ears, cheeks, paws, and tail with loose removable wisps before fixing anything. Place paired features on a horizontal guideline and compare them from the front and side. Build protruding parts as small pre-felted pieces, taper their attachment ends, lay them against the body, and poke through the join from several angles. Never use the needle as a lever to push a feature sideways; lift it, reposition the wool, and stab again. Add a nose, mouth cord, stripe, or eye catch with a fine needle in shallow passes. If a feature grows too large, soften its perimeter with surrounding body color rather than pulling it off and tearing the core. A loose ear or tail should receive a wedge of wool behind its join. Keep fingers behind the work and pause frequently to judge proportion before adding another mark.
Refine, repair, and finish
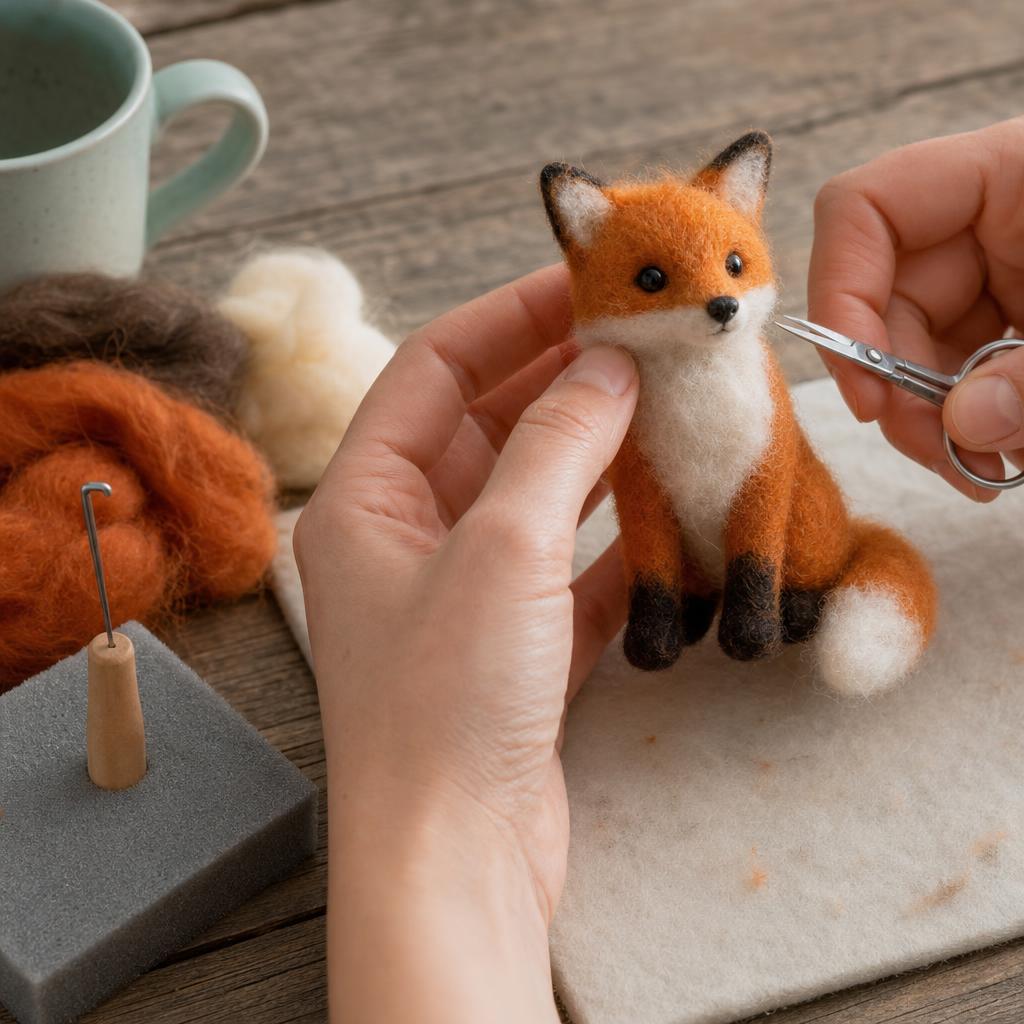
Switch to the fine needle and make short, shallow surface passes while turning the sculpture after every few pokes. Follow curves rather than drilling straight into one spot; this compacts the halo into a firm felted sculpture without creating divots. Rotate it under the lamp to find thin areas, loose patches, or an uneven seam. Cover a hole with a pinpoint of matching wool, felt its edges into the surrounding surface, and blend the repair with a few fibers from each neighboring color. Do not pull a lump apart, glue loose wool, or keep stabbing a place that has become hard; add a veil and redistribute the work instead. Hold sharp scissors parallel to the surface and snip only obvious stray locks, stopping before you expose the core or flatten deliberate texture. Inspect the underside, every join, and any wire armature with your eyes and then a cautious light touch away from needle points. If wire is present, bury every end completely inside wool; if glass eyes are used, test that they cannot loosen. A finished piece should hold its silhouette, feel evenly compact except for intentional fluff, and have no exposed wire or sharp point. Store it dry and away from heat, damp rooms, moths, and pets. Avoid detachable details on anything intended for a child, and take a final break before handling the sculpture so fatigue does not turn trimming into an injury.
Written by

Sarah Mitchell
Fiber Arts & Macramé Expert
Sarah has been knotting, weaving, and stitching for over a decade. Her work blends traditional fiber techniques with modern minimalist aesthetics.