How to Make Pressed Flower Candles Without Losing the Petals
Turn pressed flowers and plain candles into soft, botanical decorations with a simple beginner-friendly method.
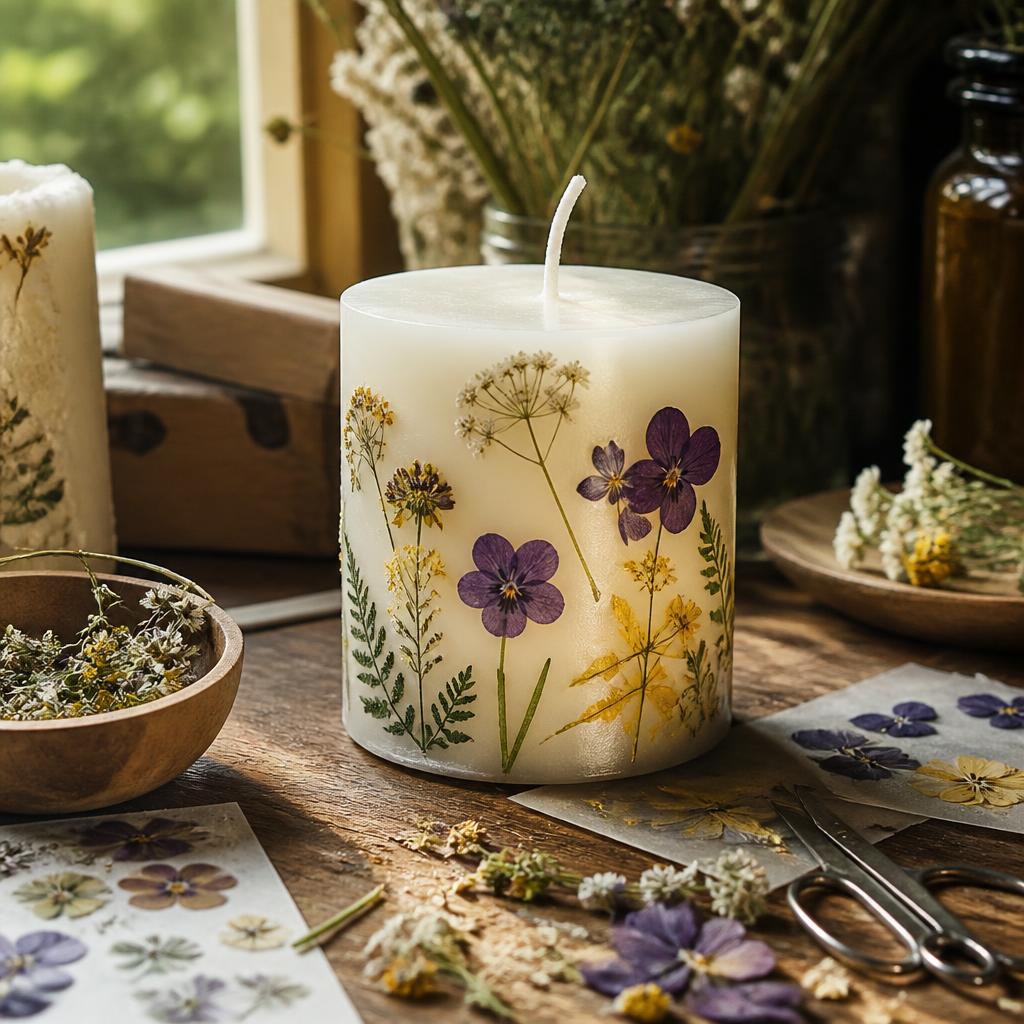
I have a soft spot for crafts that put something already sitting around the house to use. A few flowers pressed between the pages of a heavy book can look almost forgettable — until you set them against candle wax, and suddenly every little vein and stem becomes the whole point. This is how to make pressed flower candles without turning the petals into a melted mess.
If this is your first attempt, go for a plain, unscented pillar candle. Dark or heavily patterned candles compete with the flowers instead of showing them off, and a tapered candle just doesn't give you much surface to work with. For a dried flower candle DIY project, wait until every scrap of moisture is gone from the flowers first. If a petal still feels cool or bends too easily, it's not ready yet.
Lay everything out before you warm a single bit of wax. I usually put one larger flower slightly off-center and let the smaller pieces trail away from it. A candle with dried flowers looks far more natural when the stems aren't all pointing the same direction — a small thing, but too much symmetry can make a handmade object look weirdly mass-produced.
Warm only a small patch at a time, then press in one or two petals. You're not painting the candle in liquid wax — you're just making the surface tacky enough to hold the botanical where you put it. If a petal curls up on you, leave it be rather than chasing it down with more heat. A little curl is just character.
The safest candle with dried flowers is one you actually keep an eye on. Keep flowers and leaves clear of the wick, trim the wick before you light it, and stop burning the candle the moment a flame gets close to any decoration. If you want something for long-term display, an LED pillar gives you the same glow with none of the worry.
When people ask me how to make pressed flower candles, my honest advice is to start with fewer flowers than you think you need. A dried flower candle DIY project looks calmer when there's still visible wax around the stems. Really, learning how to make pressed flower candles comes down to gentle heat and being willing to leave one slightly crooked petal exactly where it landed. A dried flower candle DIY project is at its best when it still looks handmade. For a candle with dried flowers, a few well-spaced petals go a long way.
The flowers you choose matter more than people expect going in. Flat flowers — pansies, violas, Queen Anne's lace, small bits of fern — attach far more easily than thick, juicy petals. If you're pressing your own, sandwich them between absorbent paper and swap that paper out after the first day. Heavy books do the job, but a proper flower press gives you steadier pressure. Skip anything that still feels cool or rubbery to the touch; that usually means moisture is hiding somewhere in the center, and moisture is exactly what causes browning down the line.
Wax color is another decision worth pausing on. White and cream make the botanicals look delicate, while pale yellow gives the whole candle a warmer, vintage feel. I'd steer clear of very dark wax until you've tried this once — tiny flowers just vanish into it. You can test an arrangement by holding petals against the candle with a scrap of removable tape first. It's a lot less frustrating to shift the design around on the table than to try fixing it after the wax has already been warmed.
A spoon is really all you need for most small projects. Warm it in a mug of hot water, dry it off completely, and use the rounded back to soften the wax. It should feel warm to the touch, not scorching. Move it in small circles right over the spot where the flower will go, then set the petal down immediately. If the wax isn't holding it, give the area another second of warmth. If the wax starts to run, stop and let it cool — there's no prize for rushing this part.
You can decorate all the way around a candle, but a front-facing arrangement is easier to control and usually reads as more intentional anyway. Leave a clear band around the top and bottom so the thing still looks like a candle and not a jar stuffed with flowers. Small leaves are handy for filling gaps, though they deserve the same caution as petals near an open flame — dried plant material burns even when it's neatly attached.
For a gift, tuck the candle into a shallow box with crumpled tissue rather than wrapping it tightly in paper. A small note listing which flowers you used, and whether it's meant to be lit or just displayed, is a nice touch. If fingerprints show up on the wax, buff the surface lightly with a soft cloth. Skip spraying fragrance or varnish over the top — extra products can change how the candle actually burns. A little restraint keeps the finished piece both prettier and safer.
Before you even start, decide whether this candle is mostly for looks or actually meant to be burned. Anything covered in dried botanicals should be treated as display-only unless you've got a genuinely tested, flame-safe way of keeping plant material well clear of the wick and melt pool. For a safer gift, decorate the outside of a candle vessel instead, or slip a battery-powered candle inside a decorated holder — same gentle, botanical look, without asking dried petals to sit anywhere near real heat.
Keep your layout plan simple. Three larger flowers arranged in a loose diagonal often looks more relaxed than a perfectly even ring, and a few tiny leaves can lead the eye from one bloom to the next. When in doubt, work in odd numbers — three or five small elements tend to look balanced without feeling stiff. And take a quick phone photo before you start attaching anything, so you can rebuild the arrangement if a petal shifts on you.
Small imperfections are part of the charm here, but a few are worth actually fixing. A cloudy patch usually means the wax heated unevenly, while a lifted edge means the surface wasn't warm enough when you placed the flower. Rewarm just that small spot rather than running heat over the whole candle. If a petal tears, lift it out with tweezers and cover the mark with a smaller leaf or a dot of wax. You're going for a calm, finished surface — not a visible record of every fix you made along the way.
Materials You'll Need
- Plain pillar candle
- Fully pressed, dry flowers
- Tweezers
- Small spoon or low-temperature heat tool
- Paper towel
- Heatproof work surface
Step-by-Step
Gather and plan the flowers.
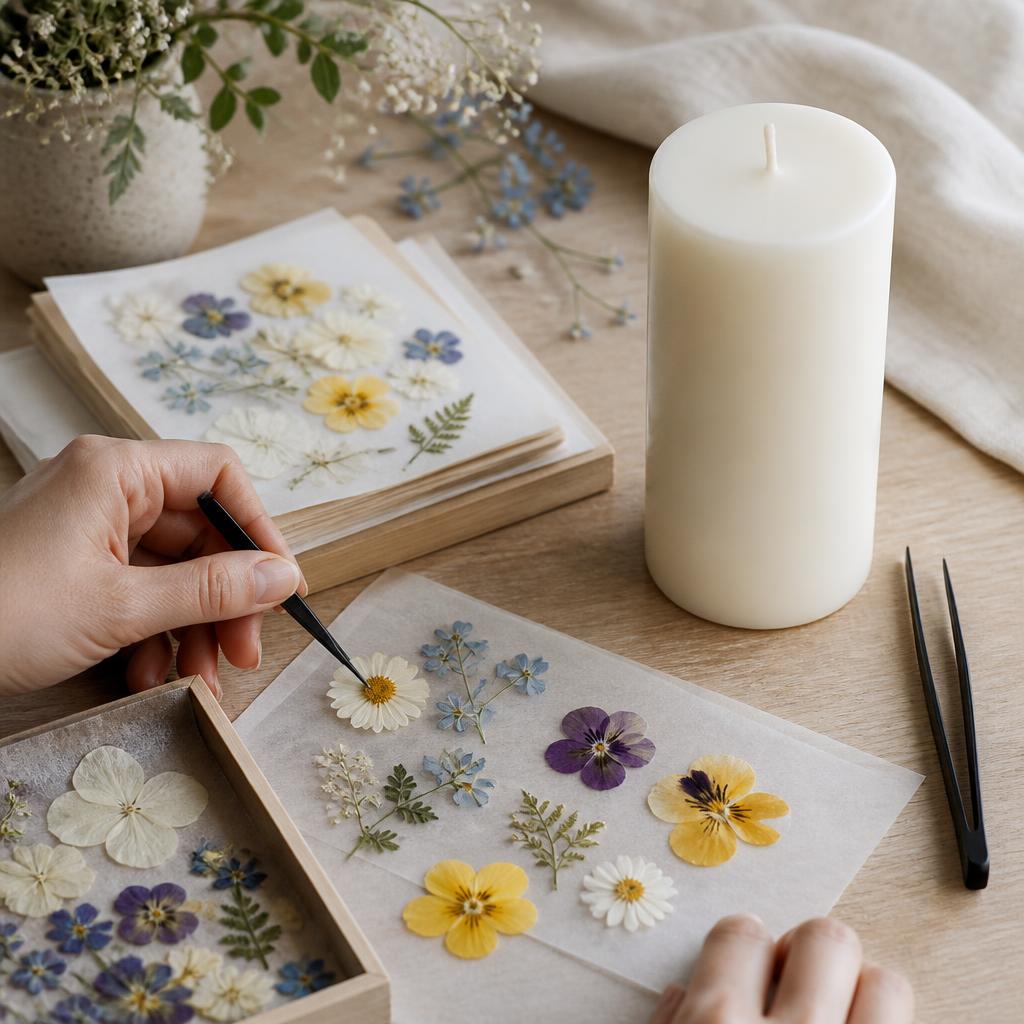
Choose flowers that are fully dry, flat, and free of dust, then lay a few possible combinations beside the candle before you warm anything, leaving some breathing room between shapes. A quick photo of the arrangement makes it much easier to recreate the design once pieces start moving around.
Warm the candle surface.
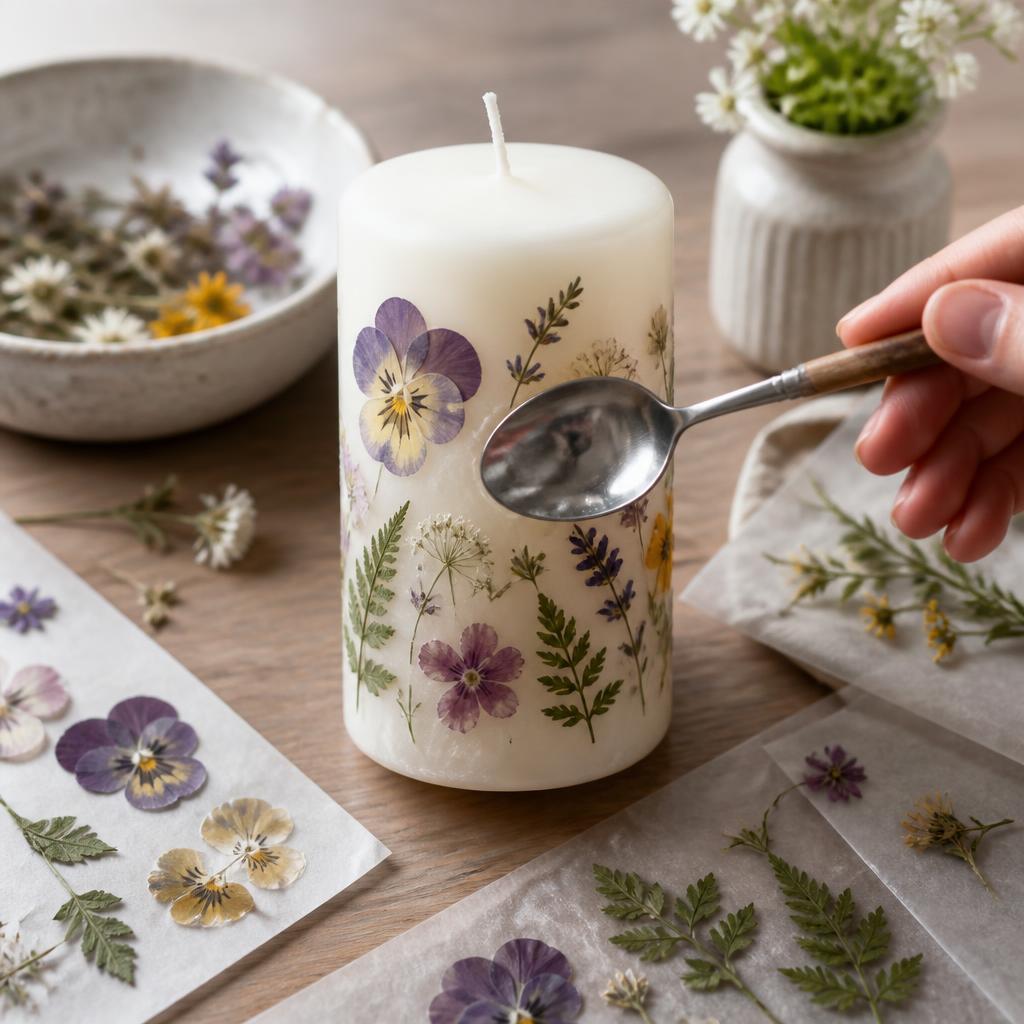
Use a spoon warmed in hot water and dried thoroughly, or a low-temperature heat tool, and soften only a small patch at a time, keeping the spoon moving so it stays even. You want the surface glossy and tacky, not liquid. Work on a protected surface, keep loose dried material well away from the heat source, and set the spoon in a heat-safe dish whenever you pause.
Set the petals in place.
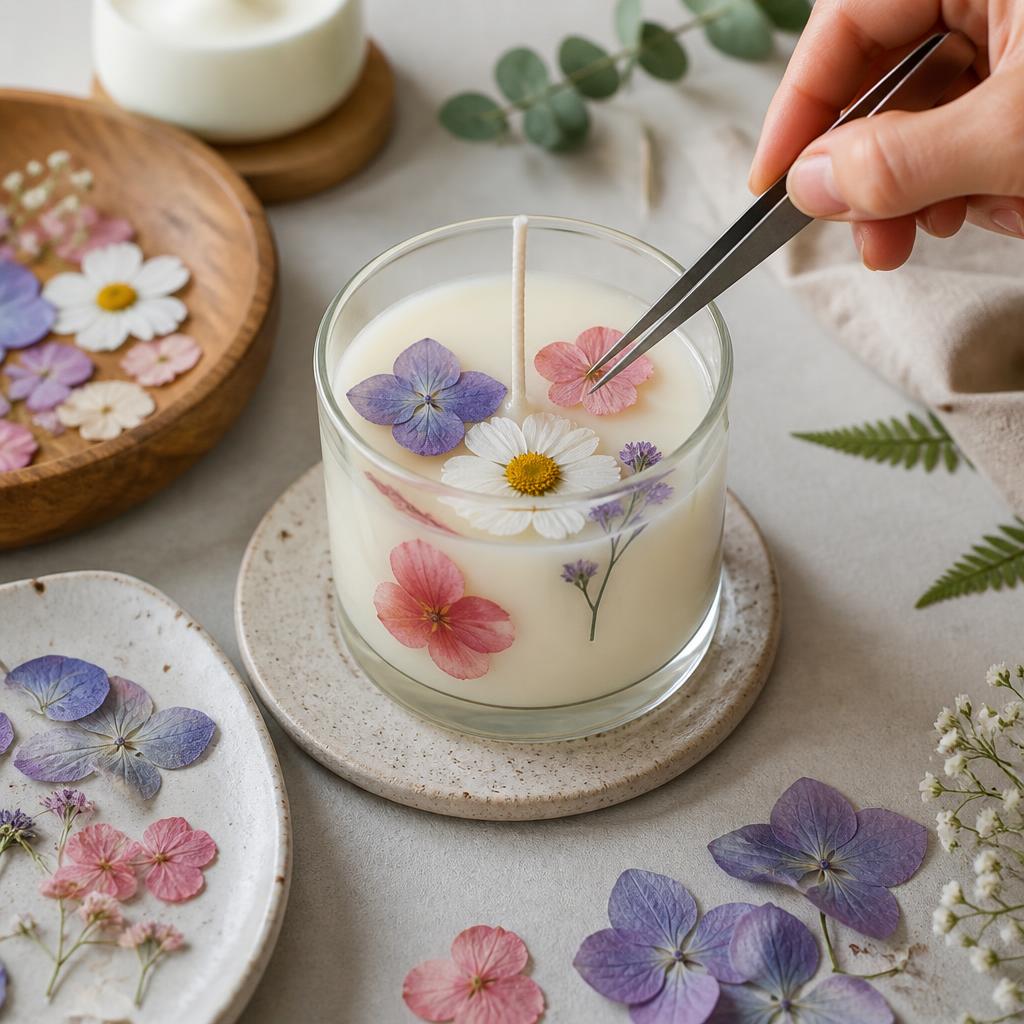
Pick up each petal by its strongest edge with tweezers and press it down gently — don't drag it across the softened wax, which can tear the flower or leave a visible smear. If a corner lifts, touch just that corner with the warm spoon instead of reheating the whole design.
Finish and burn safely.
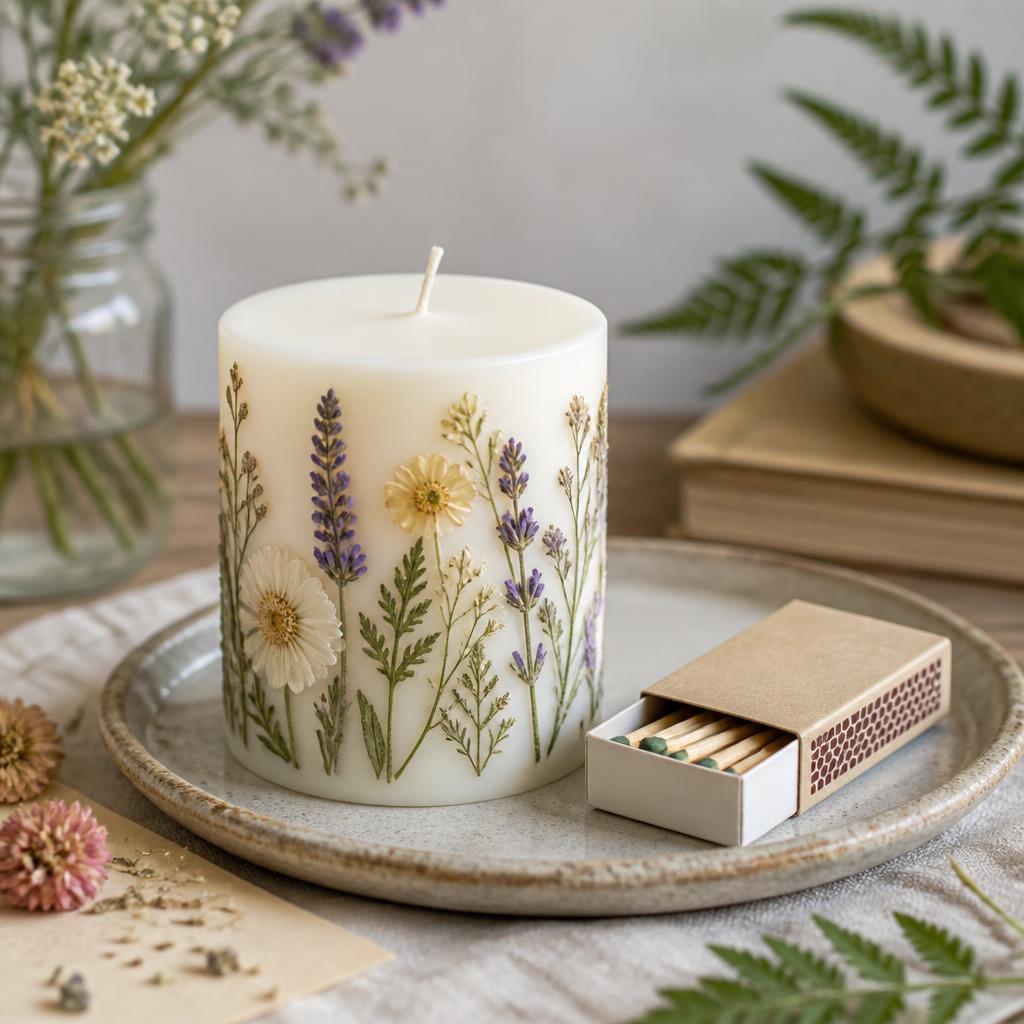
Let the wax harden completely before handling the candle, then check the edges for loose petals and brush away crumbs with a soft, dry brush. Label a heavily botanical candle as decorative unless you've actually tested the placement for safe burning, and never leave a decorated candle burning unattended.
Written by

Lily Andrews
Botanical & Nature Craft Artist
Lily forages, presses, and preserves the natural world. Her work bridges botanical science and handcraft, turning leaves, petals, and bark into lasting art.