Now Reading: Top 5 Quick and Easy DIY Crafts to Brighten Your Day
-
01
Top 5 Quick and Easy DIY Crafts to Brighten Your Day
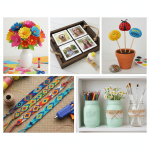
Feeling creative but short on time? This article is for you! We’ve rounded up 5 fantastic DIY crafts that are not only quick and easy to make but also use readily available materials. Whether you’re looking to add a personal touch to your home, create a thoughtful gift, or just enjoy a relaxing crafting session, these projects are perfect. Each craft includes simple step-by-step instructions and an illustrative image to guide you.
Let’s dive into the wonderful world of DIY!
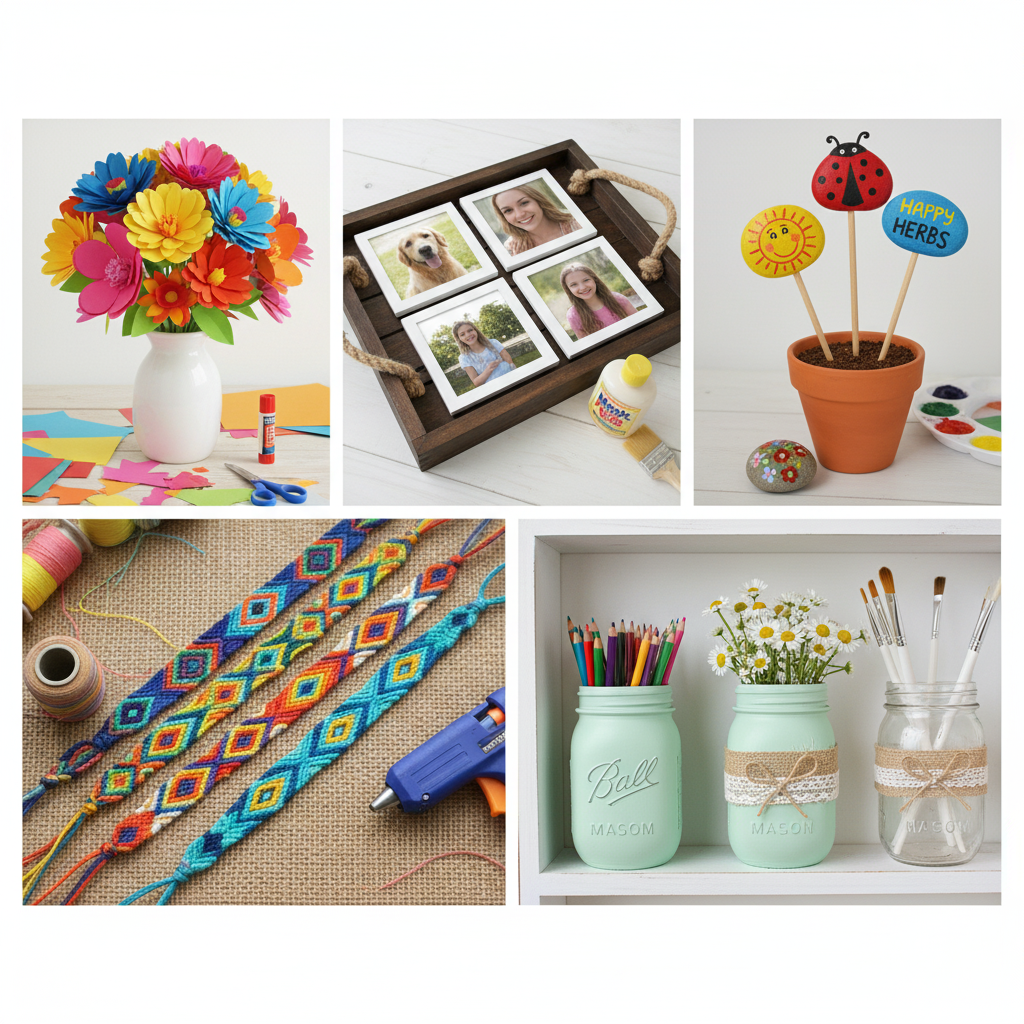
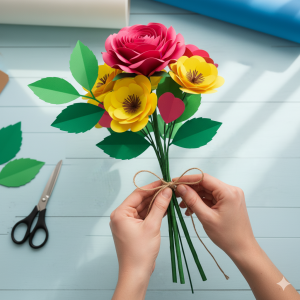
1. Charming Paper Flower Bouquet
Paper flowers are a timeless craft, offering endless possibilities for color and design. They make beautiful decorations, thoughtful gifts, and never wilt!
Materials:
- Colored paper (construction paper, cardstock, or crepe paper work best)
- Scissors
- Floral wire (optional, for stems)
- Glue stick or hot glue gun
- Pencil (for curling petals)
- Floral tape (optional)
Step 1: Gather your materials.

Step 2: Create the petals and leaves. Cut out various shapes for petals and leaves from your colored paper. For a rose, cut a spiral. For other flowers, cut individual petal shapes (teardrops, hearts, circles). Use a pencil or your fingers to gently curl the edges of the petals to give them a more natural, three-dimensional look.
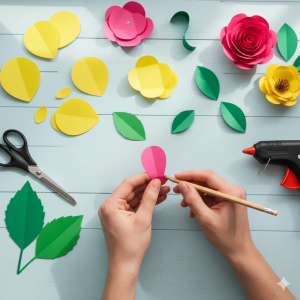
Step 3: Assemble the flowers. If making a rose from a spiral, start from the outside and coil tightly, securing the base with glue. For individual petals, apply glue to the base of each petal and wrap them around a small center piece or a floral wire (if using stems). Continue adding petals, overlapping them, to build up the flower’s fullness. Attach leaves to the floral wire or directly to the base of the flower with glue.
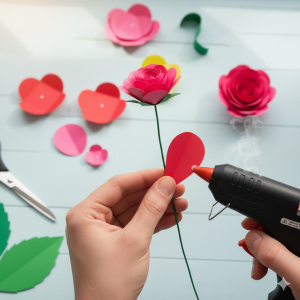
Step 4: Arrange the bouquet. Once you have several flowers, gather them into a bouquet. If you used floral wire for stems, you can bend and shape them. Secure the stems together with floral tape for a cohesive look. You can also add a decorative ribbon or twine around the base of the bouquet.
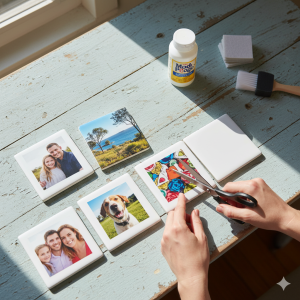
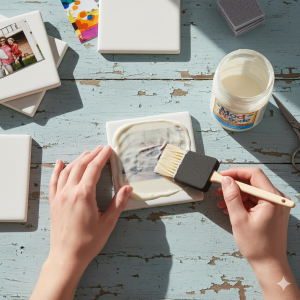
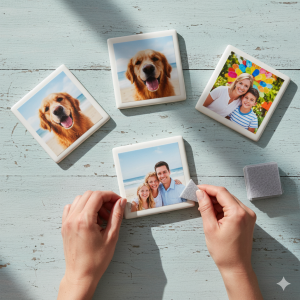
2. Personalized Photo Coasters
Turn your favorite memories into functional art with these custom photo coasters. They make excellent gifts and are super simple to make.
Materials:
- Ceramic tiles (4×4 inches or desired size)
- Printed photos (sized to fit the tiles)
- Mod Podge (gloss or matte)
- Foam brush
- Clear acrylic sealer spray (optional, for extra protection)
- Felt pads (for the bottom of the coasters)
Step 1: Prepare your photos and tiles. Trim your photos to perfectly fit the top surface of your ceramic tiles. Ensure the tiles are clean and dry.
Step 2: Apply Mod Podge and photo. Brush a thin, even layer of Mod Podge onto the top surface of a tile. Carefully center your trimmed photo on top of the Mod Podge. Smooth out any air bubbles with your fingers or a flat tool, working from the center outwards.
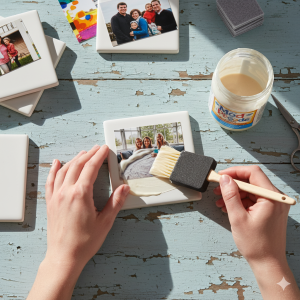
Step 3: Seal with Mod Podge. Once the initial layer is dry (about 15-20 minutes), apply several more thin coats of Mod Podge over the top of the photo and tile, allowing each coat to dry completely before applying the next. This creates a protective, waterproof seal. For extra durability, you can finish with a clear acrylic sealer spray.
Step 4: Add felt pads. Once everything is completely dry, adhere felt pads to each corner of the bottom of the tiles. This will protect your furniture from scratches.
3. Painted Rock Garden Markers
Add a touch of whimsy and organization to your garden with these adorable painted rock markers. They’re fun for all ages!
Materials:
- Smooth rocks
- Acrylic paints (weatherproof or outdoor-safe recommended)
- Paintbrushes
- Fine-tip paint markers (optional, for lettering)
- Clear sealant spray (outdoor-safe)
Step 1: Clean and prepare rocks. Wash your rocks thoroughly to remove any dirt or debris. Allow them to dry completely.
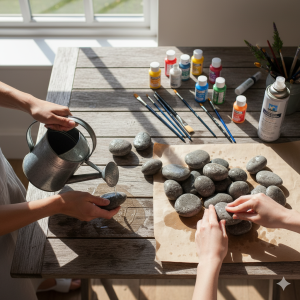
Step 2: Paint base coats and designs. Use acrylic paints to create colorful designs on your rocks. You can paint a solid background color first, then add details like vegetables, fruits, or flowers. If creating garden markers, leave space to write the plant names.
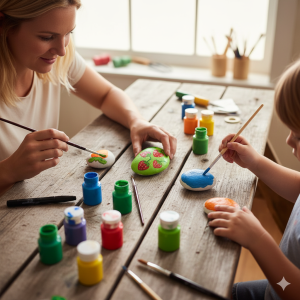
Step 3: Add lettering (optional) and details. Once the base paint is dry, use a fine-tip paintbrush or paint marker to add plant names, dates, or other decorative details. Let all the paint dry completely
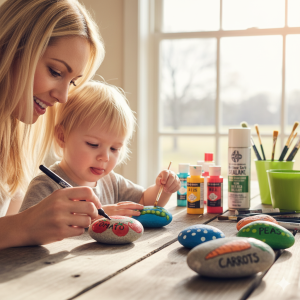
Step 4: Seal for outdoor use. In a well-ventilated area, spray your finished rocks with several light coats of a clear outdoor-safe sealant. This will protect them from the elements and keep your designs vibrant. Let cure according to product instructions.
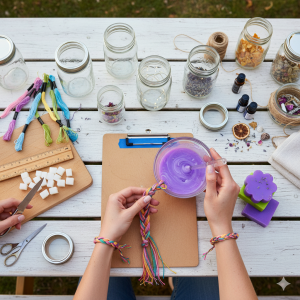
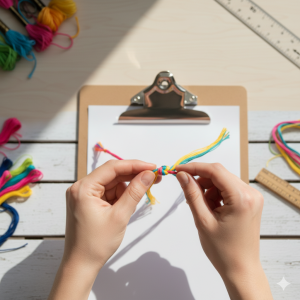
4. Easy Friendship Bracelets
Friendship bracelets are a classic craft, perfect for gifting to friends or wearing yourself. They’re simple, customizable, and a great way to use up embroidery floss.
Materials:
- Embroidery floss in various colors
- Scissors
- Tape or a clipboard to hold the floss
Step 1: Choose colors and cut floss. Select 3-6 colors of embroidery floss. Cut each strand to about 60-70 inches long. For a thicker bracelet, use more strands. Tie all strands together in a knot at one end, leaving a tail of about 3-4 inches.
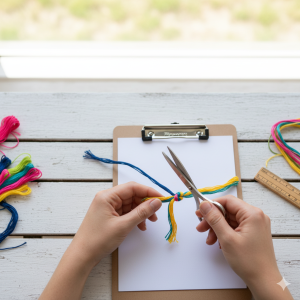
Step 2: Secure and separate strands. Tape the knotted end to a flat surface or clip it to a clipboard. Separate the strands by color into two main sections for a simple twisted or braided bracelet, or lay them out in the order you want them to appear for more complex patterns.
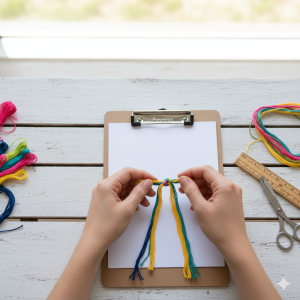
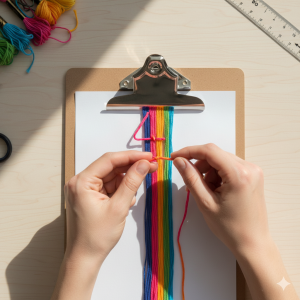
Step 3: Begin knotting or braiding. For a simple twisted bracelet, divide the strands into two equal halves and twist each half tightly, then twist the two halves around each other in the opposite direction. For a basic braid, divide into three sections and braid normally. For more intricate patterns like the candy stripe, use forward knots. Take the outermost left string and make a “4” shape over the next string, then pull it under and through the loop. Pull tight to create a knot. Repeat this knot twice on the same string, then move to the next string.
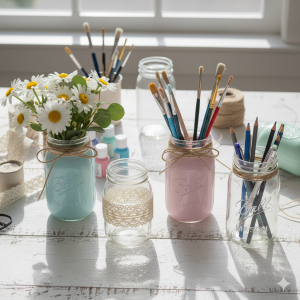
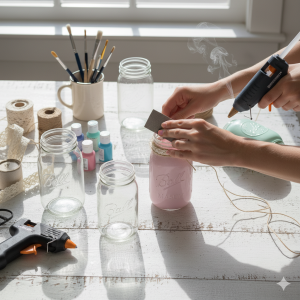
5. Decorated Mason Jar Vases/Organizers
Mason jars are incredibly versatile. Transform plain jars into charming vases, storage containers, or decorative pieces with just a few simple supplies.
Materials:
- Mason jars (various sizes)
- Acrylic craft paint or spray paint
- Paintbrushes (if using brush-on paint)
- Twine, ribbon, or lace
- Hot glue gun or craft glue
- Sandpaper (optional, for distressing)
Step 1: Clean and prepare jars. Wash and thoroughly dry your mason jars. If you want a distressed look, lightly sand areas where you’d like paint to rub off later.
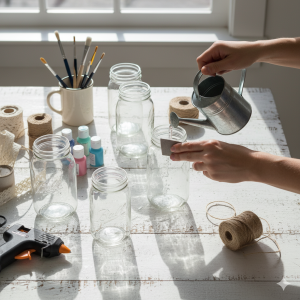
Step 2: Paint the jars. If using brush-on acrylic paint, you can paint the outside or pour paint inside and swirl it around for an even coat. For spray paint, apply several light, even coats to the outside in a well-ventilated area. Let dry completely.
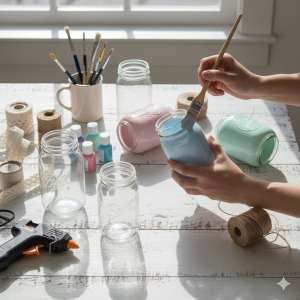
Step 3: Distress (optional) and decorate. Once the paint is fully dry, if you want a distressed look, gently rub sandpaper over raised areas like the lettering or rim of the jar to reveal the glass beneath. Then, using hot glue or craft glue, wrap twine, ribbon, or lace around the neck or body of the jar for added decoration.
Step 4: Display your decorated jars. Fill your finished jars with fresh flowers, use them to organize craft supplies, hold pens and pencils, or simply display them as charming decor pieces.