DIY Friendship Bracelets: Classic Patterns and Modern Twists
DIY jewelry making with embroidery floss is one of the most accessible crafts.
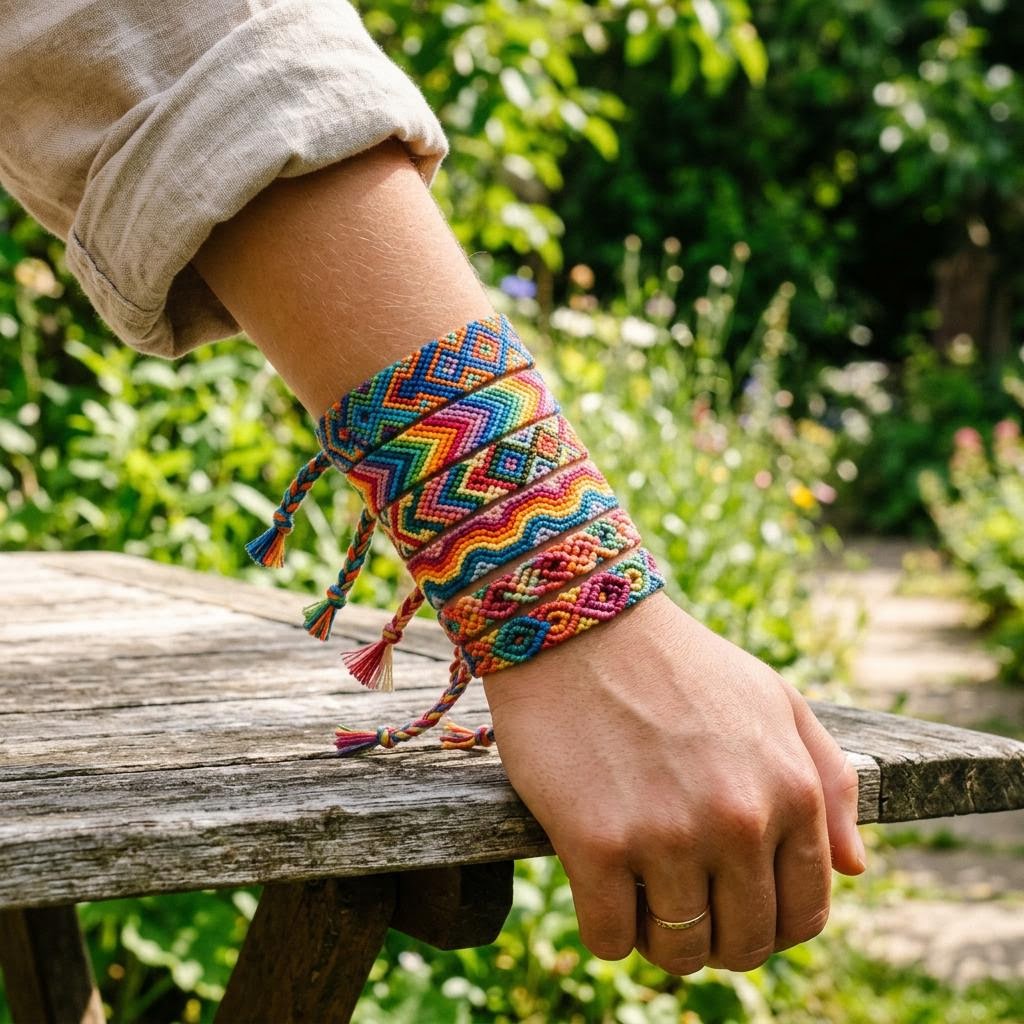
Friendship bracelets occupy an interesting cultural space — they are simultaneously one of the simplest textile crafts and a legitimate art form with serious practitioners. On one end: the classic six-strand chevron bracelet that an eight-year-old can learn in an afternoon. On the other end: the alpha bracelet, a technique capable of producing photorealistic portraits using dozens of strands in twenty or more colors, requiring weeks of work and a level of planning that approaches graphic design. The same four basic knots, scaled up in complexity, span the entire range.
The craft's contemporary revival is partly driven by a community of makers on platforms like DeviantArt and Instagram who have pushed alpha patterns into genuinely extraordinary territory. Patterns for pop culture references, album covers, and geometric mandalas circulate freely in these communities, shared as bitmap grid files that experienced makers can read and execute. A beginner looking at one of these complex patterns has no idea they involve the same knots as their first chevron — the complexity comes entirely from scale and planning.
Tension is the core practical skill, and it cannot be taught by reading about it — it has to be developed through repetition. The correct tension produces rows that are flat, parallel, and even-width. Too tight and the bracelet narrows and curves; too loose and the rows look floppy with visible gaps. Every maker develops their own tension habits, and it typically takes making three or four complete bracelets before your tension becomes naturally consistent. The fourth bracelet almost always looks noticeably better than the first.
Color theory matters more in friendship bracelets than beginners expect. Colors that look beautiful side-by-side in a color wheel often read as muddy or clashing when knotted in narrow strands. High contrast between adjacent strands — light next to dark rather than similar values — produces the clearest, most readable patterns. Complementary color pairs (blue and orange, red and green, purple and yellow) create vibrant energy; analogous color runs (all the blues and purples) create sophisticated, flowing gradients. Testing color combinations by wrapping strands loosely around your wrist before committing is a useful habit.
The knot-by-knot nature of friendship bracelets makes them unusually portable as a craft. Unlike knitting (which needs needles and yarn management), sewing (which needs a machine or good lighting), or embroidery (which needs a hoop), friendship braceleting needs only floss and a safety pin. You can knot two stitches, set it down for an hour, and pick up exactly where you left off. This makes it the ideal commute craft, waiting room craft, or watching-television craft — something for your hands while your attention is partly elsewhere.
The social tradition of giving bracelets is part of what makes them meaningful beyond the object itself. The original folk tradition was that the recipient wears the bracelet until it falls off naturally, at which point the wish they made when receiving it comes true. Modern practice is more casual — bracelets are exchanged as friendship tokens, concert memorabilia (Taylor Swift's Eras Tour sparked a massive revival of bracelet trading in 2023), and personal challenge markers. A bracelet you made yourself, given to someone you care about, carries a weight that a purchased one does not, regardless of whether the technique is simple or complex.
Materials You'll Need
- Embroidery floss (multiple colors)
- Scissors
- Measuring tape
- Safety pin or tape to anchor
- Clipboard (optional)
Step-by-Step
Measure and Cut Your Floss
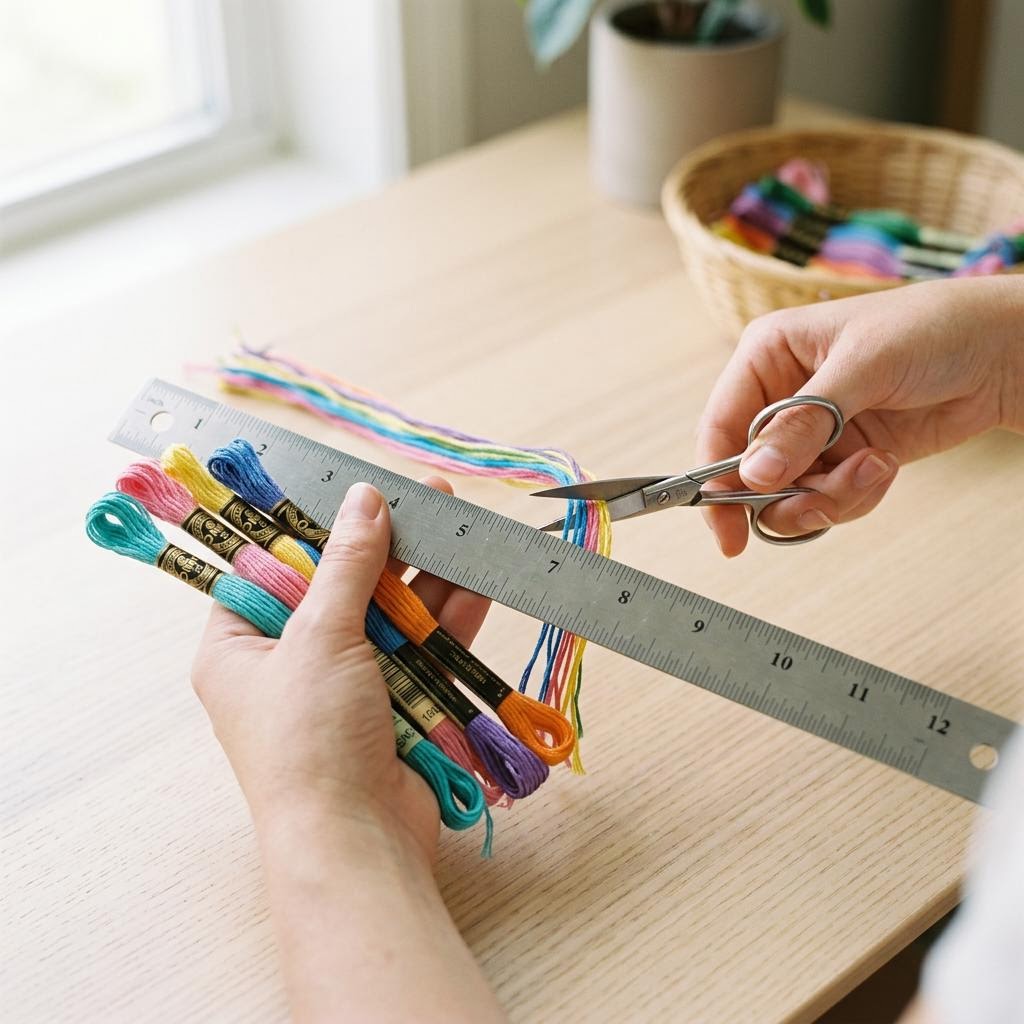
Cut each strand of embroidery floss to about 60cm — roughly the length from your fingertip to your shoulder. Longer strands tangle and fray badly; shorter strands mean you run out mid-pattern and have to join new lengths, which shows in the finished piece. DMC embroidery floss is the standard: it comes in over four hundred colors, every strand is colorfast, and the number coding system makes it easy to match colors between projects and replace exactly what you used. Most friendship bracelet patterns use six strands, each a different color, cut to the same length. Fold all six strands together and knot them about 3cm from one end — this knot is the starting anchor. Tape the knotted end firmly to a table edge, a clipboard, or your jeans knee, or pin it with a safety pin to a cushion. The anchor point must be completely fixed — if it moves while you knot, your tension becomes uneven and the bracelet twists. Separate the strands into their individual colors and arrange them in the order your pattern requires before making any knots.
Learn the Basic Knots
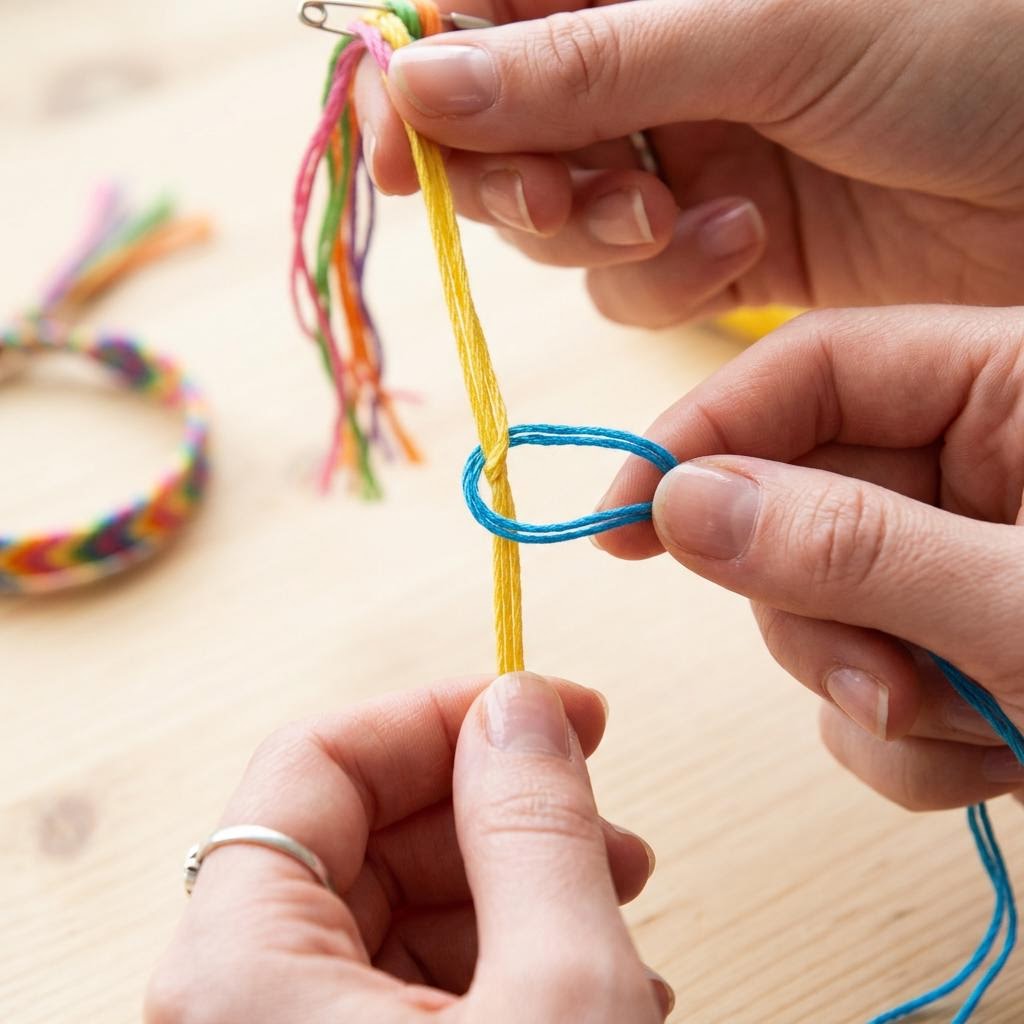
Friendship bracelets use only four knots, all variations of the same basic action. The forward knot: take the leftmost strand, cross it over the next strand to form a number four shape, loop it under and pull through — tighten upward. Repeat this action twice on the same strand to complete one full forward knot. The backward knot is the mirror image: the active strand crosses to the right forming a reverse four, loops under, and pulls through — tighten upward. Again, two pulls per knot. The forward-backward knot and the backward-forward knot are combinations used for specific pattern effects. In all four knot types, pulling consistently upward (toward your anchor point) rather than sideways keeps the rows flat and even. The most common beginner mistake is pulling sideways, which causes the bracelet to curve and spiral. Consistent upward tension is the entire technique — once you have it, the patterns are simply a matter of following which knot to use on which strand in sequence.
Knotting the Chevron Pattern
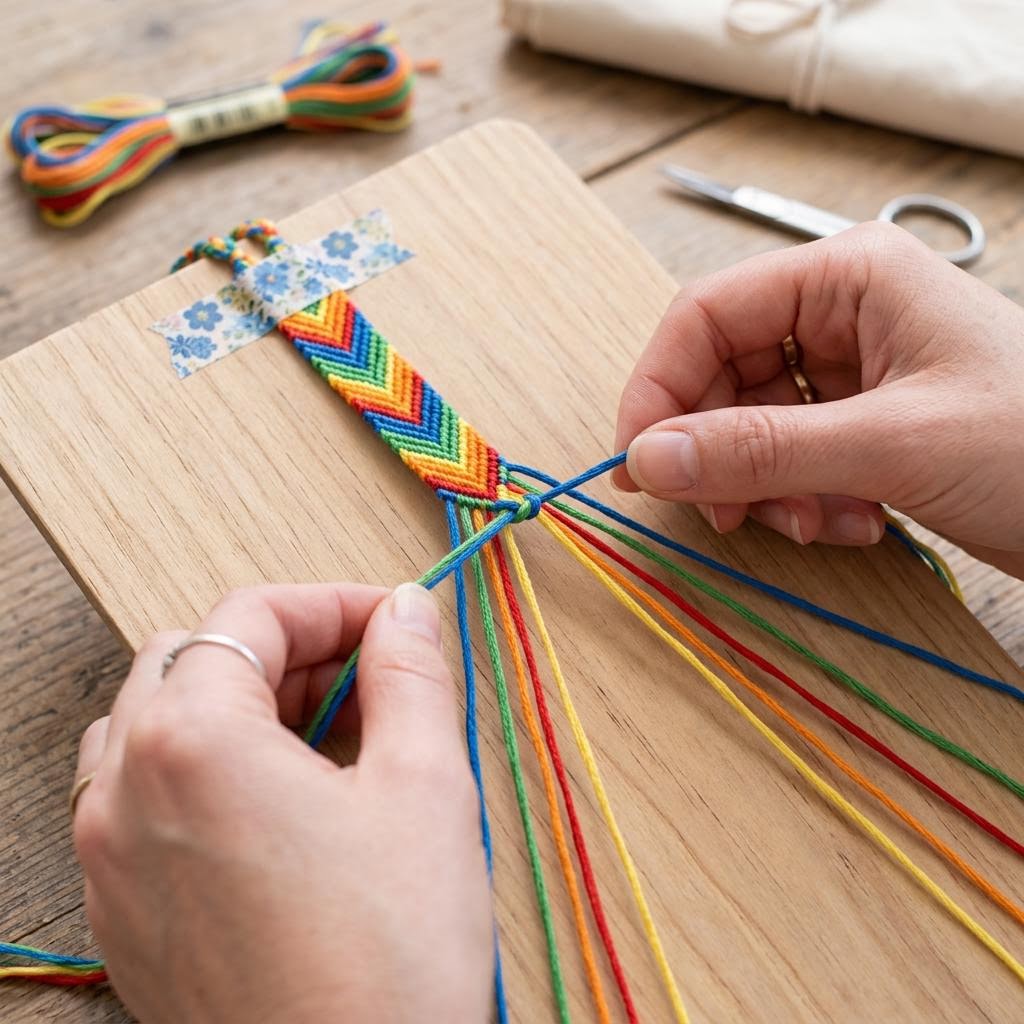
The chevron (V-shape) is the classic friendship bracelet pattern and the best one to learn first. Arrange your strands symmetrically: if you have six strands in colors A-B-C, arrange them C-B-A-A-B-C from left to right. Work forward knots from the left: strand C makes a forward knot on B, then on A. From the right: strand C makes a backward knot on B, then on A. The two active strands (both C) meet in the middle — join them with a forward-backward knot. One row of the chevron is complete. Repeat this sequence with each row: always starting from the outermost strand on each side, working inward and joining at the center. The color that starts on the outside of each side will gradually move toward the center as you work, creating the V pattern. The width of the V and the frequency of color changes are controlled entirely by the order you arranged your strands at the start. Consistent tension row to row makes the V's uniform; variable tension makes them look pinched or bulging in places.
Finishing and Tying Off
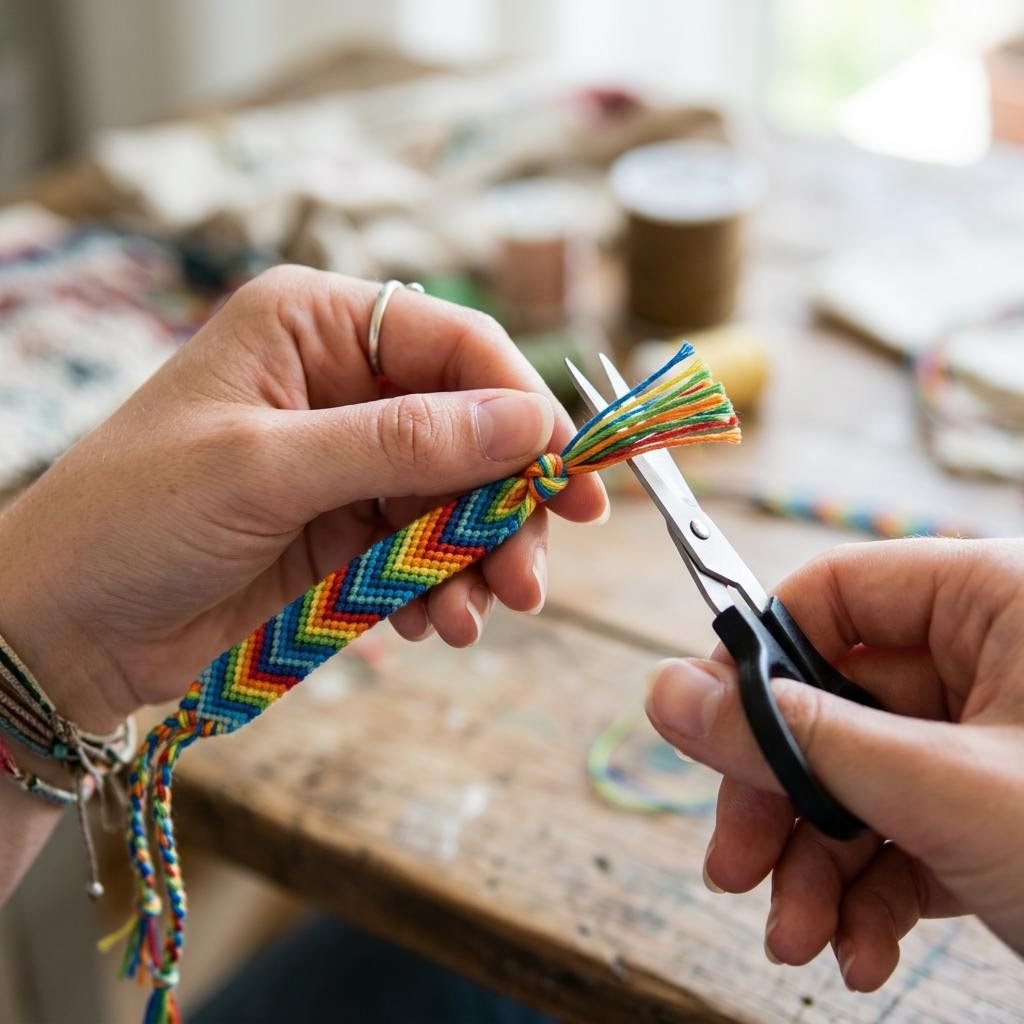
When the bracelet is long enough to wrap comfortably around the wrist (typically 18–20cm for an adult), stop knotting about 3cm before the end of the strands. Braid or knot the remaining strands together to create the closing end — matching the starting braided or knotted end. The bracelet closes by threading the ends through the starting loop and tying together, or by using a sliding knot closure if you prefer adjustable sizing. Trim any excess strand ends to about 1cm and seal with a very brief touch of a lighter flame — hold the flame close for just one second to melt the floss slightly and prevent fraying. Do not hold the flame too long; embroidery floss is cotton and will burn rather than melt if overheated. Alternatively, a tiny drop of clear nail polish on the cut ends achieves the same anti-fray effect without any heat. Store finished bracelets flat or rolled loosely — folding them sharply along the knot rows eventually causes the thread to break at the fold line.
Written by
Ava Roberts
Jewelry Design & Metalwork Artist
Ava works in silver, copper, and stone. Her handcrafted jewelry practice spans wire wrapping, cold connections, and simple metalsmithing techniques accessible to all skill levels.