Turn small fabric remnants into dimensional flowers with simple gathering, layering, and finishing techniques for gifts, clothing, or home décor.
There is something especially satisfying about rescuing a small square of fabric from the scrap basket. A print that was too tiny for a pocket can become a bright accent on a bag, and a plain leftover can soften a hair clip or gift wrap. In this guide, I explain how to make fabric flowers with a simple gathered petal method. The result is a little three-dimensional bloom that can be sewn to clothing, displayed in a jar, or turned into a pin. Learning how to make fabric flowers also gives a useful home to the smallest remnants.
Choose a stable woven fabric for your first attempt: quilting cotton, linen, lightweight denim, or a cotton blend all behave predictably. Very slippery satin can be beautiful but is harder to control, while stretchy jersey may collapse when gathered. Wash and press the fabric first so later shrinkage does not pucker the flower. An easy fabric flower tutorial should leave room for personality, so combine one main print with a quiet coordinating solid rather than searching for a perfect match. I often hold scraps next to the intended garment in daylight before cutting. This easy fabric flower tutorial works especially well with scraps that already have a pleasing drape.
## Step 1: Plan the scraps and pattern
Draw a five-petal shape on paper, about 7 cm long and 4 cm wide, with a shallow notch at the base. Cut it out and make a second template that is about 1 cm smaller if you want a fuller, layered bloom. This is your fabric flower pattern; keep it on sturdy paper or thin card so the edge does not change as you trace. Test the template in scrap fabric first. Five large petals make a relaxed flower, while six or seven narrow petals create a denser one. For a brooch, two layers are usually enough; for a hair accessory, three light layers make a pleasantly full silhouette. Save this fabric flower pattern with a note about which size made the best shape.
Press the chosen scraps with the wrong side up and place the pattern so the grain runs from the petal base toward its tip. Trace with a washable pen or chalk. You can cut fabric petals with fabric shears, a rotary cutter, or carefully sharpened household scissors reserved for cloth. Make the shapes as consistent as possible, but do not discard a petal for a one-millimeter difference. That slight variation keeps handmade cloth flowers from appearing stamped out. I call these little batches scrap fabric flowers because even narrow strips can supply two or three petals. A second reason I enjoy handmade cloth flowers is that an imperfect print can become the hidden underside.
Check the stack by fanning the pieces in your hand. The bases should meet while the tips form a circle with no large gaps. If one petal looks dramatically wider, trim only its side, not its tip, so the curve remains gentle. This is also the time to decide whether the right or wrong side will face up. For a reversible look, use prints that are attractive on both sides; otherwise mark the wrong side with a small dot. Store the templates with the scraps so a future flower is easy to repeat. Mixing two prints in one group of scrap fabric flowers makes a lively bouquet without buying new yardage. Keep a note beside the fabric flower pattern if you alter the width.
## Step 2: Cut, shape, and treat the edges
Place each traced piece on a folded scrap if the fabric is thin, then cut cleanly around the line. Keep the base straight enough for stitches to pass through. If the fabric is loosely woven, use a short line of washable glue on the seam allowance or a tiny amount of fray-check on the cut edge. Test any liquid on a spare piece because some products darken cloth. When using a synthetic fabric that responds to heat, you may briefly pass the edge near—not in—the side of a candle flame, but only with adult supervision, ventilation, water nearby, and a nonflammable surface. Never heat natural fibers this way; they scorch rather than melt. Even the offcuts from scrap flowers can be saved for a tiny center. Cut fabric petals in batches, keeping the matching sets together.
This is how to get no fray fabric edges without making the petal stiff. Apply the smallest amount of treatment possible, let it dry, and flex the piece. A crisp edge is useful, but a petal that sounds papery will not drape naturally. An iron on a low setting and a pressing cloth can shape a fold from base to tip. For a soft cupped petal, press the center briefly over a rounded tailor’s ham or the curve of a clean wooden spoon. Avoid sharp creases unless the design calls for them. Check the no fray fabric edges again after pressing, because heat can expose a missed thread. Cut fabric petals only after this test when the cloth is prone to stretching. A final look at the no fray fabric edges prevents loose threads from showing between layers.
Arrange the prepared pieces in pairs and compare their sizes. A checkpoint here is a petal that bends at the base and still springs back when lifted. If the edge waves, reduce the heat or use fewer layers of treatment. If it frays heavily, choose a tighter weave for the next flower and trim loose threads rather than pulling them. Keep scissors, hot tools, and liquids away from young children, and unplug the iron as soon as pressing is finished. If you are making scrap fabric flowers, use the firmest remnants for the bottom layer. These flowers last longer when every edge and thread receives this inspection.
## Step 3: Gather and sew the bloom
Thread a needle with a strong thread and knot the end. Starting at one side of the petal base, sew a small running stitch along the curved lower edge, leaving the top half free. Keep the stitches even but not tiny; a stitch about 4 mm long gathers smoothly and is easy to adjust. Repeat for each petal, or sew one petal at a time and add it directly to the growing circle. Gather fabric petals by pulling the thread gently until the base forms a shallow fan. Leave the thread attached while you compare the fullness. To gather fabric petals evenly, pull from both ends in turn instead of yanking one thread. A final gentle tug should gather fabric petals without making a hard crease.
When all pieces are prepared, overlap the gathered bases in a clockwise circle. The tips should point outward and the center should have a small opening for a button or covered circle. This arrangement is the foundation for sew fabric flowers that do not flatten immediately. Distribute the gathers instead of pulling one section tight and leaving another loose. A useful checkpoint is to lift the flower by its center thread; the petals should hang evenly without one slipping away. You can sew fabric flowers with a contrasting thread, but a matching shade makes the join disappear. If the ring opens, sew fabric flowers one petal at a time around a felt circle.
Knot the thread at the back, then stitch through the joined bases several times in different directions. Use a thimble if the layers feel firm. Do not cinch so hard that the thread cuts through the cloth. For a layered fabric bloom, place the smaller set of petals on top with its tips offset from the lower set. Tack the layers together through their centers, then gently bend a few upper petals upward. If the flower looks flat, loosen the center stitches and add a tiny folded scrap underneath as a spacer. If it looks lopsided, unpick only the nearest two stitches and redistribute the gathers. A layered fabric bloom should have air between layers, not a tight stack. A second layered fabric bloom can use alternating petal sizes for a softer outline.
## Step 4: Finish the center and back
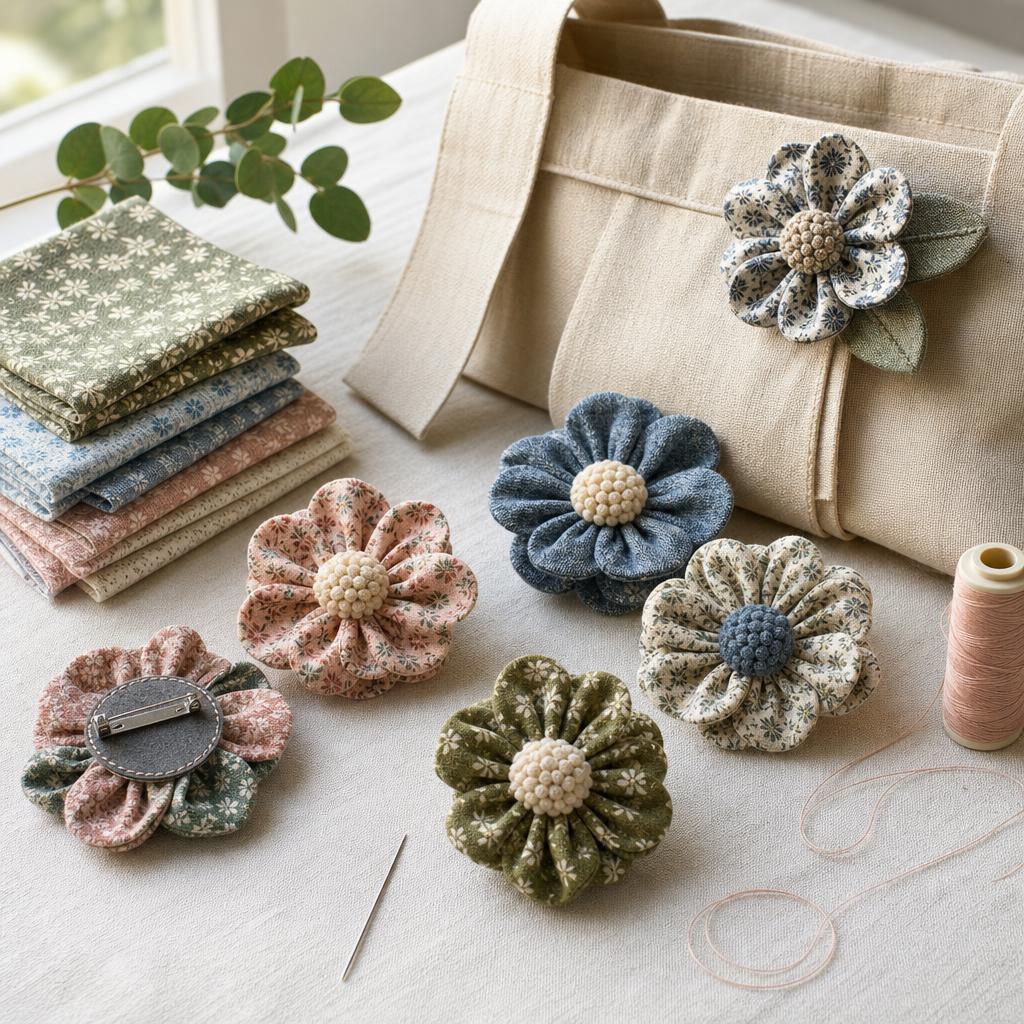
Cover the joining stitches with a fabric flower center made from a button, bead, felt circle, or a small rolled strip of coordinating cloth. To make a neat covered center, cut a circle twice the button’s diameter, run a loose stitch around its perimeter, place the button inside, and pull the thread closed. Stitch through the gathered back several times, checking from the front after each pass. A center should be secure enough to survive handling but not so tight that it pulls the petals into a puckered star. Test the fabric flower center by pressing it gently from several directions.
Turn the bloom over and trim any threads. If the flower will be sewn directly to a bag, stitch through a felt circle on the back to spread the strain. To attach flower backing for a pin, position a brooch finding horizontally across the felt, sew through its holes with doubled thread, and knot securely. A small safety check matters: pull the pin gently and inspect that no sharp end points through the front. For a child’s item, replace a loose bead with an embroidered center and follow the item’s washing requirements. Attach flower backing with a second line of stitches if the accessory will be worn often.
The same bloom can become a fabric flower brooch, a hair clip, a curtain tie, or a gift topper. For a brooch, add a second felt circle that hides every knot; for a clip, stitch the clip to felt rather than directly to a single petal. Keep the finished flower dry until any adhesive or edge treatment has fully cured. Spot clean it with a damp cloth and reshape the petals while damp, rather than putting a structured flower through a hot dryer. A fabric flower brooch should open and close smoothly before it leaves the worktable.
I consider this an upcycled sewing project because it values small remnants and accepts variation as part of the design. There is no need to buy special fabric when an old shirt, worn pillowcase, or outgrown skirt offers a clean, washable section. Sort out areas with stains or weak fibers first. The best beginner fabric craft lesson is learning to inspect material before investing time in it: a strong weave, a calm thread tension, and secure knots matter more than expensive supplies. This upcycled sewing project is also a gentle way to practice mending skills.
Once your first bloom is finished, try changing just one feature. Make the petals longer, alternate two colors, or stitch a small bead cluster into the center. The method remains steady: how to make fabric flowers well depends on thoughtful cutting, gentle gathering, and a backing that matches the way the flower will be used. Keep your paper template and a successful scrap beside your sewing box, and the next easy fabric flower tutorial can happen whenever an appealing little remnant appears. This beginner fabric craft rewards a slow hand more than a fancy machine. A second beginner fabric craft session can explore texture, while this upcycled sewing project remains a useful starting point. Give the fabric flower center one final tug test, then use attach flower backing instructions before wearing it. Another center can be embroidered, and a second backing pass is worthwhile for a fabric flower brooch. This handmade cloth flowers method is a friendly craft and a practical way to reuse cloth.
Materials You'll Need
- Light- to medium-weight woven fabric scraps
- Paper, pencil, and scissors
- Fabric scissors
- Hand-sewing needle and strong thread
- Button, bead, or covered fabric circle
- Iron and pressing cloth
- Fray-check liquid or candle for suitable synthetic fabric
- Brooch pin or hair clip
Step-by-Step
Choose and Prepare the Scraps
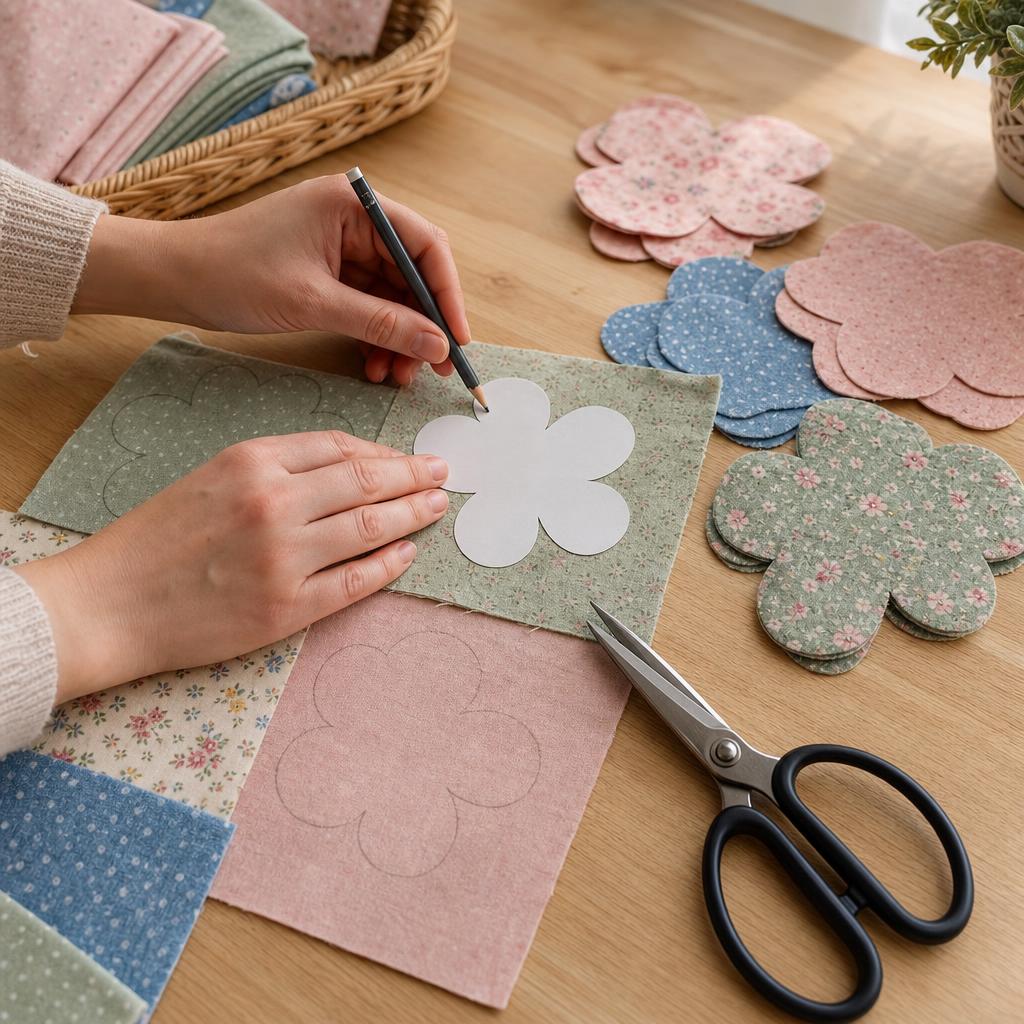
Choose stable, washable woven scraps such as quilting cotton, linen, lightweight denim, or a cotton blend; avoid stretchy jersey and slippery satin for a first flower because they collapse or shift while gathering. Wash and dry the fabric so later shrinkage does not pucker the bloom, then press it flat with the iron on a suitable setting. Draw a five-petal template about 7 cm long and 4 cm wide, with a shallow notch at the base, on sturdy paper or thin card. Cut it cleanly, then make a second template about 1 cm smaller if you want two layers. Mark the grain direction from each petal base toward its tip so the pieces bend consistently. Test the template in spare fabric before committing to a favorite print. Fan five cutout shapes in your hand and check that their bases meet while the tips form an even circle. If the flower will be a brooch, plan two light layers; a hair accessory can take three. Trim a dramatically wide test petal at the side, not the tip, so its curve remains intact. Decide whether the right or wrong side faces up and mark the wrong side with a tiny chalk dot. Keep the template, selected scraps, and intended attachment together, and reserve firm, attractive remnants for the bottom layer.
Cut and Shape the Petals
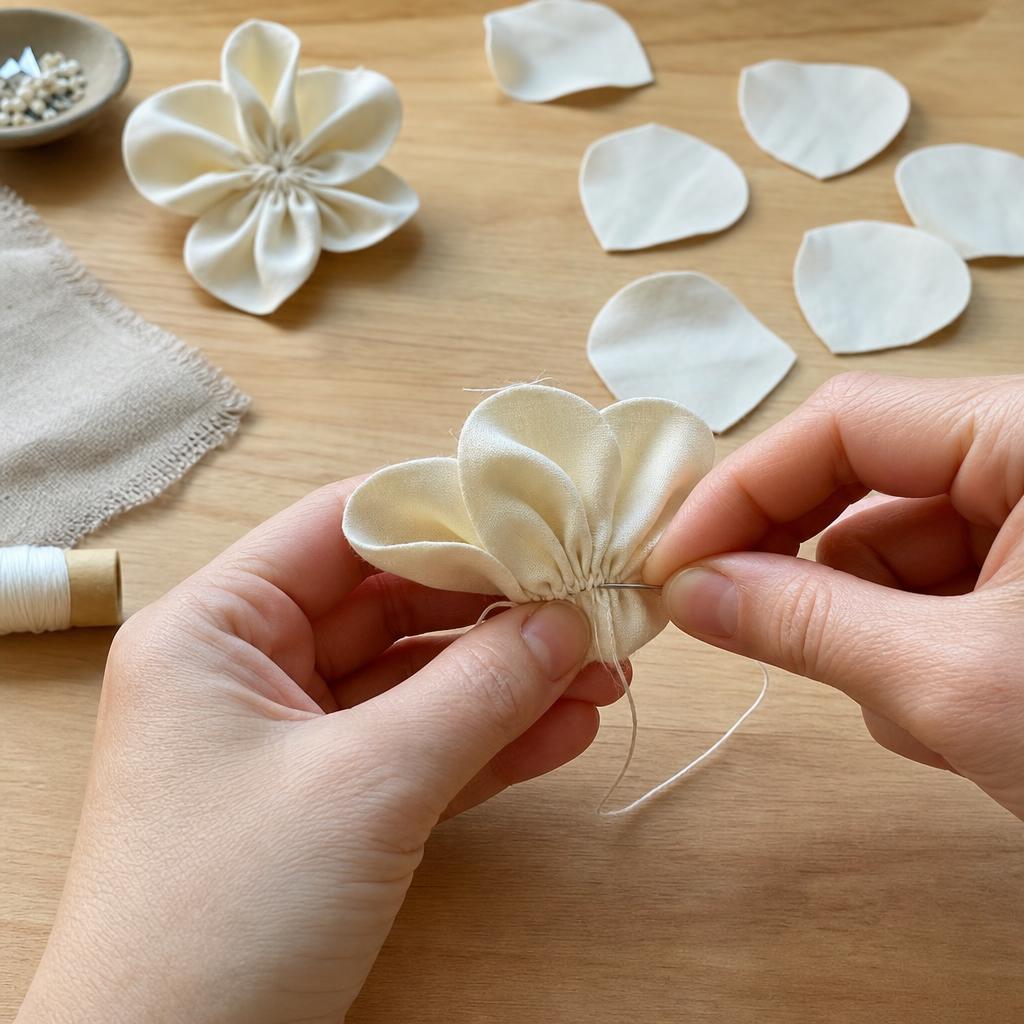
Place the paper template on pressed fabric with the grain running from base to tip, trace it with washable chalk or pen, and mark a small running-stitch line along the curved lower edge. Trace all pieces before cutting so a matching set stays together. Cut fabric petals with sharp fabric shears, keeping the base straight enough for stitches; a one-millimeter variation is harmless, but a visibly wider piece can be trimmed at its side. Test the edge treatment on a spare scrap first. For loosely woven cloth, use the smallest amount of fray-check recommended and let it dry. With suitable synthetic fabric only, an adult may briefly pass an edge near, never through, the side of a candle flame on a nonflammable surface with ventilation and water nearby; natural fibers scorch, so never heat-seal them. A low iron and pressing cloth can create a gentle fold from base toward tip, or cup the center briefly over a rounded tailor’s ham or clean wooden spoon. The checkpoint is a petal that bends at its base and springs back without a papery feel. If it becomes stiff, reduce treatment; if it waves, lower heat. Trim loose threads instead of pulling them, unplug the iron promptly, and keep scissors, flame, and liquids away from children.
Gather and Build the Bloom
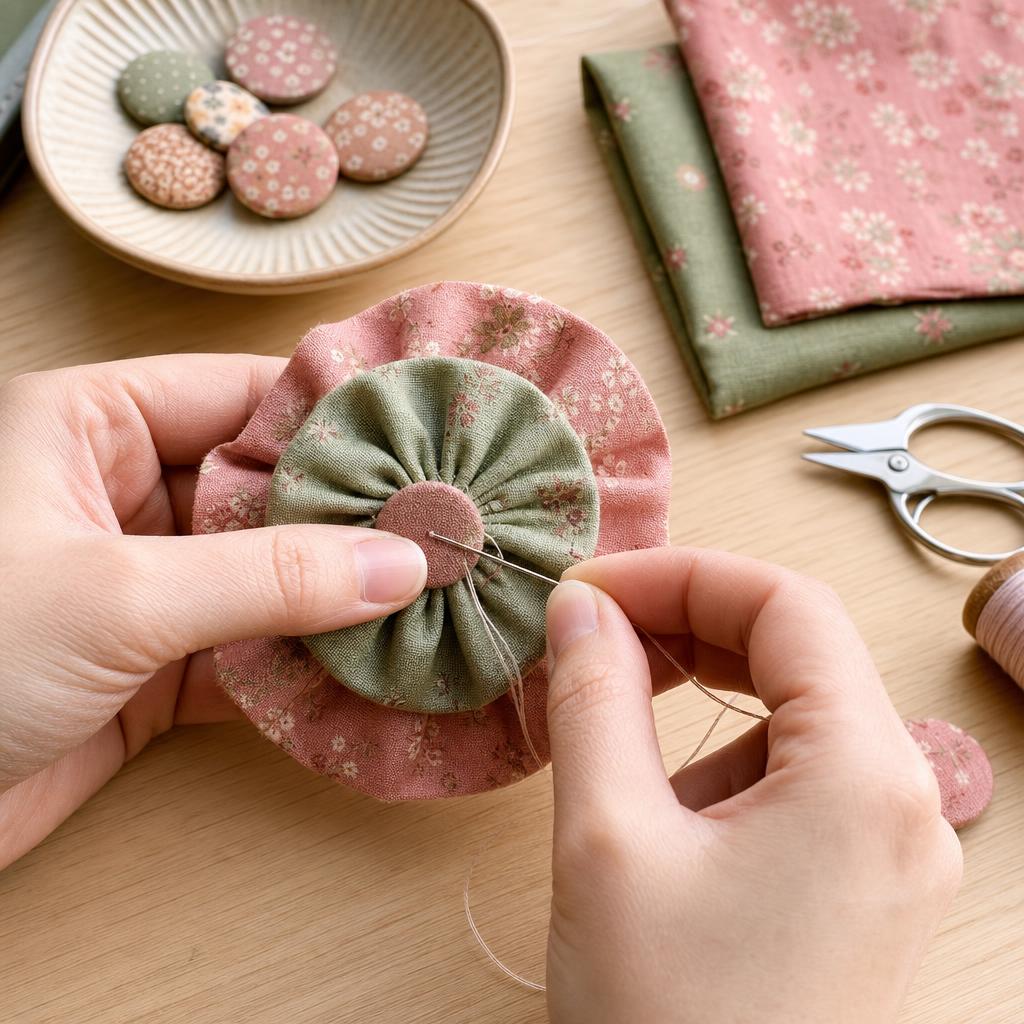
Thread a hand-sewing needle with strong thread, knot the end, and begin at one side of a petal base. Sew a running stitch about 4 mm long along the curved lower edge, leaving the upper half free so the petal can open. Repeat for every petal, keeping the thread tails long enough to adjust. Pull gently from both ends in turn until each base forms a shallow fan; do not yank, because a hard pull can cut through cloth. Lay the gathered petals clockwise with their bases overlapping, tips pointing outward, and a small center opening for the button or fabric center. Compare the circle from above before tying anything. The observable checkpoint is even fullness: lift the arrangement by its center thread and no petal should slip or hang dramatically lower. If one section is tight, loosen its gathers; if the ring opens, sew one petal at a time around a small felt circle. Knot the joined bases at the back, then stitch through them several times in different directions, using a thimble if the layers resist. For a second layer, offset the smaller petals so gaps do not line up, tack through the center, and bend upper tips gently upward. If the bloom is flat, loosen only nearby stitches and add a tiny folded scrap as a spacer; if lopsided, redistribute two petals rather than redoing everything.
Add the Center and Finish
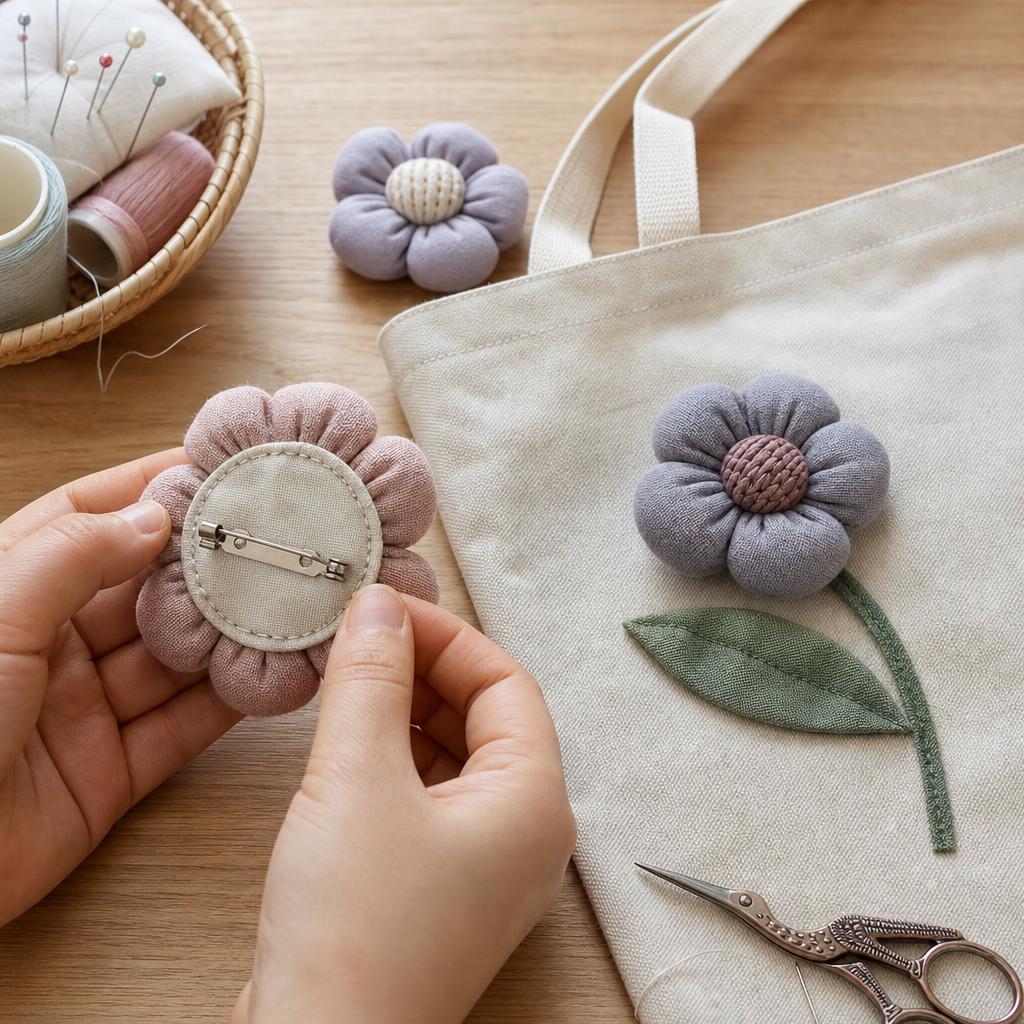
Choose a button, bead, felt circle, or rolled fabric strip that covers the joining stitches without overpowering the petals. For a covered center, cut fabric about twice the button’s diameter, sew a loose running stitch around its perimeter, place the button inside, and pull the thread closed. Position the center from the front, then stitch through the gathered back several times in different directions. It should resist a gentle press from every side without puckering the flower into a star. Turn the bloom over, trim thread tails, and cover the knots with a felt circle if the back will be visible. For a fabric flower brooch, place a brooch finding horizontally across the felt and sew through every hole with doubled thread; add a second line for frequent wear. Pull the pin gently and inspect the front and back to ensure no sharp end can poke through. For a hair clip or bag decoration, stitch the hardware to felt rather than a single petal, distributing strain across the backing. Avoid loose beads on children’s items; embroider a center instead and follow the item’s washing needs. Keep the finished flower dry until fray-check or adhesive has cured completely. Open and close a brooch pin several times before wearing it, then spot-clean with a damp cloth and reshape petals while damp. Never put a structured flower through a hot dryer.
Written by

Clara Jensen
Scandinavian Home Craft & Candle Maker
Clara brings Nordic simplicity and warmth to home crafting. She specializes in soy candles, beeswax wraps, and hygge-inspired home accessories.