How to Make Paper Beads From Pages You Love
Turn colorful pages, a little glue, and patient rolling into lightweight jewelry with a polished handmade finish.
I first tried this craft with a stack of pages rescued from a damaged travel magazine. The colors were too beautiful to throw away, yet the pages were too glossy for my usual collage box. Once rolled, a sunset photograph became a tiny stripe of orange and plum. That happy surprise is the reason I keep returning to this process. It is an inexpensive way to make useful jewelry while giving paper a second life. If friends ask how to make paper beads, I tell them to begin with one page and a test triangle rather than buying a complicated kit. When I demonstrate how to make paper beads, I emphasize that a slow first attempt teaches more than a rushed batch. The calm pace makes beginner paper crafts feel approachable, even for someone who has never made jewelry before.
Step 1: prepare the paper and plan the design
The most important part of how to make paper beads is choosing paper that can bend without cracking. Magazine pages, lightweight scrapbook paper, old maps, and clean gift wrap all work. Avoid anything greasy, brittle, or heavily embossed. I sort pages by color first, then look for areas where a narrow triangle will include a pleasing gradient. A small piece of cardboard under the work keeps the table protected and gives a ruler a stable edge.
For a first paper bead tutorial, cut triangles about 25 centimeters long. Make the base 2 to 3 centimeters wide for a slender bead, or widen it for a fuller center. The long edges should be straight, but they do not need to be mathematically perfect. Draw several templates on scrap card, label them with their base widths, and use those templates to trace a batch. This saves time and makes a finished strand feel intentional. A second paper bead tutorial can use the same template with a different page, which is a nice way to compare how ink and paper weight change the result. A third paper bead tutorial might explore a broad triangle, but wait until the first measurements feel familiar.
Before cutting a whole collection, make one test strip. Hold the triangle by the point and gently flex it. If the coating splits, choose a different section or paper. When I work with magazine paper beads, I place the printed side down so the outside colors remain visible as the triangle tightens. A second group of magazine paper beads can use pages from the same spread, giving a necklace a subtle repeated palette. A third group of magazine paper beads may use black-and-white pages as calm spacers. Keep scraps in a small envelope; narrow offcuts are useful for tiny accents later. Good preparation prevents most uneven edges, and it makes this one of my favorite beginner paper crafts.
Step 2: roll with steady pressure
Place the wide end of a triangle against a bamboo skewer, slim knitting needle, or paper bead roller. Leave a very small gap if you want a larger hole for cord, and use the same tool for every bead in one strand. Apply a thin line of glue along the final five centimeters rather than coating the entire triangle. Too much adhesive makes the layers slide and creates a hard lump at the seam.
Begin rolling paper beads by turning the tool slowly between your fingers while guiding the paper with your other hand. Keep the point centered on the growing coil. The first few turns determine the shape, so stop after two rotations and inspect both edges. If one edge is climbing, unwind while the glue is still fresh and start again with less side pressure. The rhythm of rolling paper beads becomes easier when the free hand guides rather than pulls. After a few examples, rolling paper beads should feel like turning a small wheel, not wrestling the page. The goal is a snug spiral, not a tightly crushed roll.
A useful paper bead roller does not need to be a specialty purchase; a smooth skewer works beautifully. Still, a roller with a handle can be comfortable when making a large batch, and a paper bead roller with a broad grip can reduce hand fatigue. Wipe away glue strings immediately, because a dried string can leave a ridge beneath the finish. Set each completed bead on wax paper with the seam underneath. At this point, handmade paper beads may feel delicate, and that is normal. I often compare handmade paper beads by touch before finishing, looking for a smooth transition at every seam. Give them at least thirty minutes before moving them to a tray. I keep handmade paper beads in shallow rows so their seams remain easy to inspect.
Step 3: check shapes, color, and strength
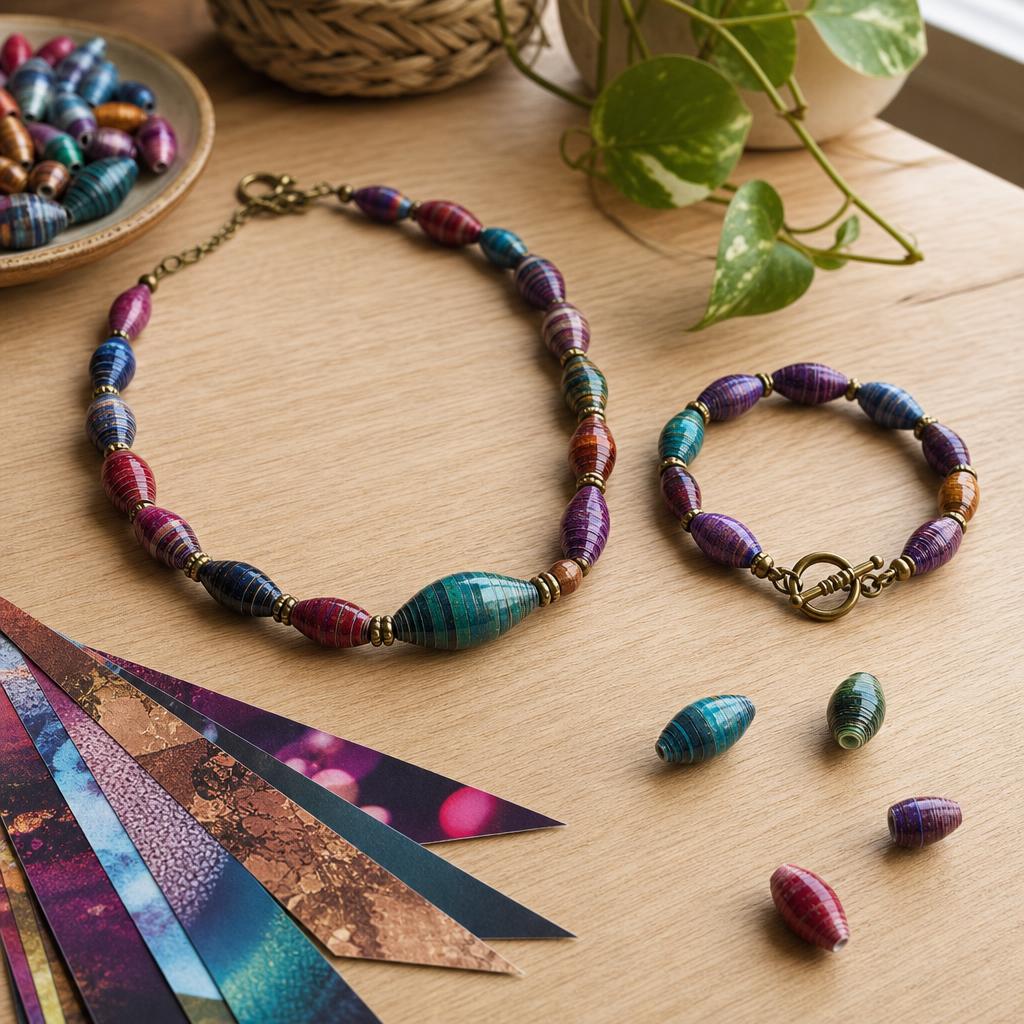
Once the first group has set, compare the beads on a ruler. A paper bead necklace looks polished when lengths are similar, but small variations can be charming in a mixed design. To make matching pairs, weigh the triangles or place them side by side before rolling. To make paper bead shapes with more drama, use a broad triangle for a barrel, a narrow triangle for a slim taper, or two triangles layered together for a faceted profile. You can also combine paper bead shapes in a graduated row, placing the widest profile at the center. Testing paper bead shapes beside a ruler quickly reveals which profile will sit comfortably. Do not force a warped bead into the group; keep it as a test piece or gently sand a high edge.
This is also the time to plan paper jewelry ideas on a towel. Arrange colors from light to dark, alternate long and short forms, and leave space for spacer beads. I often photograph the arrangement before taking it apart. A preview reveals whether two busy patterns are competing and helps me remember a combination I like. These paper jewelry ideas are easy to adapt into earrings or a key fob once the central balance feels right. Sketching three paper jewelry ideas before cutting can prevent a beautiful page from being used in a design you do not love. If a bead has a soft seam, add a pinhead of glue and let it cure fully. If the central hole has collapsed, rotate the skewer through it once, without widening it aggressively.
For a paper bead bracelet, prioritize comfort: round the ends, keep the bead count light, and use a flexible cord. A second paper bead bracelet can alternate one bright bead with two quiet ones, making a small stash go further. Try a third paper bead bracelet with a sliding knot if you want an adjustable gift. For a necklace, place the boldest bead near the center and use smaller pieces toward the clasp. A strand should drape rather than feel stiff. Check every bead for a sharp paper corner, exposed adhesive, or dampness before applying finish. Patience here is cheaper than repairing a completed piece.
Step 4: protect, finish, and assemble
To seal paper beads, use a clear water-based varnish or decoupage medium with good ventilation. Brush a very thin coat over one side, rotate the bead on the skewer, and cover the remaining surface. Prop the skewer across two cups so the bead does not touch anything while it dries. A second or third thin coat is stronger and smoother than one heavy coat. This is the right moment to apply paper bead glaze if you want a glassier shine, but test it on a spare first because some products soften ink. When I use paper bead glaze, I mark the date of the final coat so I do not assemble pieces before they cure. Let the paper bead glaze settle without shaking the skewer.
Let every coat cure according to its label. Do not string a bead that still feels cool, tacky, or flexible. A completed paper bead necklace should pass a simple durability check: rub one finished bead with a dry cotton cloth, inspect the hole, and tug the cord gently. If color transfers or the surface dents, add time rather than more liquid. When I finish a paper bead necklace, I leave it on a clean cloth overnight and test the clasp the next morning. Keep finished pieces away from rain, sinks, and perfume. They are sturdy for normal wear, but they are still paper. To seal paper beads well, resist the temptation to speed up drying with high heat; patience keeps the finish clear. Remember to seal paper beads only after the adhesive has fully set.
Thread beads with a blunt needle, add small spacers where knots might rub, and finish with a clasp rated for the cord. For recycled paper jewelry, I like waxed cotton because its matte surface lets the colors lead. A second recycled paper jewelry design can use linen cord for a softer, more rustic line. A third recycled paper jewelry variation could pair one paper color with wooden spacers. Tie a temporary knot first and wear the piece over a towel for a minute; this catches a length or balance problem before the final knot. Use round-nose pliers carefully, keeping their jaws away from the coated surface.
The nicest thing about this upcycled jewelry project is that imperfection becomes part of the story. A visible map line, a tiny registration mark, or a slightly different roll tells you where the source material came from. This upcycled jewelry project also makes a thoughtful small gift when the recipient recognizes the book or map used. A final upcycled jewelry project can be stored as a keepsake rather than worn. Store the pieces flat in a soft pouch, and clean them only with a dry cloth. If you keep a few templates, scraps, and a trusted finish nearby, the next batch will be faster without losing the quiet, handmade quality that makes these beads special. That repeatable rhythm is why I recommend these beginner paper crafts to anyone seeking a low-pressure afternoon.
Materials You'll Need
- Colorful magazine or scrapbook pages
- Pencil and ruler
- Sharp scissors or craft knife
- Glue stick or white craft glue
- Bamboo skewer or bead roller
- Fine paintbrush
- Clear water-based varnish
- Jewelry cord and findings
Step-by-Step
Prepare and Cut the Paper
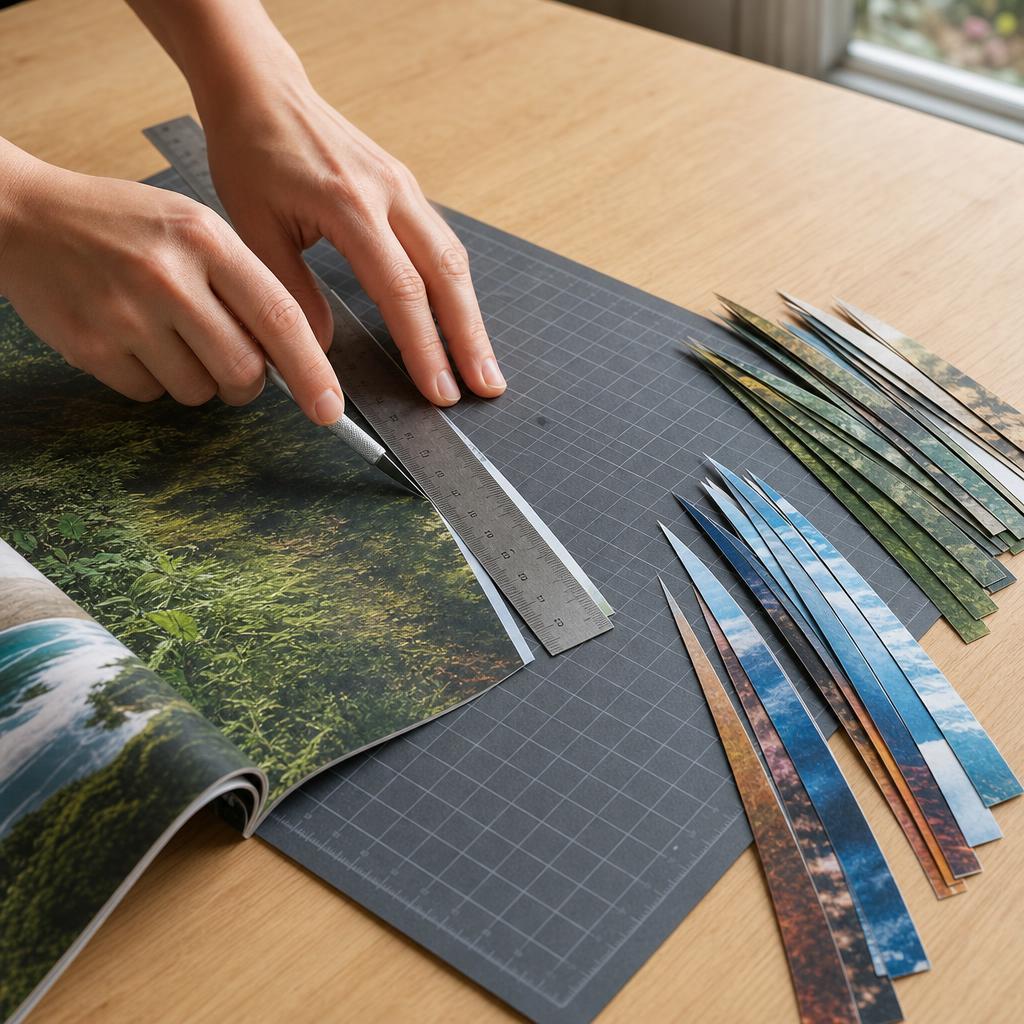
Cover the table with scrap cardboard and gather a ruler, pencil, sharp scissors, or a craft knife with a cutting mat. Choose clean, flexible magazine, map, scrapbook, or gift-wrap pages; reject paper that is brittle, greasy, deeply embossed, or already split at the fold. On the unprinted side, draw triangles about 25 centimeters long. Use a 2- to 3-centimeter base for a slim bead and a wider base for a fuller barrel, then make a card template so every triangle in a set matches. Place the printed side down when you want its colors on the outside, and orient gradients deliberately before tracing. Cut one test triangle first and flex it gently from the wide end toward the point. A good sheet bends without coating cracks, while a peeling surface needs a different section or page. Check that both long edges are straight and that the tip ends cleanly; a crooked tip will travel visibly during rolling. If an edge wanders, trim it with small corrective snips rather than forcing it into shape. When using a craft knife, cut away from your body and keep fingertips behind the ruler. Sort the finished triangles by color in shallow piles, and save narrow offcuts for spacers or small accent beads.
Roll Each Triangle Evenly
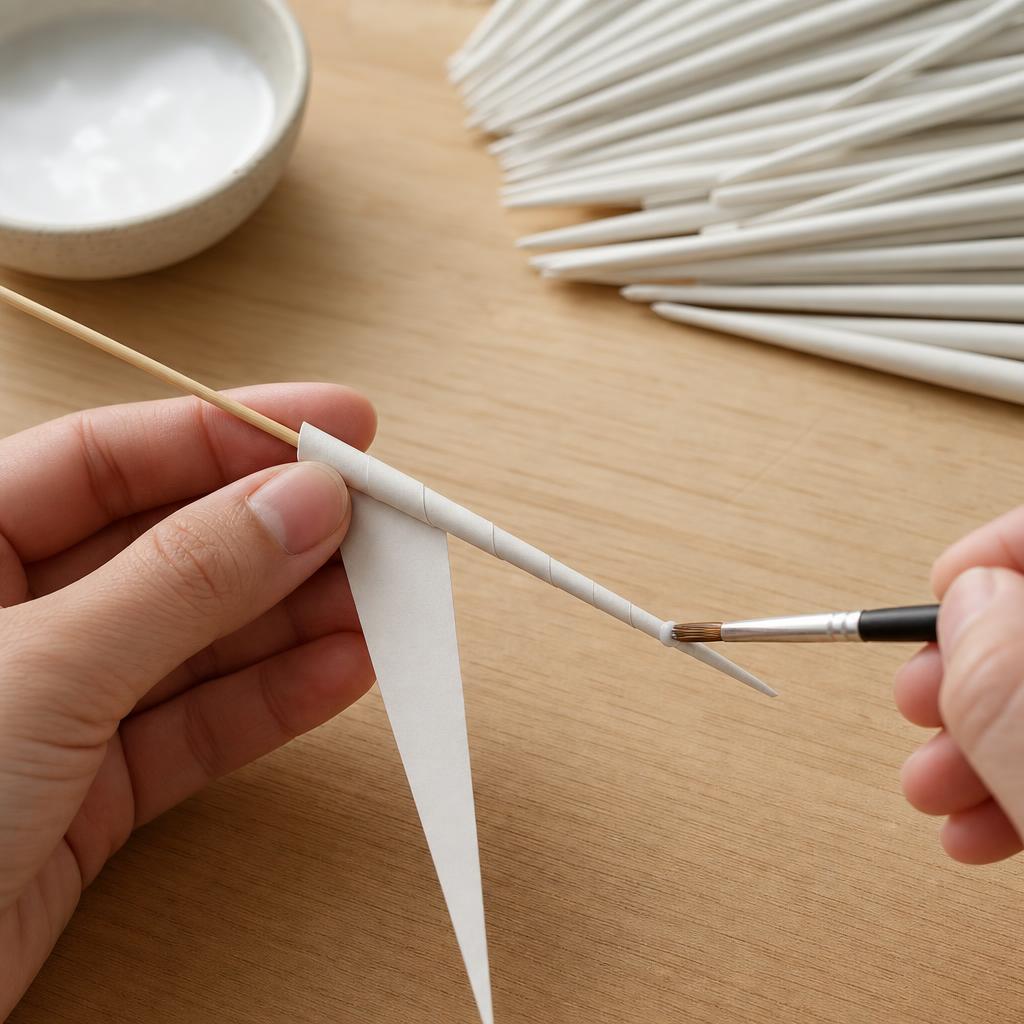
Set a smooth bamboo skewer, slim knitting needle, or paper bead roller beside the triangles, and use the same diameter for one strand. If the jewelry cord is thick, choose a tool that leaves a hole just large enough for it; a loose hole makes a bead wobble. Place the wide edge squarely against the tool, centered from side to side, and make two slow turns before applying any adhesive. Then brush a thin, even line of white craft glue along the final 5 centimeters near the point, not across the whole triangle. Rotate the tool between your fingers while the other hand guides the paper, keeping the point aligned with the center of the growing coil. Every few turns, pause and inspect both rims: the layers should meet snugly, with no folded ridge or open wedge. If one edge climbs, stop immediately, unwind while the glue is fresh, flatten the paper, and restart with less sideways pressure. If the paper buckles, the first wrap was crooked; remove it rather than hiding the defect under later layers. Wipe away glue strings with a damp brush or cloth before they dry. Slide the finished bead onto wax paper with its seam underneath, and leave it undisturbed for at least 30 minutes. Do not twist a soft bead off the tool, because that can collapse the center hole.
Build and Check the Collection
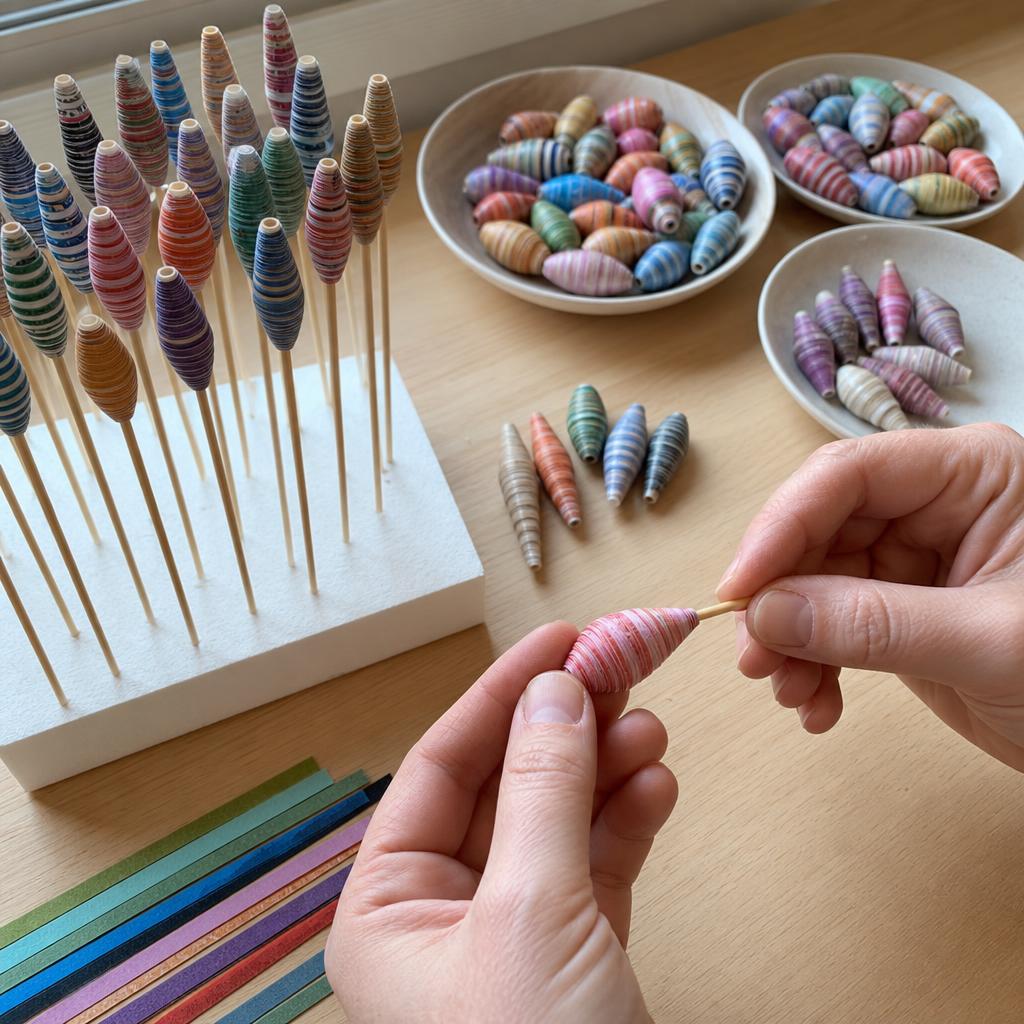
After the rolled beads have set for at least 30 minutes, place them beside a ruler and compare length, center-hole size, and profile rather than judging them only by color. Matching beads look intentional in a paper bead necklace, while measured variations can create a graduated centerpiece. A broad triangle produces a rounder barrel, a narrow triangle makes a slim taper, and a layered triangle can create a faceted profile. Arrange the dry beads on a towel in the proposed order, photograph the layout, and check that busy prints do not sit next to one another in a distracting cluster. Run a fingertip around every rim and seam. A loose layer can receive a pinhead of glue and must cure again; do not varnish it while it can still shift. If the center hole has narrowed, rotate the original skewer through it once with almost no pressure. If the hole is collapsed or the bead is badly warped, set it aside as a sample instead of forcing it into the design, since aggressive reaming can tear the paper. Look for sharp corners, exposed adhesive, damp spots, and color transfer from the ink. For a bracelet, count the beads on a flexible cord and keep the weight comfortable; for a necklace, place the fullest bead near the center and smaller ones toward the ends. Keep accepted beads in shallow rows so seams remain visible during the final inspection.
Finish and Assemble Safely
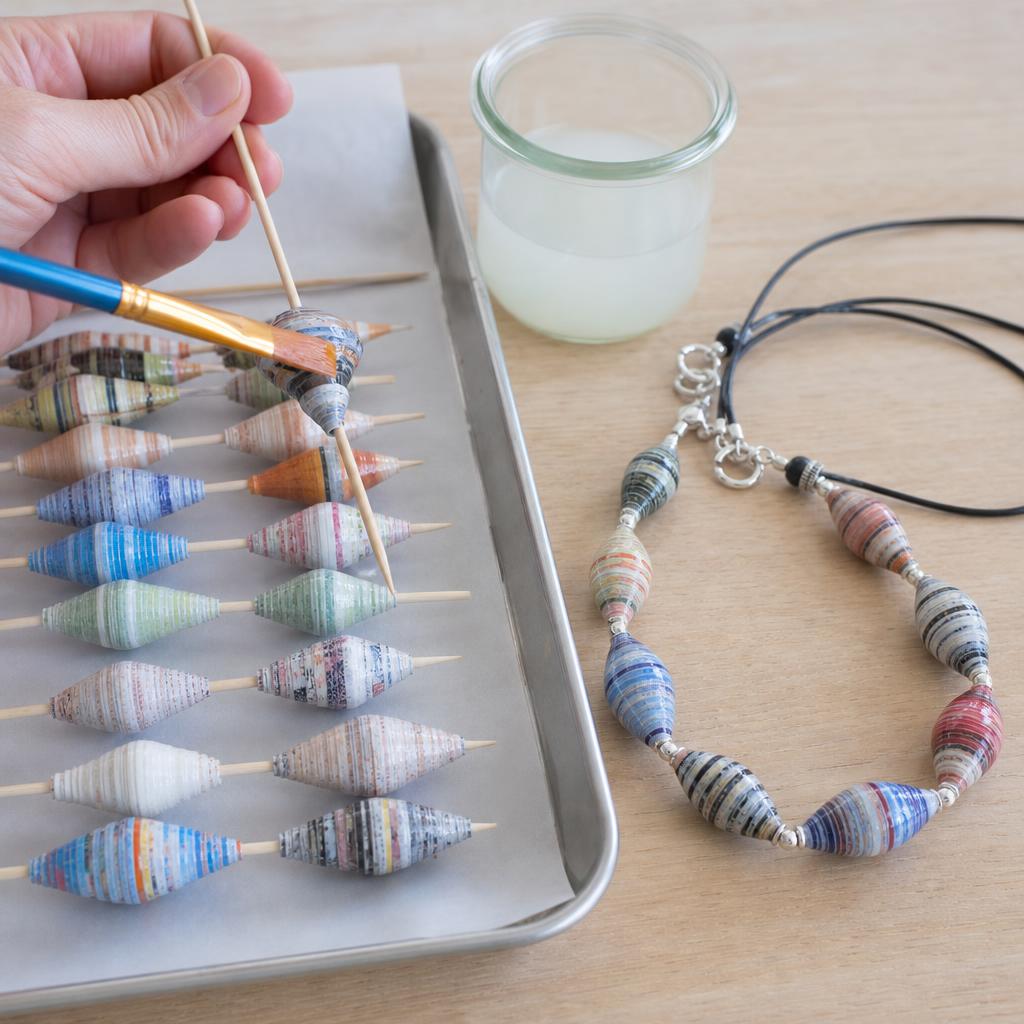
Once every bead is firm and the adhesive seam no longer moves, protect the surface with clear water-based varnish or decoupage medium. Work in a ventilated area, brush a very thin coat over one side, rotate the bead on its skewer, and coat the remaining surface without flooding the hole. Rest the skewer across two cups so the bead hangs free, then follow the product label for drying time. Two or three thin coats give a smoother, tougher finish than one heavy coat. Test any high-gloss paper bead glaze on a spare first, because some formulas soften magazine ink or cloud metallic printing. A bead is ready only when it feels dry rather than cool, tacky, or flexible; if it dents or transfers color onto a cotton cloth, allow more curing time instead of adding another wet layer. Thread the finished pieces with a blunt needle and cord rated for their combined weight. Tie a temporary knot, wear or hold the strand over a towel, and check length, spacing, and balance before securing the final knots. Use round-nose pliers carefully on rings and clasp components, keeping metal jaws away from the coated paper. Tug the clasp and cord gently as a durability check. Finished paper jewelry should stay away from rain, sinks, perfume, and high heat; store it flat in a soft pouch and clean it with a dry cloth.
Written by

Sophie Chen
Bath & Beauty Craft Formulator
Sophie blends cosmetic science with artisan craft. She develops small-batch skincare, soap, and bath product recipes that are safe, effective, and beautiful.