Blue Daylight: A Thoughtful Guide to Cyanotype Printing
Make luminous botanical blueprints at home by combining sunlight, leaves, and a calm, careful printing routine.
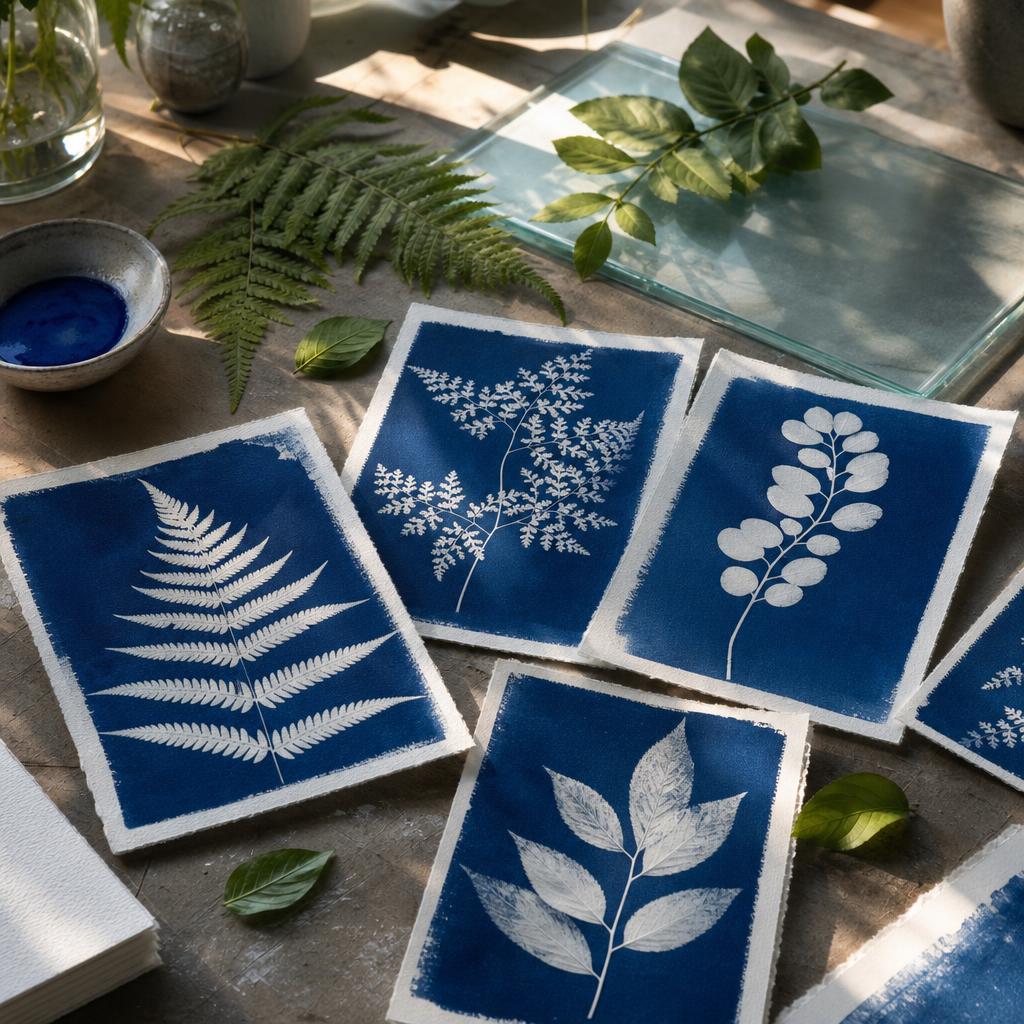
There is a quiet kind of anticipation in making a blue photograph with a leaf. I can spend an entire walk noticing the lace of a fern or the uneven edge of a maple, then bring that small discovery indoors and wait for sunlight to reveal it. This guide to cyanotype printing at home treats the process as both a chemistry exercise and a nature study. You do not need a darkroom, but you do need patience, a tidy work surface, and a willingness to make one modest test before using your best paper. The pleasure of cyanotype printing at home is that an ordinary windowside table can become a small seasonal studio.
Start with a table that can be cleaned easily and a room where you can reduce daylight. Read the label on your kit before opening anything; different makers use slightly different strengths and mixing directions. Keep children, pets, food, and metal jewelry away from the work area. The photographic mixture is mild compared with many studio chemicals, yet it can irritate skin and permanently stain fabric. A beginner cyanotype tutorial should always make room for gloves, eye protection, and careful disposal rather than treating safety as an afterthought. I return to that beginner cyanotype tutorial whenever I teach a friend, because the calm setup prevents hurried mistakes. This is the part of a beginner cyanotype tutorial that saves the most frustration later.
For this kind of sun printing with plants, I collect leaves on a dry day and choose specimens with distinct silhouettes. Ferns, dill, cosmos, grasses, and thin wildflowers give beautiful lines. Thick succulent leaves may leave a broad shape but can hold the paper away from the frame. Avoid protected plants and never pick a plant you cannot identify as harmless to handle. A pressed leaf is not required; a fresh, flat leaf works if its surface is dry and clean. The best sun printing with plants starts with observation, not with collecting the largest possible bouquet. When I repeat sun printing with plants, I often use one leaf from the same walk and compare its changing texture.
## Step 1: Prepare paper and a controlled workspace
Cut sheets slightly smaller than your glass or frame. Watercolor paper with a modest tooth accepts liquid well without buckling as dramatically as office paper. Before mixing, cover the table with a washable mat and set out a dark drawer, opaque envelope, or box for wet sheets. I mark the back of each sheet with a pencil so I can record the date and exposure conditions without touching the coated face.
Open and measure the cyanotype chemicals only after the rest of the station is ready. Mix equal parts in the quantity you expect to use that day, using a plastic or glass tool rather than a reactive metal container. Stir gently to avoid bubbles. When you prepare cyanotype solution, use the kit instructions as the authority: an improvised ratio can make a weak image or leave unreacted yellow residue. Keep the bottles closed and wipe drips immediately. Fresh cyanotype chemicals are easier to judge when the bottles have been stored cool and tightly sealed. I prepare cyanotype solution only for the session ahead, because mixed liquid loses reliability as it sits. Keep unused cyanotype chemicals in their original labeled containers. If you prepare cyanotype solution again tomorrow, wash and dry the tray first.
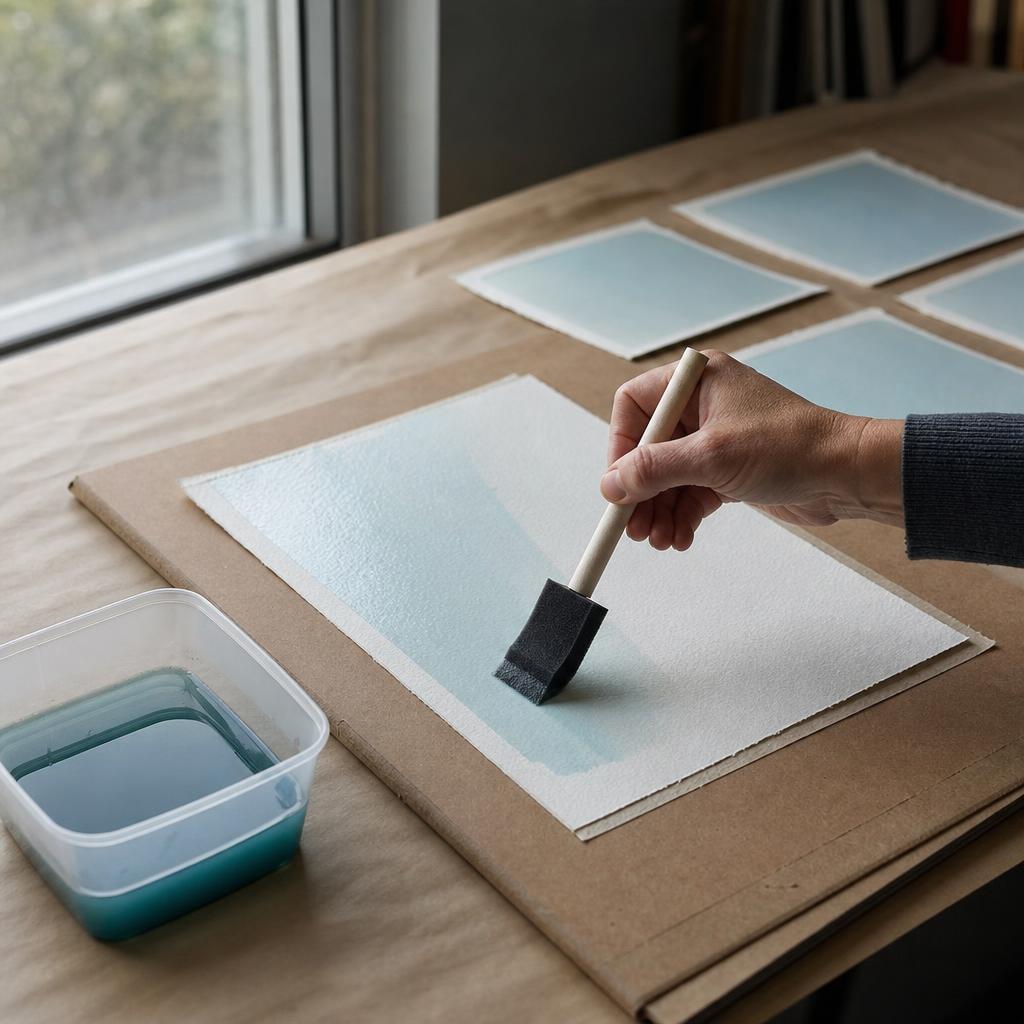
With the lights low, coat watercolor paper in one direction, then turn it and make a second light pass. The goal is a thin, even film, not a glossy puddle. I leave a narrow uncoated border because it makes the finished image easier to handle. If you coat watercolor paper too heavily, it may dry slowly and produce streaks; if the brush skips, add a little solution to the brush rather than pressing harder. Place the sheets horizontally in darkness until they feel completely dry, usually overnight. A fresh sensitized sheet should remain protected from window light while it dries. If you coat watercolor paper in a cramped tray, rotate the sheet instead of dragging the brush off its edge.
Checkpoint: hold a dry sheet at an angle under very dim light. It should look evenly pale yellow-green, with no shiny pools, bare islands, or tacky corners. If there are streaks, reserve that sheet for a practice exposure. Do not move forward while paper still feels cool and damp.
## Step 2: Build a botanical composition
Lay the dry leaves on an uncoated scrap first. I begin with one tall stem, then balance it with two smaller shapes, leaving quiet space around the subject. When you arrange leaves for printing, remember that the plant blocks ultraviolet light; the parts touching the paper will remain pale while exposed areas turn blue. Place textured leaves with their most interesting side facing down if you want the veins to cast shadows. Take a quick phone photograph after you arrange leaves for printing so you can rebuild the composition if wind scatters it. You can arrange leaves for printing as a simple border when a centered specimen feels too formal.
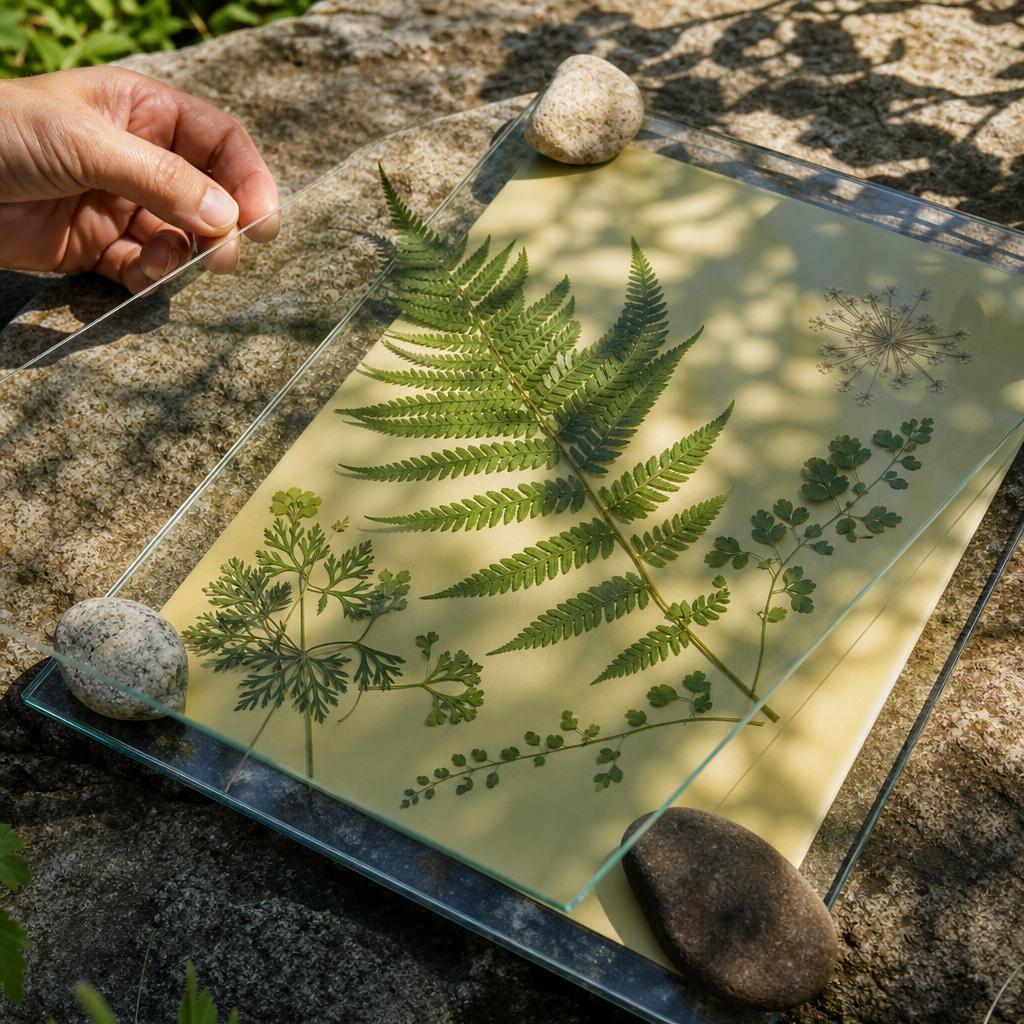
Make the final arrangement in subdued light. Put the coated sheet on a rigid board, position the botanicals, and cover everything with clean glass or a contact frame. Press evenly with clips, but do not crush fragile petals. The clearest botanical sun print comes from close contact: even a narrow gap can create a fuzzy halo. A transparent acrylic sheet can work, though it may scratch and is more likely to flex than glass. A second botanical sun print can use the same leaves in a looser, more playful arrangement. For a third botanical sun print, I sometimes turn the stems diagonally to suggest movement.
Checkpoint: before going outside, lift one corner of the frame just enough to confirm that every leaf is still where you planned it. If a specimen curls, mist the back of the leaf very lightly and flatten it between clean paper for a few minutes; never add moisture to the sensitized sheet. Keep a second arrangement ready so a failed composition becomes useful information rather than a wasted afternoon.
## Step 3: Test the light and expose
Sunlight changes quickly. Put a small piece of coated scrap under a leaf and cover half of it with an opaque card. Carry the frame outdoors, remove the card, and begin a timer. With the test, you can expose cyanotype print material in five-minute increments and compare the exposed bands. Bright summer sun may need only several minutes, while a hazy autumn afternoon can take much longer. I expose cyanotype print samples before an important session so the weather has fewer surprises. To expose cyanotype print paper evenly, keep the frame level and avoid opening it during a cloud.
The cyanotype exposure time is the point at which the uncovered coating becomes a dull bronze or gray-green rather than a bright wet yellow. Do not wait for finished blue outdoors; the deep color arrives during washing and oxidation. If clouds pass, note the interruption. A clear frame should remain still, and a clamp or heavy board can stop wind from shifting the leaves. If the image looks pale after the first rinse, try a longer test rather than guessing at the final sheet. Record your cyanotype exposure time beside the cloud cover and the season, since those notes become useful next month. Your next cyanotype exposure time may be shorter if the sun rises higher and brighter.
Checkpoint: inspect only the test, not the precious print, until you have a useful comparison. A harsh, high-contrast silhouette can be attractive, but areas with delicate veins need enough time to register. Underexposure produces a weak blue; overexposure can swallow subtle plant details. Write the date, weather, paper brand, and timer result on the back of the test.
## Step 4: Wash, finish, and store the image
Take the exposed sheet indoors and rinse cyanotype paper in a tray of cool running water. Move it gently through several changes, face up, until the water is almost clear and no yellow-green liquid remains. Do not rub the coating or blast it with a hard stream. A pale gray image at this stage is normal. Let oxygen do its work as the damp paper rests in clean water and then on a rack. I rinse cyanotype paper longer when its corners hold visible yellow, because leftover sensitizer can muddy the highlights. Never rush to rinse cyanotype paper in hot water, which can distort the sheet.
Over the next several hours, the image will develop Prussian blue as it oxidizes. If you develop Prussian blue slowly in ordinary air, the tonal shift is easier to judge and the paper has time to relax. Keep the print away from direct sun while wet. If a sheet remains streaky, the likely causes are uneven coating, contamination in the tray, or incomplete washing; record that diagnosis instead of trying to scrub the surface. Watching it develop Prussian blue is one of the most satisfying quiet moments in the process.
Once dry, press the print beneath clean books between smooth sheets of paper if it has curled. To preserve cyanotype prints, keep them in an acid-free sleeve or portfolio, away from humidity, alkaline boards, and prolonged bright light. A short display behind UV-filtering glazing is kinder than a sunny windowsill. Never return leftover mixed chemistry to stock bottles, and follow the product label for disposal of unused solution and rinse water. I preserve cyanotype prints in a flat portfolio with a note about the paper and exposure, so future handling stays gentle. To preserve cyanotype prints for gifting, place a sheet of glassine between them rather than stacking blue faces together.
The final checkpoint is visual and practical: the blue should be even, botanical edges should be readable, and the sheet should be dry with no odor or tackiness. A small flaw does not ruin the nature printing project. It may show you where a leaf lifted, where the sun changed, or where your brush paused. I save those tests in a notebook because the record turns each new print into a more confident conversation with weather, paper, and place. That notebook makes cyanotype printing at home feel less like chasing a perfect result and more like noticing a season. Every nature printing project leaves a record of a particular day, even when the image is not perfect. I label each nature printing project with the place where I found its leaves.
Materials You'll Need
- Watercolor paper, 250 gsm or heavier
- Cyanotype two-part photographic kit
- Nitrile gloves and protective eyewear
- Soft brush and plastic mixing tray
- Flat leaves, ferns, or translucent flowers
- Glass sheet or contact-printing frame
- Cool running water and drying rack
Step-by-Step
Prepare the paper and chemistry
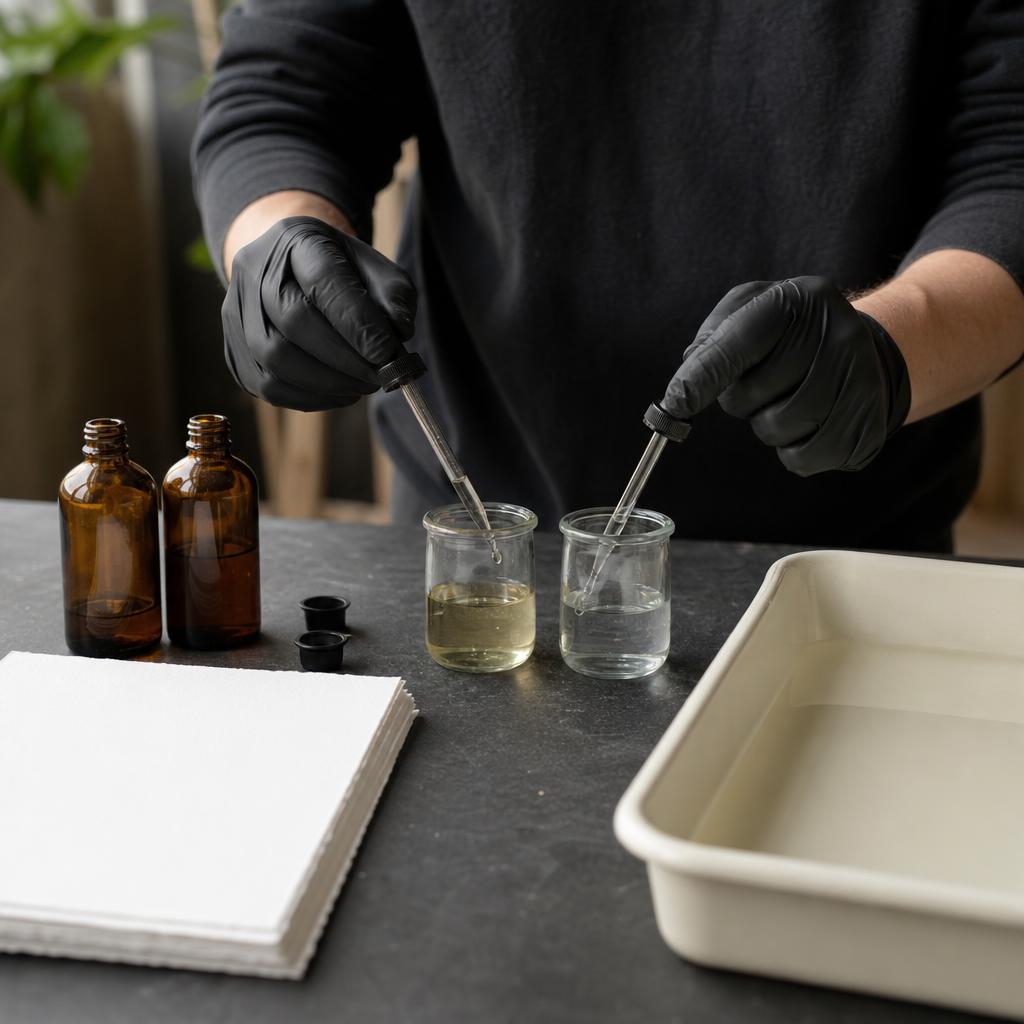
Set up a washable table away from food, children, pets, and direct window light, then put on nitrile gloves and protective eyewear. Read your kit label before opening either bottle; use its stated equal-parts ratio only if the manufacturer specifies it, and measure just enough for this session in a clean plastic or glass tray. In dim light, stir gently with a plastic tool so you do not introduce bubbles. Use a soft brush to lay one thin coat across 250-gsm watercolor paper, working in one direction and then making a light crosswise pass. Leave a narrow border for handling rather than flooding the edges. The surface should look evenly pale yellow-green, not glossy or puddled. Bare islands mean the brush skipped; streaks or tacky pools mean the coat was too heavy. Add solution to the brush instead of pressing harder, and reserve a visibly uneven sheet for testing. Place coated paper horizontally in an opaque box or dark drawer until completely dry, usually overnight; never expose it to sunlight while damp. Wipe drips immediately, keep bottles labeled and closed, and do not return mixed chemistry to stock. If skin is splashed, rinse promptly with plenty of water and follow the kit safety directions.
Compose a botanical negative
Choose flat, dry leaves, ferns, grasses, or thin flowers with distinct silhouettes, and handle only plants you can safely identify; never collect protected specimens. Before opening the sensitized paper, rehearse the composition on an uncoated scrap. Balance one dominant stem with smaller shapes, leave breathing room around the edges, and photograph the arrangement so it can be rebuilt if wind moves it. In subdued light, place the coated sheet on a rigid board with the sensitized side facing up. Position the botanicals with interesting veins or textures against the paper, then cover them with clean glass or a contact-printing frame. Clip or weight the frame evenly, pressing close enough to prevent gaps without crushing fragile petals. A curled leaf creates a pale fuzzy halo instead of a crisp silhouette; flatten it briefly between clean papers, or choose a fresher specimen, and never mist the coated sheet. Before carrying the frame outside, lift one corner just enough to confirm that no stem shifted. If the layout feels crowded, remove a specimen now rather than trying to rearrange it in sunlight. Keep a second dry composition ready as insurance. Wear gloves if handling an unfamiliar plant, keep the chemistry-covered surface away from your face, and avoid touching it with wet fingers.
Expose and watch the blue shift
Prepare a test strip from sensitized scrap before committing a favorite sheet. Put a leaf over part of it, cover half with opaque card, and carry the closed frame outdoors so stray light does not begin the exposure. Set the frame level in bright, unobstructed sunlight, remove the card, and start a timer. Reveal another band every five minutes, or use shorter intervals in intense midsummer sun, so the strip records a useful progression. Keep the glass pressed down and weighted against wind; do not open the frame whenever a cloud passes. Exposed cyanotype areas should shift from yellow-green toward dull bronze or gray-green, while the leaf-covered portions remain lighter. Stop when the test gives clear tonal separation and fine veins are still visible; do not wait for finished Prussian blue, because washing and air oxidation create that color later. Cloud cover, season, latitude, paper, and glass can all change the cyanotype exposure time, so record the date, weather, paper brand, and timer result. Underexposure leaves a weak, easily lost image; overexposure can swallow delicate detail. If a cloud interrupts the test, note the pause and repeat a strip rather than guessing. Keep the precious frame closed until the test is useful, and use shade or an opaque folder when carrying exposed paper back indoors.
Wash, oxidize, and protect
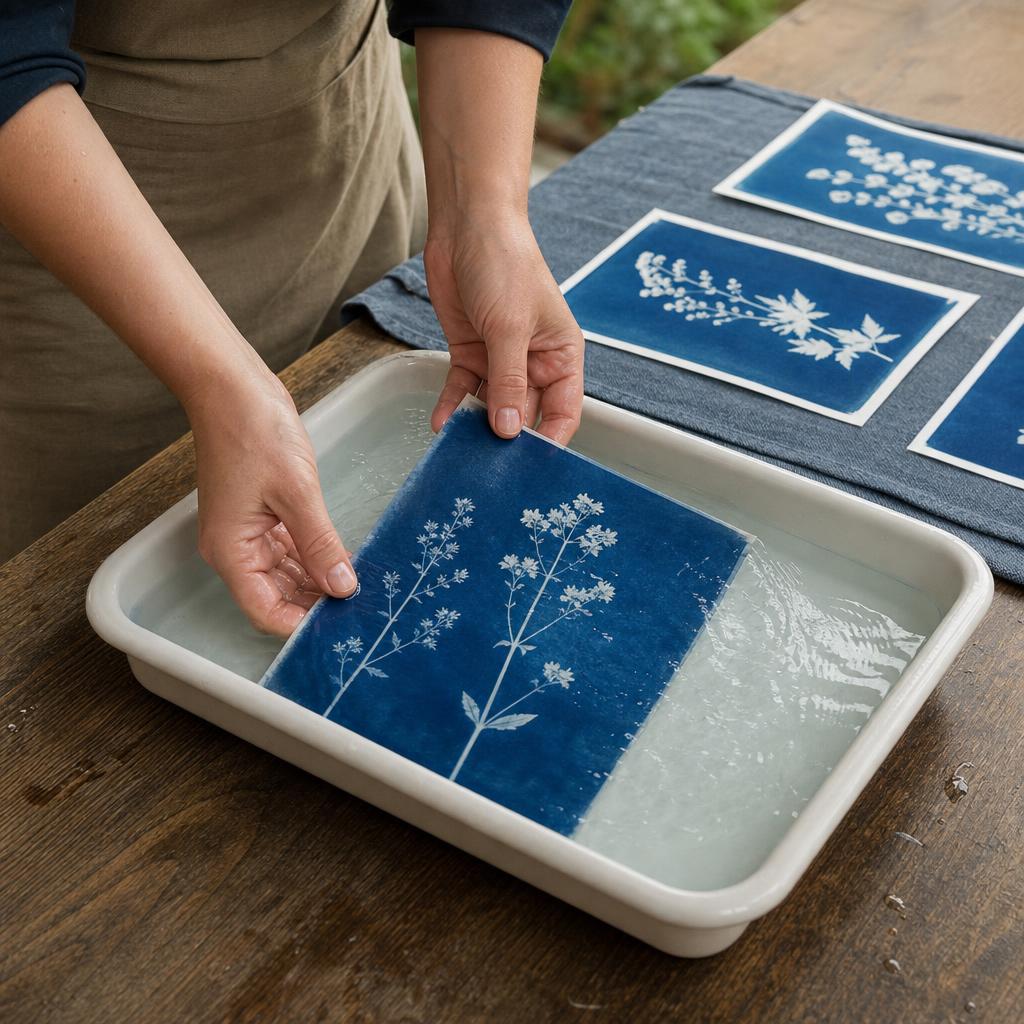
Bring the exposed frame indoors and remove the plant material in subdued light, lifting fragile pieces rather than scraping them across the coating. Place the sheet face up in a tray of cool water and move it gently through several fresh changes. Let water flow beside the paper instead of blasting its surface, and never rub the image. Continue until yellow-green runoff disappears and the highlights look clean; visible yellow in a corner means more washing is needed. A pale gray image immediately after rinsing is normal. Set the print on a rack to air-oxidize, away from direct sun, heat, and dust; over the next several hours the image should deepen into an even Prussian blue. If it remains streaky, record whether the likely cause was uneven coating, tray contamination, or incomplete washing rather than trying to scrub it. Once fully dry, press it between clean smooth papers under books if it curls. Check that the sheet is dry, odor-free, non-tacky, and readable before storage. Keep prints in an acid-free sleeve or portfolio with glassine between stacked faces, and display behind UV-filtering glazing rather than on a sunny sill. Keep gloves on while handling wet chemistry, never return mixed solution to a stock bottle, and follow the kit label for disposal of unused solution and rinse water.
Written by

Maya Suzuki
Japanese Craft & Washi Art Expert
Maya bridges Japanese craft heritage and contemporary design. She specializes in washi paper art, shibori dyeing, and traditional Japanese textile techniques.