DIY Mosaic Stepping Stones for a Colorful Garden Path
Shape a durable garden accent from concrete and colorful shards, then finish it with a weather-resistant surface for safe outdoor walking.
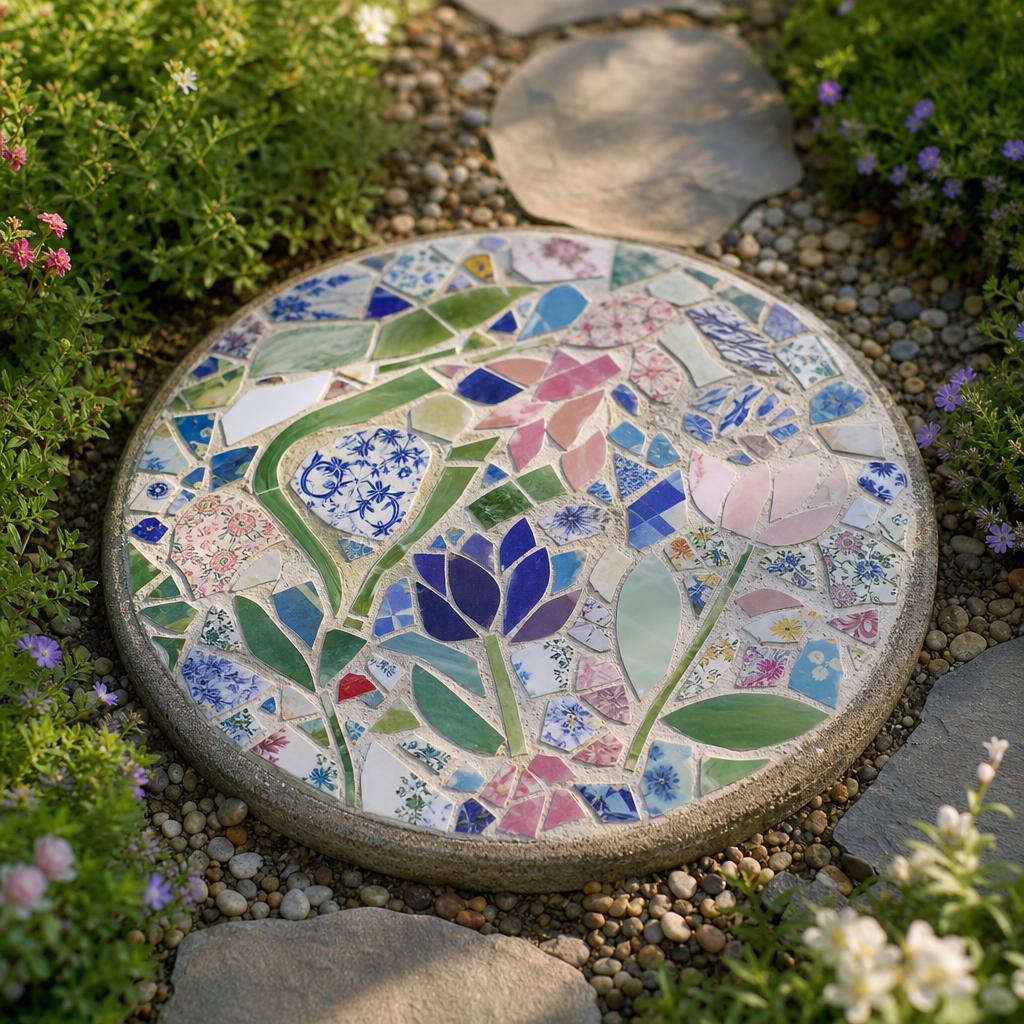
A stepping stone can be both useful and quietly joyful. Mine began as a plain circle beside a shed, but a few blue scraps turned it into a small patch of sky that made the daily walk to the compost bin feel intentional. These DIY mosaic stepping stones are manageable for a first concrete project because each piece is small, yet the same habits produce a whole path. Choose a dry, mild day, give yourself room to work, and remember that concrete dust is not something to breathe or brush off casually.
Start by deciding where the finished stone will live. A level garden bed is kinder to a beginner than a steep slope, and a stone used for walking should be broad enough for a comfortable foot. The most useful homemade garden stepping stones are thick enough not to flex and have a gently textured top rather than slippery glass across the entire surface. Measure the mold, sketch its outline on paper, and collect colors that contrast clearly. Keep glazed fragments, pebbles, and porcelain separate until you know how they behave.
### Step 1: Plan the surface and prepare safely
For this mosaic stone tutorial, I like a low-sided silicone mold because the cured piece releases with less persuasion. A sturdy plastic plant saucer can work too, but coat it lightly with a release product recommended for concrete. Do not use a flimsy food container that can bend while full. Place the mold on a rigid board so you can move it without sloshing the mix, and cover the board with plastic. A stepping stone mold should sit absolutely level; use folded cardboard beneath the board, not beneath the wet stone itself.
Make a paper version of the mold and test your picture there. A simple spiral, leaf, sun, or row of alternating colors reads better than a crowded scene once the joints are filled. To arrange mosaic pieces, turn each shard face up and leave a little breathing room between neighbors. If you are using broken china mosaic, wrap each plate or tile in a thick towel before tapping it with a mallet. Wear safety glasses, long sleeves, and gloves. Pick pieces with blunt or easily covered edges, and sweep chips with a brush rather than picking them up with bare fingers. Outdoor mosaic tiles need a little extra thought about frost and slipperiness, so favor textured faces. A second mosaic tile design can repeat one color at the rim, and a second stepping stone mold is worth leveling before the concrete arrives. Keep one rounded broken china mosaic fragment aside as a color test rather than forcing it into the border.
This is the checkpoint for scale and safety. Walk through the planned pattern with your hand hovering above the paper, then set aside any fragment that is too sharp, too thick, or likely to sit proud of a shoe. Wash dusty pieces and let them dry. Children can help sort large, safe pieces, but an adult should handle breaking ceramic, dry concrete, and the final placement. Keep a separate bucket for cleanup because concrete residue should not be rinsed into a household drain.
### Step 2: Mix and pour a stable base
Read the package directions before opening the bag. The best concrete stepping stone mix is one that can hold tile without being soupy; extra water weakens the finished stone and encourages pieces to sink. Put on a dust mask outdoors, add the measured water to the bucket, then gradually add mix while stirring. Scrape the sides and bottom until the texture resembles thick cake batter with no dry pockets. Let it rest for the time specified on the package, then stir briefly again. For a second batch of DIY mosaic stepping stones, use the same measured concrete stepping stone mix rather than estimating by eye. Homemade garden stepping stones are strongest when the proportions stay consistent.
Pour half the mixture into the stepping stone mold and spread it into the rim with a wooden stick. Tap the board gently with a rubber mallet or lift one edge a few millimeters and set it down. Bubbles will rise, but aggressive shaking can separate the aggregate. Add the rest of the mix, checking the thickness at several points. A small stone may need a few centimeters of depth; follow the product guidance and do not guess if the mold is unusually large.
Make a checkpoint before placing decoration. The base should be level, damp, and firm enough to support a light touch without becoming watery. If a dry pocket appears, fold it in rather than adding a splash of water. If the mix is already stiff, work efficiently and do not force it past its working time. Wipe the rim clean now, since hardened concrete there can prevent a clean release later.
### Step 3: Embed and refine the pattern
Press each tile face up into the wet concrete with a slight rocking motion. The goal is to embed mosaic tiles deeply enough that they cannot loosen, while leaving enough color visible to read the design. Do not push every piece to exactly the same depth by force; use a flat scrap of wood across neighboring pieces to compare their tops. Leave narrow, consistent joints so the concrete can grip the edges. Keep a few plain areas between motifs to prevent visual noise. An outdoor mosaic tiles sample can be tested on a scrap of cured mix before committing to the full stone.
A helpful mosaic tile design has a clear center and a calm border. I place the largest pieces first, then fill curves with smaller ones, rotating each shard until its shape supports the line. Step back after a few minutes and check the pattern from the height of a standing person. If a tile tilts, lift it gently, add a dab of mix, and reset it. If concrete smears over the face, wait until the stone is firm enough to wipe without dislodging the tile; rubbing too early can drag the whole design. In a second mosaic stone tutorial, I would arrange mosaic pieces in a loose fan, then compare that rhythm with the paper sketch before pressing on. Before the final press, arrange mosaic pieces once more from the standing view so the focal point is not hidden by a shoe.
Pressing is the main checkpoint. Run a gloved fingertip lightly across the surface and look for a sharp corner, an empty pocket, or a piece sitting dangerously high. The surface should have enough exposed concrete for traction, especially if the stone will be wet. If you want to embed mosaic tiles in a border, keep that border below the mold's top edge rather than building a raised rim. Stop decorating when the design is complete and cover the stone loosely with plastic to slow drying. The second mosaic tile design should still leave walking room, and the last handful of concrete stepping stone mix can fill a shallow gap rather than raise a tile. If one corner needs repair, embed mosaic tiles only while the mix is still workable, never after the surface has begun to crack.
### Step 4: Cure, seal, and install
Patience now protects all the earlier work. To cure concrete safely, keep the mold shaded, level, and protected from pets, rain, and direct heat for the full curing period on the mix label. Do not test strength by lifting a corner the next morning. After the recommended time, turn the mold onto a padded surface and flex the mold, not the stone. If it resists, wait another day. Brush off crumbs, then wash the surface with clean water and let it dry completely.
Inspect the edges and use fine masonry paper only on a small sharp point, wearing eye protection. Choose a penetrating exterior product when you seal mosaic stone, and follow its ventilation and recoat instructions. Apply thin coats rather than a glossy puddle. Sealing can deepen colors and make cleaning easier, but it cannot repair a cracked or structurally weak stone. Keep the piece off the ground until the sealer has cured.
For weatherproof garden art, set the stone on a shallow bed of compacted sand or gravel so it sits level with the surrounding soil. Leave enough space between stones for a natural stride and test each one with your full weight before inviting others onto the path. A garden path project should guide feet, not create a seesaw. Recheck after heavy rain and adjust the base if a stone settles. Never place a decorative stone where a mower, bicycle, or vehicle could strike it.
The finished piece is also a lesson in restraint. In beginner mosaic craft, an imperfect curve or mismatched shard is not a flaw if the surface is stable and the image feels considered. I enjoy the way changing daylight finds different glazes, and I like knowing that a chipped plate now marks a route through the garden instead of sitting forgotten in a cupboard. Clean tools promptly, store unused mix as directed, and make the next stone only after you have watched this one endure a few walks and a change of weather. Before starting another set of DIY mosaic stepping stones, I would sketch a third mosaic stone tutorial pattern, reserve the nicest outdoor mosaic tiles, and remember that homemade garden stepping stones deserve level foundations. A fresh beginner mosaic craft can cure concrete safely by following the label, then seal mosaic stone surfaces only when dry. That is how weatherproof garden art, a repaired broken china mosaic, and a thoughtful garden path project can last. For truly weatherproof garden art, cure concrete safely in shade, seal mosaic stone with thin coats, and inspect the garden path project after rain. This final pause is useful beginner mosaic craft practice rather than wasted time.
Materials You'll Need
- Reusable silicone or plastic mold
- Premixed concrete
- Clean water and mixing bucket
- Outdoor ceramic or porcelain tiles
- Safety glasses, gloves, and dust mask
- Wooden stir stick and rubber mallet
- Exterior masonry sealer
Step-by-Step
Choose the Design and Mold
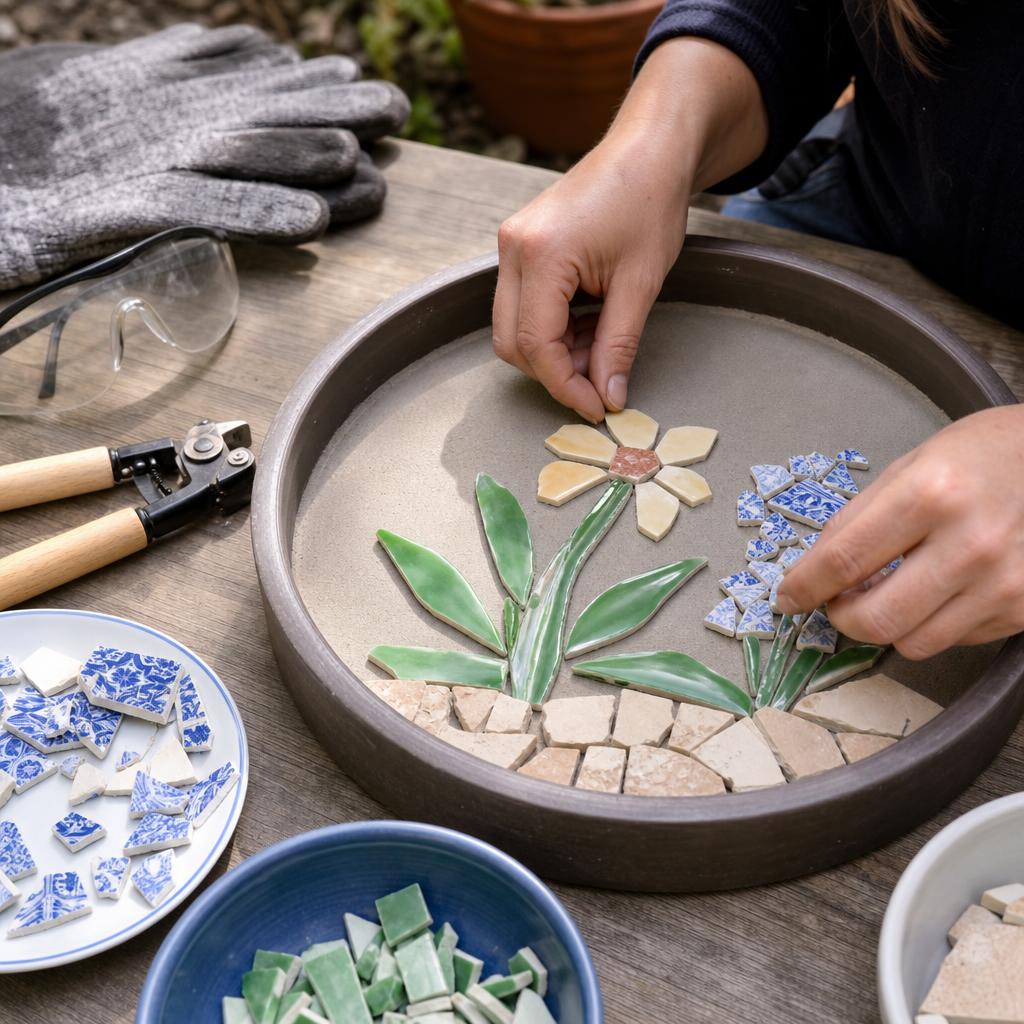
Choose a low-sided silicone or sturdy plastic stepping stone mold whose shape is broad enough for a comfortable foot and deep enough to resist flexing. Set it on a rigid board, cover the board with plastic, and level the mold with folded cardboard beneath the board rather than beneath the wet stone. Trace the mold on paper and test a simple spiral, leaf, sun, or alternating-color border before mixing anything. Arrange mosaic pieces face up with small, even spaces, reserving larger pieces for the center and smaller pieces for curves. If breaking china is necessary, wrap each plate or tile in a thick towel, tap it with a rubber mallet outdoors, and wear safety glasses, gloves, long sleeves, and a dust mask. Sweep chips with a brush; never collect them with bare hands. Select textured ceramic or porcelain for outdoor mosaic tiles, and reject pieces that are sharp, excessively thick, cracked, or likely to stand proud of a shoe. Wash dust from usable pieces and let them dry. The checkpoint is both visual and physical: hold a hand above the paper design and run a gloved finger over the planned surface to find dangerous points. Keep children away from breaking and dry concrete, and use a separate cleanup bucket rather than rinsing concrete residue into a drain.
Mix and Pour the Concrete
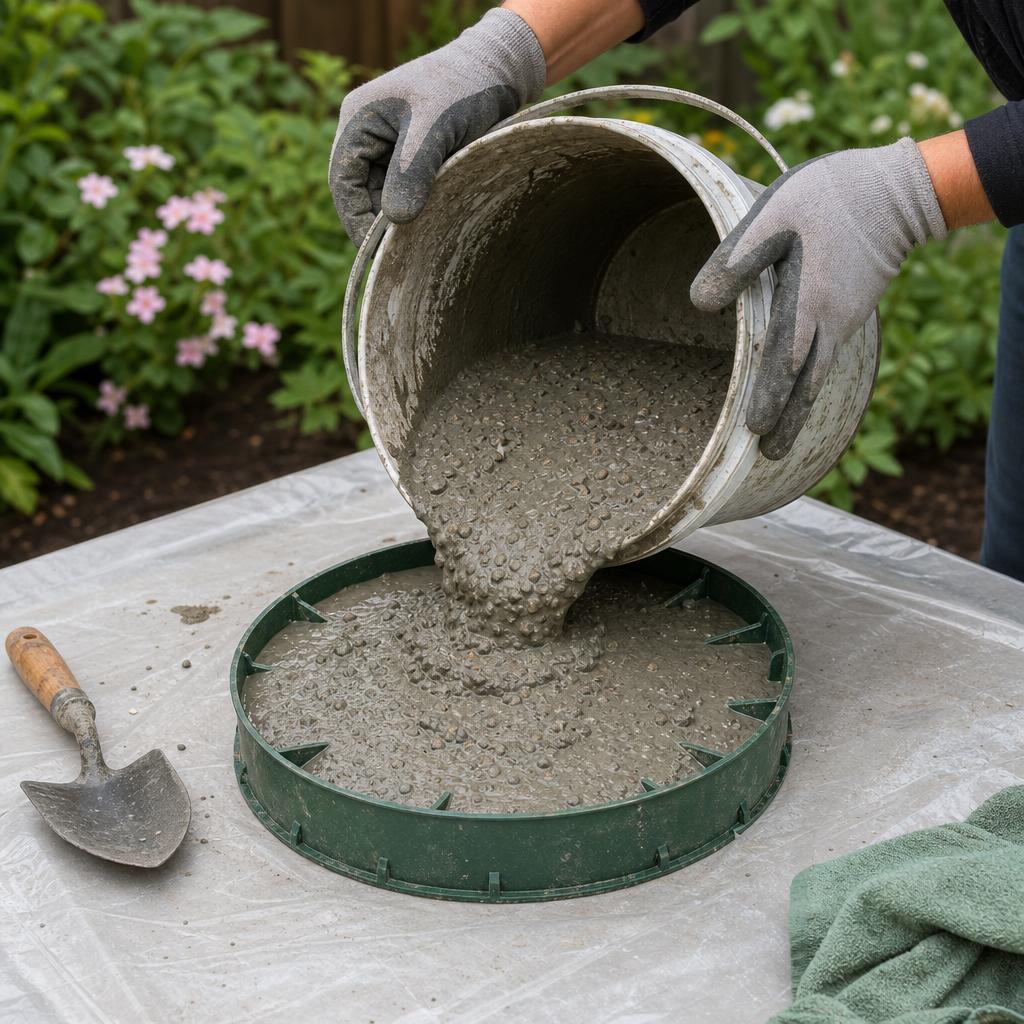
Work outdoors or in a well-ventilated area on a level, plastic-covered surface, wearing safety glasses, gloves, and a dust mask while handling dry mix. Read the concrete package and measure its water exactly; extra water makes a weak stone and can cause tiles to sink. Put the measured water in a bucket first, add concrete gradually, and stir from the bottom and sides with a sturdy stick until no dry pockets remain. The correct consistency is thick and workable, like stiff cake batter, not soup. Let the mix rest for the package-specified time, then stir briefly. Pour about half into the mold, push it into the corners, and spread an even base with the stick. Tap the supporting board gently with a rubber mallet, or lift one edge a few millimeters and set it down, to release trapped air without separating the aggregate. Add the remaining mix and check depth at several points. The checkpoint is a level, damp surface that supports a light touch without flowing. If a dry pocket appears, fold it in; do not splash in unmeasured water. If the mix begins to stiffen, work within its stated time rather than forcing it. Wipe concrete from the rim immediately so cured crumbs will not prevent clean release.
Set the Mosaic
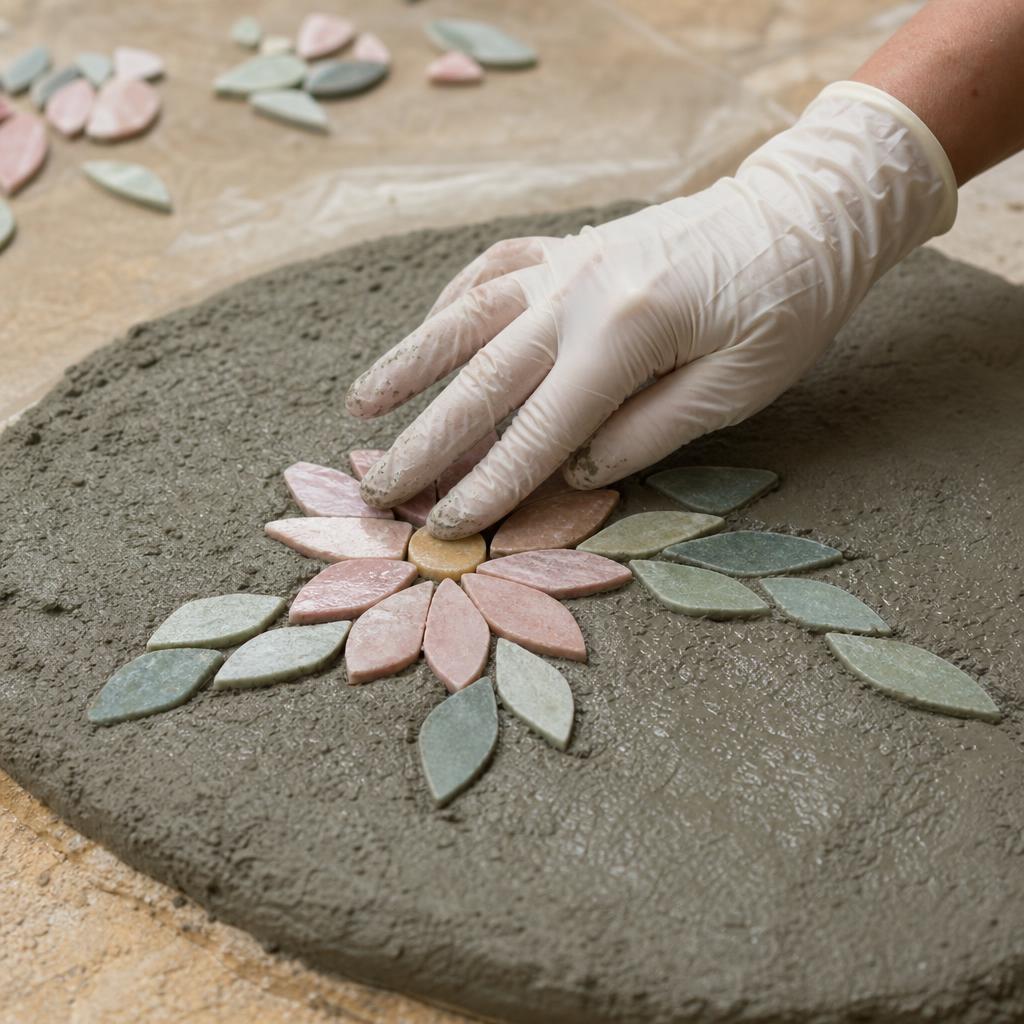
Place the largest tiles first, face up, following the paper plan, then fill curves and gaps with smaller pieces. Press each tile into the wet concrete with a slight rocking motion until it is embedded securely, leaving narrow, consistent joints for concrete to grip. Compare neighboring tops with a flat scrap of wood rather than forcing every piece to an identical depth. The tile faces should sit below the mold rim and leave enough exposed concrete for traction; a completely glazed walking surface can become slippery when wet. Step back to view the mosaic from standing height after each small section, checking that the focal shape still reads and that the border is calm. If a piece tilts, lift it gently, add a dab of mix, and reset it. If concrete smears a face, wait until the surface firms enough to wipe without dragging adjacent tiles. A sharp corner, empty pocket, proud tile, or raised border is a checkpoint failure: correct it while the mix remains workable, using gloves and a wooden stick. Do not press decorative pieces after the concrete has started cracking or stiffening; patching by force can loosen the base. When the design is complete, smooth exposed concrete lightly, clean the mold rim, and cover the stone loosely with plastic to slow drying while keeping the pattern undisturbed.
Cure, Seal, and Place
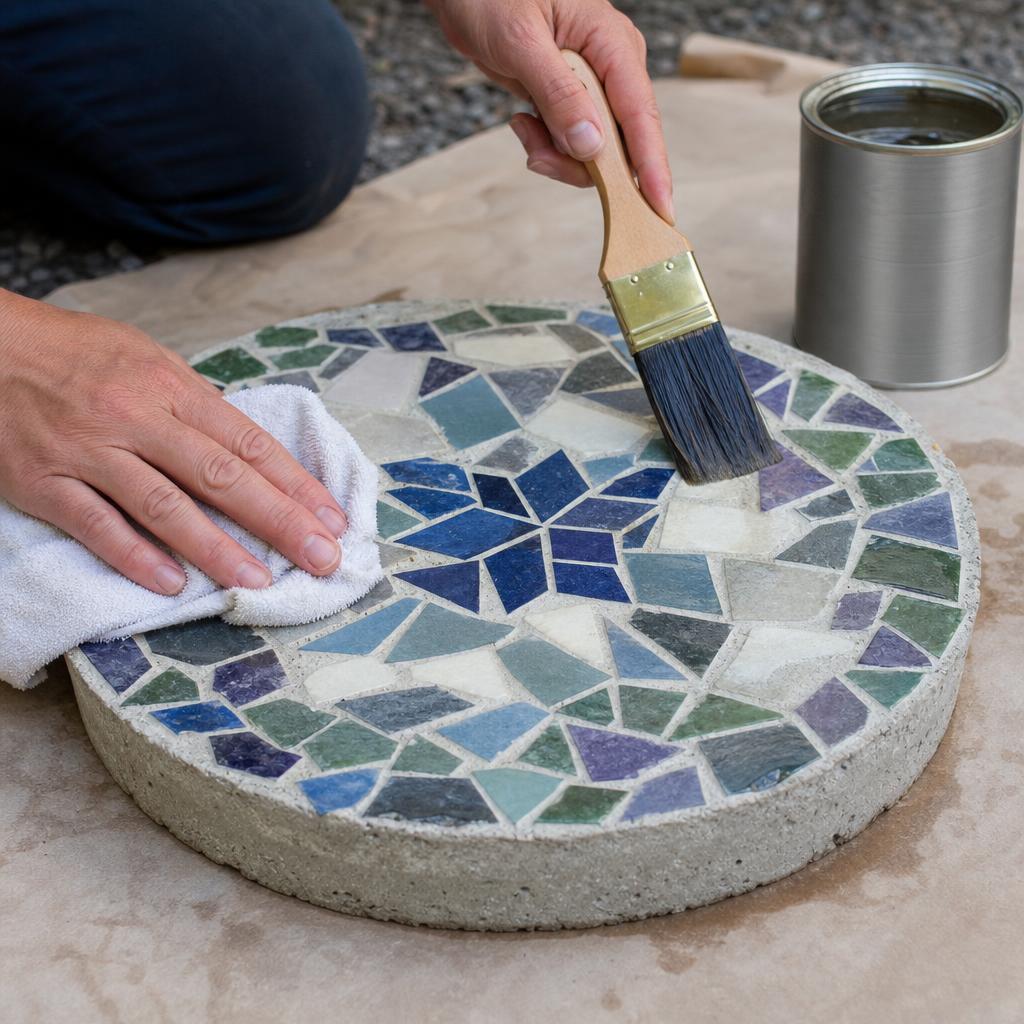
Keep the filled mold shaded, level, and protected from pets, rain, freezing temperatures, and direct heat for the complete curing period printed on the concrete package. Leave the loose plastic cover in place to slow moisture loss, and do not test strength by lifting a corner the next morning. When the label permits demolding, turn the mold onto a padded surface and flex the mold rather than prying the stone. If it resists, wait another day; forcing release can crack the edges. Brush away crumbs, rinse off residue with clean water, and let the stone dry completely. Inspect every edge and lightly smooth only a small sharp point with fine masonry paper while wearing eye protection. Apply a penetrating exterior masonry sealer in thin coats according to its ventilation, temperature, drying, and recoat instructions. Avoid a glossy puddle that could make the surface slippery, and keep the piece off the ground until the sealer cures. For installation, excavate a shallow bed in a compacted garden area, add sand or gravel, and set the stone level with surrounding soil. Test it with full body weight; it should not rock, tilt, or settle under a foot. Recheck after rain and adjust the base if needed. Keep stones away from mower, bicycle, and vehicle paths, and never treat sealer as a repair for a cracked or structurally weak stone.
Written by

Ava Roberts
Jewelry Design & Metalwork Artist
Ava works in silver, copper, and stone. Her handcrafted jewelry practice spans wire wrapping, cold connections, and simple metalsmithing techniques accessible to all skill levels.