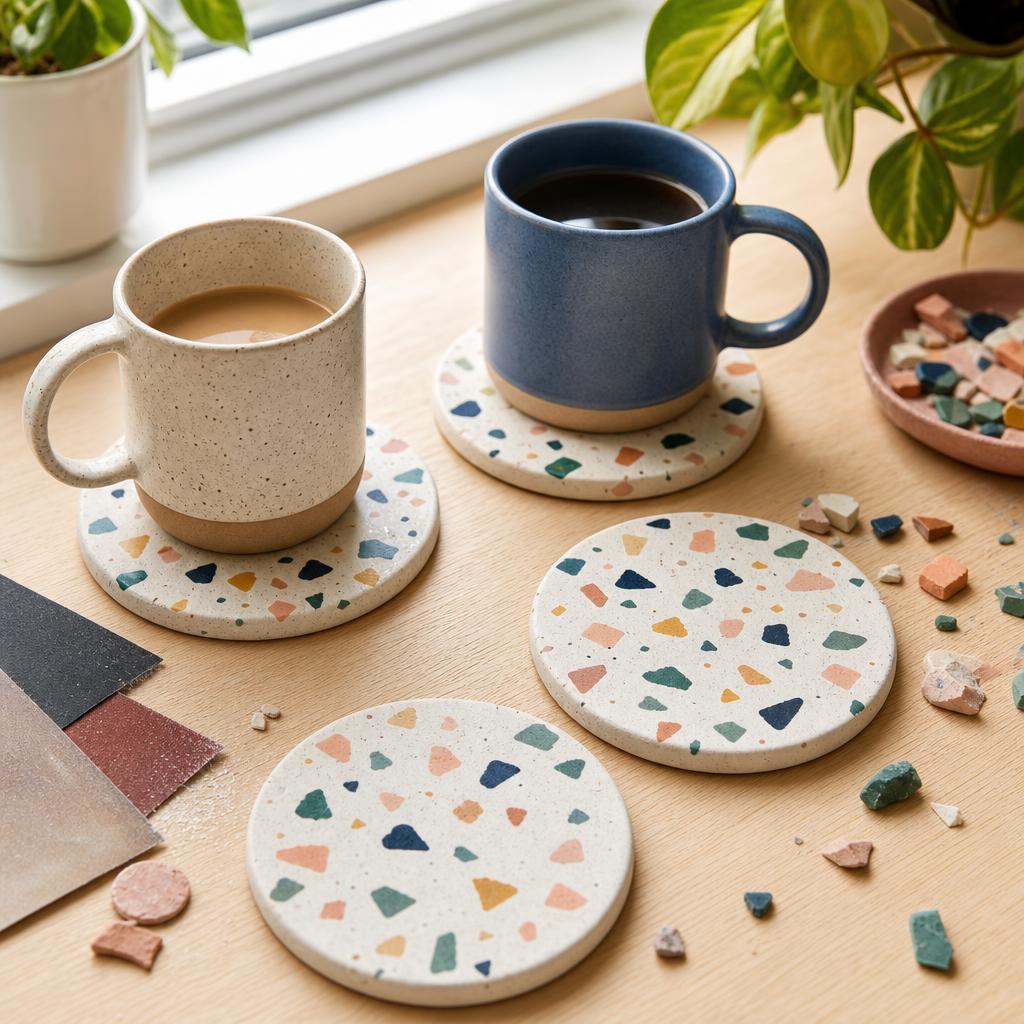
Shape cheerful, durable terrazzo-style coasters from polymer clay with an approachable four-step process and a polished handmade finish.
I love a project that looks collected rather than manufactured. These DIY terrazzo coasters turn a few small blocks of polymer clay into a set with the lively, irregular character of terrazzo tile, but the process is quiet enough for a kitchen table. The finished homemade terrazzo coasters are useful under a mug, attractive on a coffee table, and forgiving when your chips do not land exactly where you imagined. This is a clay terrazzo tutorial for a relaxed afternoon, not a test of perfect geometry. I think of DIY terrazzo coasters as tiny design exercises, and homemade terrazzo coasters make a thoughtful present when each one has a slightly different arrangement. The phrase polymer clay coasters sounds practical, but these polymer clay coasters can still feel like small art objects.
Before touching clay, clear a level work surface and cover it with parchment or a washable mat. Keep food preparation surfaces separate from craft tools, and reserve the blade and roller for clay. I choose a warm ivory as the base, a muted coral, a leafy green, and one dark accent. A limited terrazzo color palette makes random pieces look intentional. If you prefer a calmer set, replace the dark accent with pale blue; if you like a bolder set, make one color much deeper than the others. A second terrazzo color palette can use sand, rust, olive, and charcoal without changing the technique. Make a paper circle the size of your intended coaster so you can test the balance before committing material.
## Step 1: Prepare the clay
Cut equal portions of the base clay and the accent colors. Warm each portion in your hands, then condition polymer clay by folding and rolling it until it bends without cracking. Do not rush this part. Stiff clay can split around embedded pieces, while overheated clay becomes sticky and picks up every crumb. A good checkpoint is a narrow coil that bends into a U without whitening along its outside edge. If it breaks, keep folding; if it clings to your fingers, let it rest on the work surface for a few minutes. If you need to condition polymer clay a third time, do it in small batches so the surface stays clean.
Flatten the accent colors into thin sheets and slice or pinch them into varied little shapes. A mixture of short rectangles, triangles, and thin slivers creates a convincing stone-like scatter. These are your terrazzo clay chips, so keep some pieces no larger than a grain of rice and a few closer to a fingernail. Place each color in its own small dish or on separate scraps of parchment. That organization prevents accidental mixing and lets you compare the pattern with your test circle. Condition polymer clay again briefly if a cut edge begins to crumble, because clean chips embed more neatly. Keep extra terrazzo clay chips in a labeled envelope for a later batch.
Do not make all the pieces identical. Real stone has rhythm without repetition, and a handmade surface benefits from a little asymmetry. Remove lint with a piece of fresh masking tape rather than rubbing it into the clay. Wash and dry your hands between colors when using pale clay. The checkpoint here is simple: the base portion should be smooth, and every accent piece should be ready before you start rolling.
## Step 2: Arrange and embed the chips
Press the base clay into a thick, rough rectangle. Spread the chips over it with tweezers or the tip of your blade, leaving a little base visible between clusters. Scatter clay chips with a light hand; dropping a whole pile in one spot makes a mound that will stay visible after rolling. Turn the slab a quarter turn and look from several angles. I usually move one dark piece away from the edge and add a few small pieces near large ones so the pattern feels connected rather than polka-dotted. Scatter clay chips near the perimeter too, but leave a narrow border for a clean cut.
Lay parchment over the arrangement and press with your fingertips from the center outward. The paper stops the surface from sticking to your roller and helps distribute pressure. Keep the first passes gentle. Your goal is to tack the pieces in place, not to crush them into a single muddy color. If a chip folds, lift it with the blade and replace it before continuing. After the chips hold, use an acrylic roller to roll terrazzo slab evenly to about 4 mm thick. Roll in one direction, rotate the sheet, and roll again, checking the thickness with two spacer sticks if you have them. Roll terrazzo slab only until it reaches that thickness; extra passes blur the contrast.
Lift the parchment and pause for a checkpoint. You should see sharp fragments with soft edges, not long streaks. If an area is crowded, trim away a few pieces and patch the base clay into the gap. If the design looks too sparse, place two or three chips on top and cover it again before another very light pass. Keep the edges of the slab tidy because a clean edge gives more usable circles later. Keep your hands cool and take breaks; warm clay stretches and can distort the pattern.
## Step 3: Cut and refine the rounds
Chill the slab on a flat tile for ten minutes if it feels floppy. Set a round cutter down vertically and press straight through rather than twisting. This is the moment to cut round coasters, so hold the cutter firmly and leave enough space between circles to avoid a warped shared edge. Lift the surrounding clay first, then slide a thin blade under each round. Save the leftover clay for a small dish or a future speckle test instead of kneading it back into the clean pattern. When you cut round coasters, pause between cuts to check that the cutter remains upright.
Place each circle on parchment and inspect it at eye level. Smooth the rim with a fingertip or a soft silicone tool, using tiny inward strokes. Do not drag across the face, because that can smear a chip. If one side is thinner, press that section very gently between two flat sheets. The checkpoint is a level coaster that sits without rocking on the tile. Set it down on a glass or metal surface to confirm; a wobble now will remain after curing.
A blade mark can be softened with a clean finger, but fingerprints are easier to avoid than erase. If the cutter has pulled the edge outward, chill the clay again and repeat the cut with less pressure. This is also the stage to add a tiny maker mark on the back, never on the drinking surface. Work slowly and keep the rounds separated so their edges cannot touch while you transfer them. Cut round coasters all at once before returning scraps to the storage box.
## Step 4: Cure and finish
Read the clay package for its exact temperature and time, then bake polymer clay safely on a ceramic tile lined with parchment. Use an oven thermometer if your oven tends to run hot, and never use a microwave. Keep the room ventilated, do not leave the oven unattended, and let the coasters cool inside or on a heatproof surface away from children and pets. Underbaking leaves the pieces weak; overheating can darken pale clay. Follow the manufacturer’s instruction for your brand rather than guessing from thickness. To bake polymer clay safely a second time, use the same measured temperature rather than adding heat to hurry the cure.
Once fully cool, test one coaster on a mug before finishing the whole set. If a rim feels rough, wet the paper and gently sand coaster edges with fine abrasive, working around the circumference instead of across the face. Wipe away the slurry with a damp cloth and dry completely. A polished rim is pleasant to touch, but do not sand aggressively enough to expose a chip or thin the round. If you spot a hairline crack, set that piece aside rather than hiding a structural problem under finish. Bake polymer clay safely by allowing every piece to cool before sanding, since warm clay can still flex.
Brush on two very thin coats of a sealer labeled compatible with polymer clay, allowing the first to cure as directed. Thin layers dry more evenly than one thick coat, and they preserve the matte stone effect. The goal is to seal terrazzo coasters against ordinary condensation, not to make them dishwasher-proof. Keep finish off the underside so adhesive can grip. Let the final coat harden fully before testing; a fingernail mark means it needs more time. When you seal terrazzo coasters, wipe the brush between colors so no stray pigment dulls the surface.
Measure the underside and cut circles from cork. A cork coaster backing prevents sliding, protects furniture, and hides any tiny underside variations. Apply a small amount of craft adhesive in the center and a ring near the edge, press the cork into place, and weigh it under a book with parchment between them. Trim any overhang after drying. That backing also keeps heat from transferring directly to a delicate tabletop, though these coasters are still not trivets for oven-hot pans. Let the cork coaster backing cure overnight before stacking the set.
Care is uncomplicated: wipe the face with a damp cloth, dry it upright, and avoid soaking or abrasive cleaners. The first set may have a few chips that sit closer together than planned, and that is part of the appeal. This beginner clay project teaches you how pressure, temperature, and restraint shape a surface. It is a beginner clay project I return to when I want practice without a large commitment. When you make another set, change only one variable—perhaps a softer palette or a larger cutter—so you can see what your hands have learned. A final pass to sand coaster edges, a fully cured coat to seal terrazzo coasters, and a securely glued cork coaster backing turn a playful experiment into a useful gift. Polymer clay coasters are ready for daily use only after the sealer and backing have both cured. In this clay terrazzo tutorial, the remaining terrazzo clay chips can become a border on a matching tray. For a beginner clay project, sand coaster edges lightly and let patience do the finishing. A final set of DIY terrazzo coasters in a third terrazzo color palette can make a whole table feel cheerful; homemade terrazzo coasters are happiest when each roll terrazzo slab session leaves its own small surprise. This clay terrazzo tutorial is easiest when you scatter clay chips slowly and inspect the pattern before curing.
Materials You'll Need
- Oven-bake polymer clay in four colors
- Acrylic roller or smooth glass bottle
- Round cookie cutter, about 9 cm
- Craft blade
- Parchment paper and ceramic tile
- Fine wet/dry sandpaper
- Polymer-clay-compatible sealer
- Thin cork sheet and craft adhesive
Step-by-Step
Prepare the Clay and Color Plan
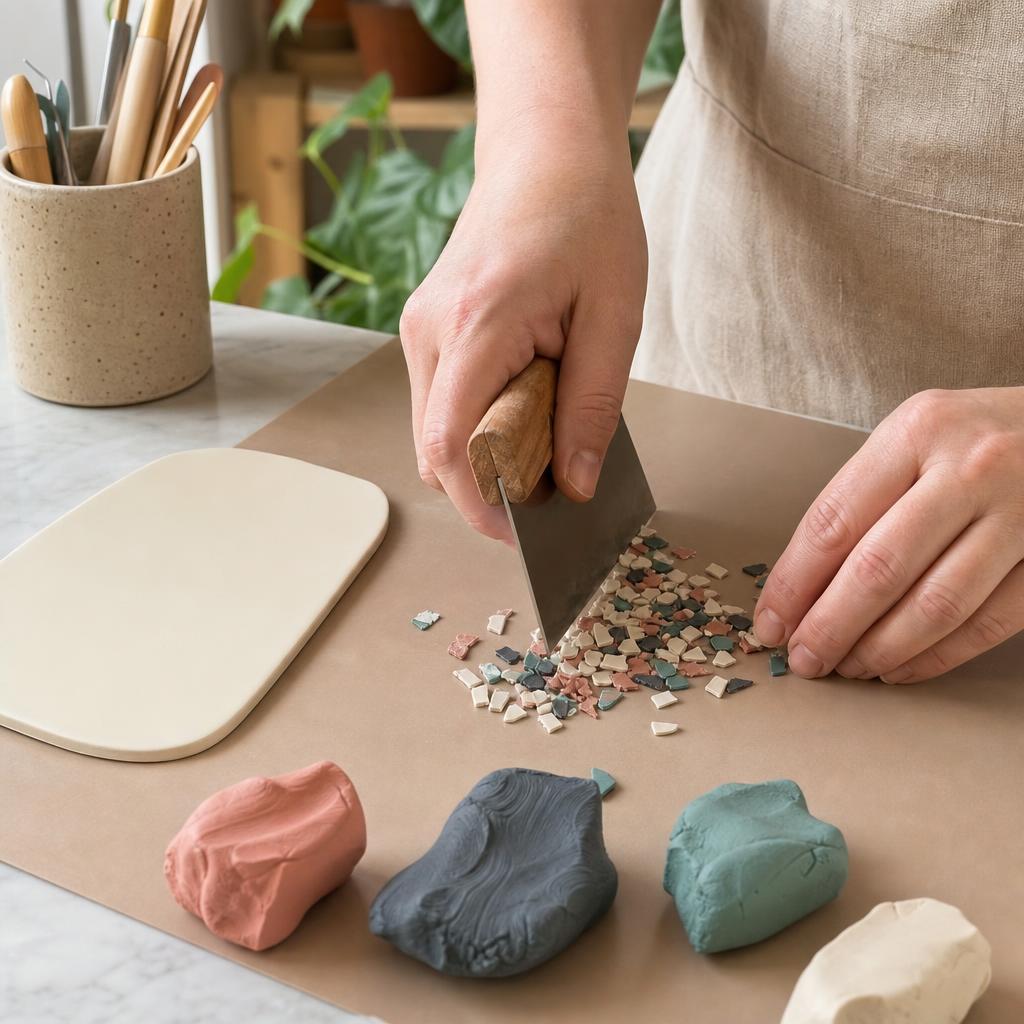
Cover a clean, dedicated craft surface with parchment, then choose a base color and three contrasting polymer-clay accents. Reserve clay tools for crafting rather than food use, and keep lint, dust, and food away from the work area. Divide equal portions of each color, warm one portion at a time in your hands, and condition it by folding, pressing, and rolling until it bends without cracks. A narrow coil should curve into a U without whitening; if it snaps, keep conditioning, while sticky clay needs a short rest to cool. Flatten each accent into a thin sheet and slice a varied mix of rectangles, triangles, and slivers with a sharp craft blade. Make some chips about rice-sized and others closer to a fingernail so the pattern has scale. Keep colors separated on parchment and sketch a paper circle the intended coaster size to test the palette. Wash and dry hands between pale colors, remove lint with fresh masking tape, and do not knead accent colors together. Before moving on, check that the base is smooth, every color is supple, and enough chips are ready to cover the slab without forming dense piles. Store extras in labeled wrapping rather than leaving them exposed.
Build the Speckled Slab
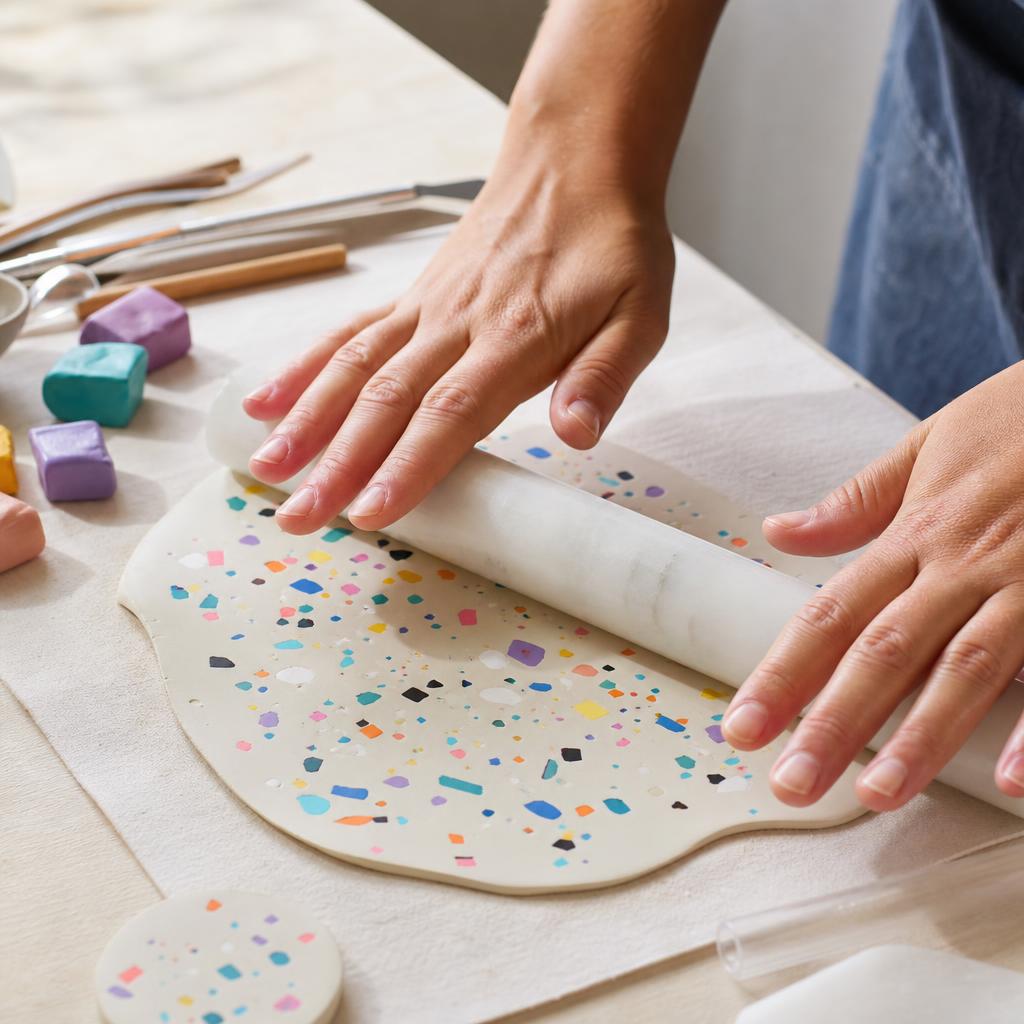
Press the conditioned base clay into a rough rectangle slightly larger than the coaster cutter and keep it evenly thick. Scatter the prepared chips by hand or with tweezers, leaving visible base clay between clusters and placing a few pieces near the future perimeter. Vary direction and size instead of making rows; a pile in one spot will become a permanent lump. Move any dark chip that crowds the edge, and compare the arrangement with the paper circle before embedding it. Lay parchment over the design and use fingertips to press from the center outward, just enough to tack chips in place. Lift the paper and inspect: fragments should remain distinct, not smeared into streaks. If a chip folds, pick it up with the blade and replace it. Roll the slab under parchment with an acrylic roller, using light passes in one direction, then rotate the sheet and roll again until it is about 4 mm thick. Spacer sticks can confirm evenness. Stop when the slab reaches that thickness; extra passes blur contrast. If an area is sparse, add a few chips and make one gentle pass. If crowded, trim pieces and patch with base clay. Chill warm clay briefly so edges stay crisp.
Cut and Refine the Rounds
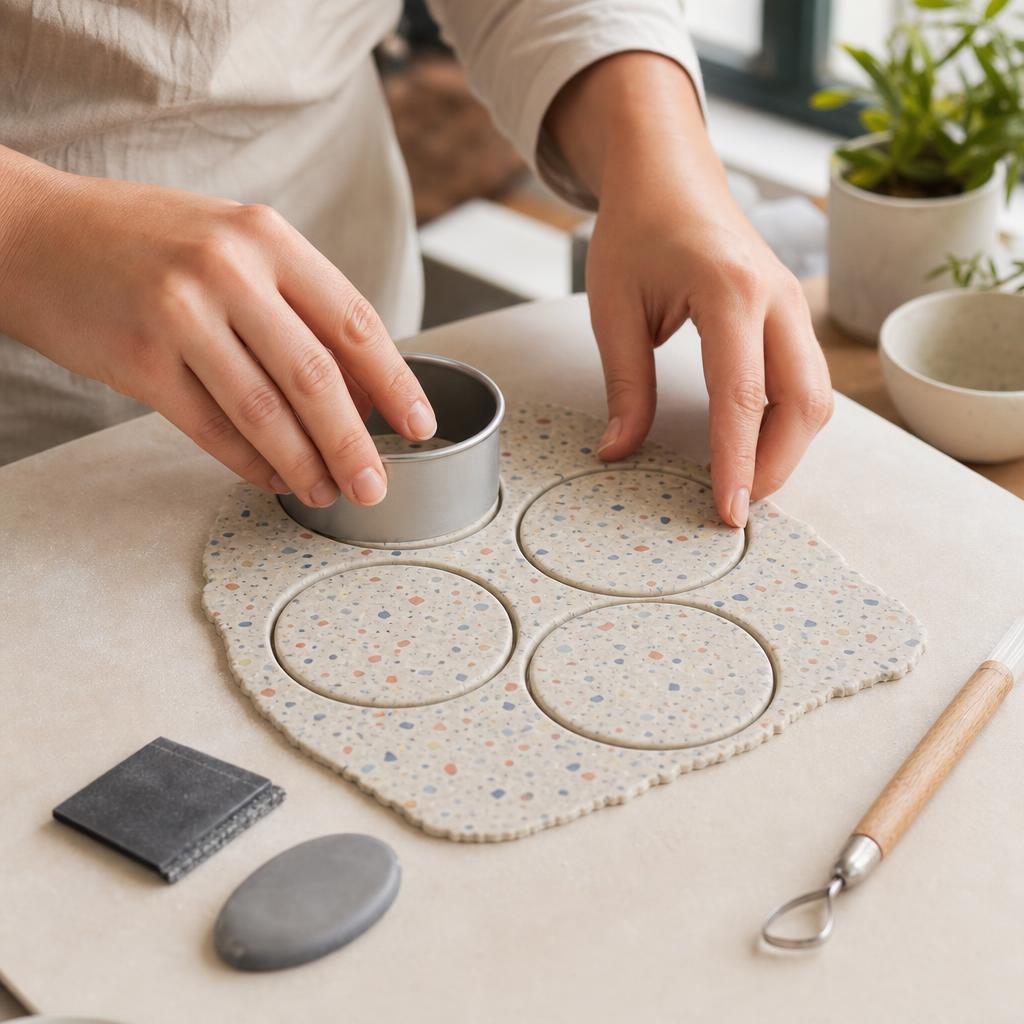
If the patterned slab feels soft or stretches when lifted, place it flat on a tile and chill it for about ten minutes. Set the round cutter vertically on the slab and press straight down in one firm motion; twisting drags chips and distorts the rim. Leave enough space between cuts for clean circles. Lift away the surrounding clay first, then slide a thin blade beneath each round and transfer it to parchment on a ceramic baking tile. Save scraps for a later speckle test rather than kneading them back into this pattern. Inspect every coaster at eye level. Smooth its rim with a fingertip or soft tool using tiny inward strokes, never sweeping across the decorated face. If the cutter pulled one side outward, chill the slab again and recut with less pressure. If a circle is thinner on one side, sandwich it gently between flat parchment sheets and press only that area. Set each round on a glass or metal surface to check that it sits flat without rocking; correct a wobble before baking. Remove visible fingerprints with a clean, lightly smoothed finger, and keep pieces separated so rims cannot touch. A small maker mark belongs on the underside only. Work slowly around the perimeter, because aggressive smoothing can expose a chip or erase its crisp edge.
Bake, Finish, and Add Protection
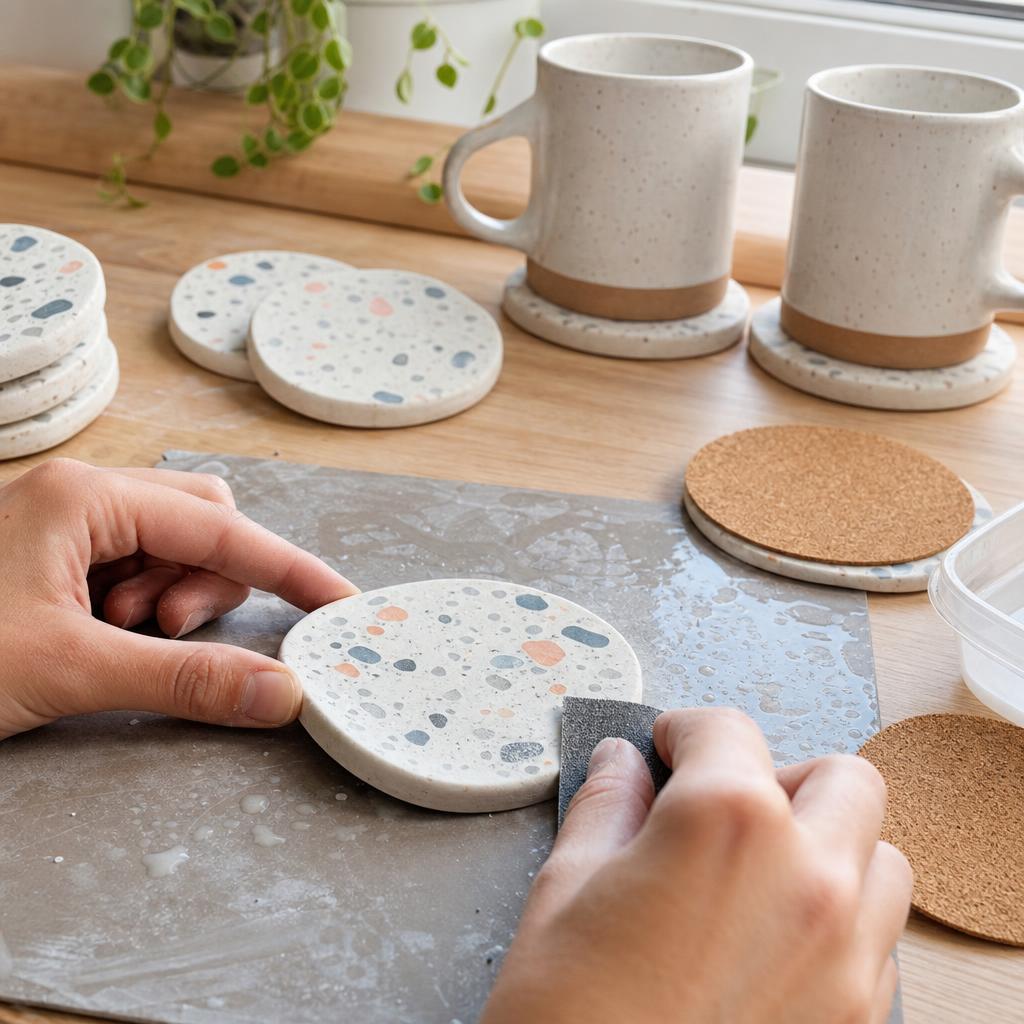
Read the polymer clay package and use its exact temperature and time for the measured thickness; do not substitute a guessed setting. Put the parchment-lined ceramic tile in a properly preheated oven, use an oven thermometer if temperatures fluctuate, and never microwave the pieces. Ventilate the room, remain nearby, and keep children and pets away from the hot oven and tile. Let coasters cool completely on a heatproof surface before handling, sanding, or judging their strength. Test one cooled piece first. For a rough rim, wet fine wet/dry sandpaper and gently sand coaster edges around the circumference, not across the face; wipe away slurry and dry it fully. Set aside any coaster with a hairline crack rather than hiding a structural fault. Brush on two thin coats of a sealer specifically labeled compatible with polymer clay, allowing the first coat to cure as directed. Keep finish off the underside so adhesive can grip, and wait until a fingernail leaves no mark. Trace the underside onto thin cork, cut a matching circle, and apply a small center dot plus an edge ring of craft adhesive. Press the cork under parchment beneath a book, trim overhang after curing, and leave it overnight. The backing protects furniture but is not a trivet; care for the finished set with a damp cloth, not soaking or abrasive cleaners.
Written by

Zoe Turner
Textile & Embroidery Artist
Zoe embroiders the world she wants to see. Her hoop art blends traditional needlework stitches with contemporary illustration and botanical motifs.