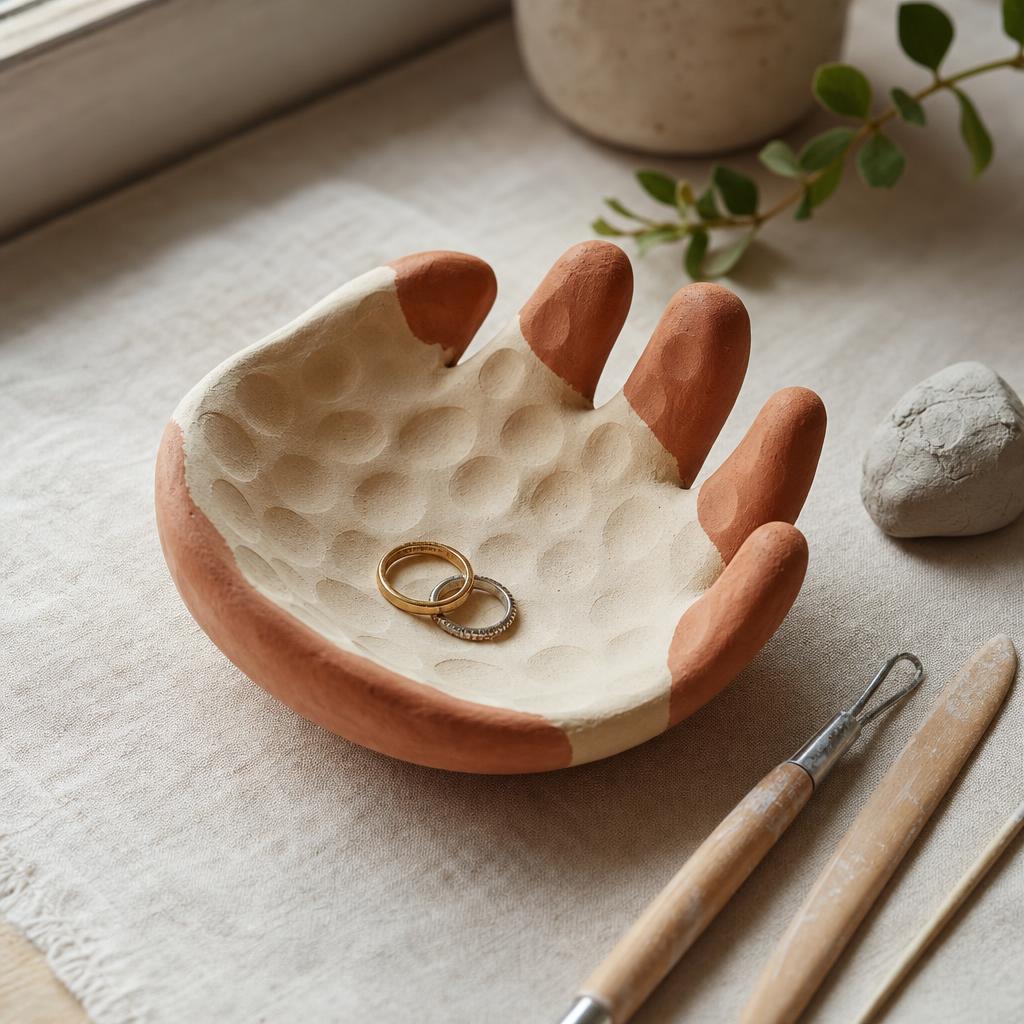
Turn a small lump of air-dry clay into a useful, gently shaped bowl with four calm, beginner-friendly stages.
I love an object that still shows the quiet evidence of its maker. A pinch pot has a soft thumbprint, a slightly lively rim, and a shape that feels more personal than something made from a mold. This guide to how to make a pinch pot is meant for an afternoon at the table, not a race to produce a perfect vessel. I keep the first one small enough to hold in both hands, because a manageable scale makes every decision easier to see.
Before beginning, cover the table with paper or a silicone mat and wash your hands. Air-dry clay is not food-safe simply because it looks like pottery, so plan to use the finished piece for jewelry, keys, wrapped sweets, or a little plant saucer only when its label permits that use. Keep clay dust out of the air, never sand wet clay, and set paint, tools, and snacks in separate areas. Those modest precautions make this a relaxed beginner pottery project rather than a messy emergency. If you have wondered how to make a pinch pot, remember that a clean setup is part of the technique.
## 1. Prepare and center a friendly lump
Read the clay package first. Different brands vary in drying time and in how much water they tolerate. Cut off a portion about the size of a small orange, immediately wrap the remainder, and knead the portion between your palms. The goal is to soften it without warming it until it becomes sticky. To prepare clay ball, fold the mass inward several times, then roll it under a cupped hand until the surface looks continuous. If you see a dry seam, press it closed instead of adding a splash of water.
To prepare clay ball for shaping, use the heel of your hand for a few gentle presses and turn it after each press. I look for a ball that feels dense but yielding, with no hollow pockets or loose flakes. Tap it lightly on the mat to make a stable bottom; do not flatten it into a pancake. This is also the moment to decide whether the vessel will be round, oval, or slightly irregular. A quiet plan keeps you from overworking the clay later.
The first checkpoint is a smooth ball that sits without rocking. If it sticks to the mat, lift it and let its surface air for a minute. If it feels crumbly, warm it longer in your hands and blend the seam with a barely damp fingertip. Too much water can make the outside slick while the inside remains dry, so resist the tempting quick fix. A consistent lump is the foundation of an air dry clay pinch pot that will dry evenly. The prepare clay ball stage is complete when the surface stays closed after a gentle turn.
## 2. Open the center and build the wall
Hold the ball in one palm and press your thumb straight into the middle, stopping well above the bottom. Leave a base that feels about as thick as your little finger. Turn the ball a quarter turn after every few presses, using the fingers of your other hand to support the outside. This rotation is how to pinch clay evenly without creating a thin spot on one side. Use the pad of the thumb rather than a fingernail; a nail leaves a sharp trench that later becomes a crack.
Continue around the circle in small movements. Pinch pot thickness should be fairly uniform, although the base can remain slightly heavier than the wall for stability. Do not try to make the wall paper-thin. When the opening is wide enough, place the piece on the table and check that the bottom is still flat. If it has become too narrow, widen the opening with a rounded tool, then support the outside while you resume. This steady alternation is more reliable than squeezing hard once. For a pinch pot for beginners, a little extra pinch pot thickness is safer than a wall that collapses.
At this checkpoint, gently pinch clay evenly from bottom to rim and listen to the feel of the material. A wall that bends like rubber needs a pause; cover the pot loosely for five minutes so the surface firms. If a split appears, compress both sides toward the split and smooth clay cracks with a damp fingertip, working from the ends toward the center. Never hide a deep opening under water alone. Add a tiny coil of fresh clay, blend its edges, and check the repaired area before making the next pinch. If a second split opens, smooth clay cracks only after the wall has rested; chasing every mark while it is soft can distort the whole form.
## 3. Shape the bowl and refine its character
Once the wall is open, decide whether you want a straight-sided cup, a flowerlike flare, or a low dish. To shape a clay bowl, support the inside with one hand while the other hand nudges the outside upward in small arcs. Rotate constantly. I often pause after one full turn, set the pot down, and look at it from eye level. This reveals a leaning rim that is invisible when the piece is held close to the face. This patient approach is particularly useful for a pinch pot for beginners.
To shape a clay bowl with a comfortable profile, keep the lip slightly rounded rather than sharp. Compress it between two fingers, then smooth the thumb marks without erasing every trace of the process. This is a good place to add clay texture: press a lace scrap, a leaf, or the end of a pencil into the outside with light, even pressure. Test the pattern on a clay offcut first, because a deep impression can weaken a thin wall. Leave an undecorated band near the rim so the finished piece remains pleasant to hold. To add clay texture without weakening the form, use one clear motif rather than covering every inch.
Use a wooden skewer to draw a simple line or a blunt tool to make a few dimples, but keep additions shallow. If you add clay texture, make sure the raised bits are firmly blended at their edges; loose appliqué can fall away during drying. Run a soft, damp cloth around the base to remove crumbs, then set the bowl down again. The second checkpoint is a rim that looks intentional, a base that touches the table evenly, and no shiny wet patches.
If the bowl has become too wide, do not squeeze the whole wall at once. Support one section, coax it inward, rotate, and repeat. If it is too narrow, widen it from the inside with a rounded handle. Should fingerprints bother you, wait until the surface is leather-firm before smoothing; endless rubbing while soft usually makes the shape lopsided. Aim for a balanced handmade form, not mechanical symmetry.
Before drying, I revisit how to make a pinch pot by turning it slowly and checking the silhouette. For a pinch pot for beginners, the final pinch pot thickness should feel consistent from base to lip, with no soft puddle of clay. This air dry clay pinch pot is ready for the next stage when it can sit without a wobble. A second look at an air dry clay pinch pot often reveals a place to pinch clay evenly or smooth clay cracks before they become permanent. If the profile needs help, shape a clay bowl with one gentle turn rather than a squeeze. Then dry clay slowly, sand air dry clay, paint a pinch pot, and seal clay pot only in that order; each pause protects the work. That sequence is what makes a beginner pottery project feel thoughtful.
## 4. Dry, sand, paint, and finish with care
Place the bowl on a piece of cardboard, wood, or another breathable surface. To dry clay slowly, keep it out of direct sun, radiators, and a hot car. Turn it once after several hours if the bottom feels damp, then leave it alone. Thick bases dry more slowly than rims, so patience matters. To dry clay slowly is to let the inside catch up with the surface. To prevent clay cracking, avoid sealing the piece while moisture remains inside and never force-dry it with a hair dryer. A loose paper cover for the first day can moderate a very dry room; remove the cover if condensation appears.
After the clay is completely hard, inspect the base and rim under a bright lamp. To prevent clay cracking, fill a hairline surface mark with a little matching clay or lightweight filler, let that repair cure, and inspect again. Do not sand a structural split and pretend it is sound. When the surface is ready, sand air dry clay outdoors or over a protected surface while wearing a dust mask and eye protection. Use fine paper, make a few gentle passes, and wipe the dust away with a damp cloth rather than blowing it into the room. A final way to prevent clay cracking is to avoid setting the finished piece on a damp windowsill.
Sand air dry clay only after the piece has reached its final hardness. A small sanding sponge is useful around the rim, where flat paper can catch. Then apply thin coats of acrylic. If you want to paint a pinch pot, start with an optional base coat, let it dry, and add color with a nearly dry brush around texture. To paint a pinch pot neatly, rest your painting hand on a clean block so you do not drag fingers across wet color. Leave the inside unpainted if the bowl might hold anything that could touch pigment.
When the color is fully dry, seal clay pot surfaces with a product compatible with air-dry clay. Seal clay pot pieces in several thin coats, allowing each to dry as directed; a thick glossy layer can stay tacky and obscure your texture. A sealer does not make an unmarked air-dry clay object waterproof or food-safe. Add a felt pad underneath if the bowl will sit on furniture. Finally, label the back with the date if you enjoy tracking your experiments.
The last checkpoint is practical rather than cosmetic: the bowl should sit securely, have no sharp edge, and feel dry all the way through. I like to leave it overnight after the final coat before putting jewelry or wrapped treats inside. Every uneven thumb mark tells me where my hands were learning. That is the pleasure of a beginner pottery project: a useful little form carries both the technique and the memory of making it.
Materials You'll Need
- Air-dry clay
- Small bowl or tile for a work surface
- Cup of water
- Clay knife or wooden skewer
- Soft cloth
- Fine sandpaper
- Acrylic paint and brushes
- Water-based craft sealer
Step-by-Step
Condition and Center the Clay
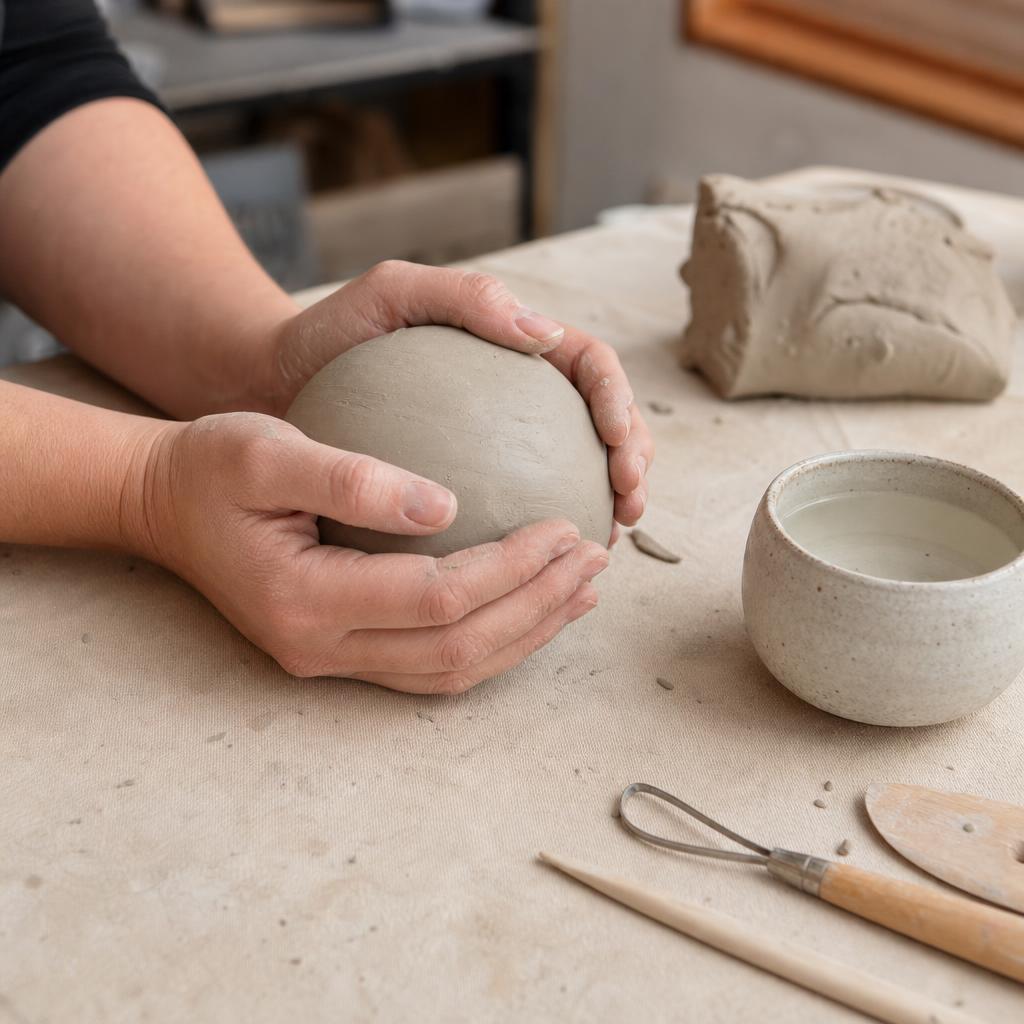
Cover the table with paper or a silicone mat, wash and dry your hands, and cut off a piece of air-dry clay about the size of a small orange. Wrap the unused clay immediately so it does not form a skin. Pick out hard crumbs, then fold the piece inward several times and knead it between your palms. Use the heel of your hand for gentle presses, turning the clay after each one; you are conditioning it, not heating it until sticky. Roll it under a cupped palm until the surface looks continuous, then tap one side lightly on the mat to create a stable bottom. The checkpoint is a dense, yielding ball with no visible seams, hollow pockets, loose flakes, or rocking when set down. If a seam opens, pinch its edges together and blend it with a barely damp fingertip. If the clay feels crumbly, warm it longer in your hands before adding moisture. If it becomes slick, stop wetting and let the surface air for a minute. Keep water nearby for repairs, but do not soak the clay; excess water can leave a soft skin over a dry interior. Finish this stage with a smooth ball that still holds its shape when turned.
Open and Pinch the Wall
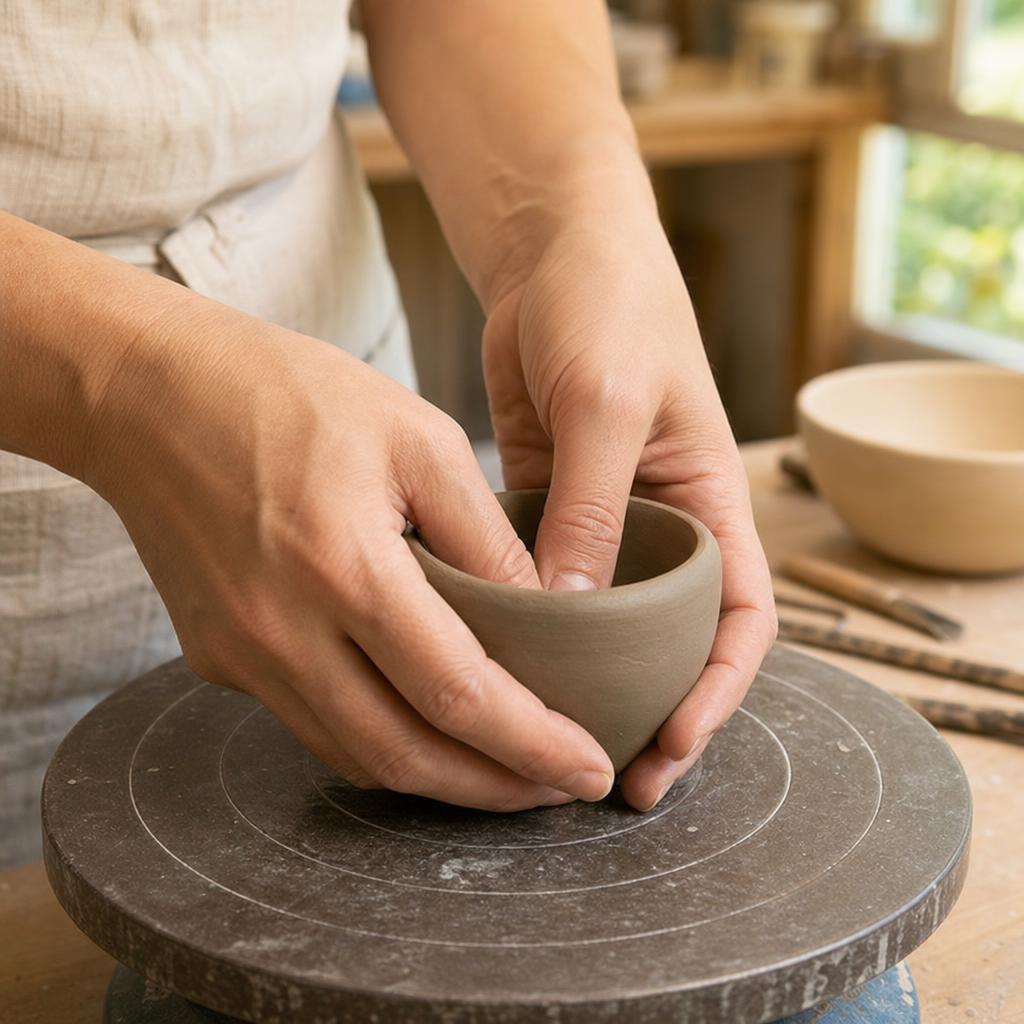
Hold the conditioned ball in one palm and press the pad of your other thumb straight into its center. Stop well above the bottom, leaving a base approximately as thick as your little finger; check by feeling from the outside rather than poking through. Support the outer wall with your fingers while pinching a small section between thumb and fingertips. Rotate the pot a quarter turn after each pinch, working around the circle instead of squeezing one area repeatedly. Keep the thumb pad flat and avoid using a fingernail, which creates a sharp groove. As the opening widens, place the pot on the mat and check that the bottom remains flat and sturdy. The checkpoint is an opening with a fairly even wall, a base that does not flex, and no side noticeably thinner than its neighbors. If the wall bends like rubber, cover the pot loosely for five minutes so it firms before continuing. If a crack starts, compress both sides toward it from the ends, then smooth the surface with a barely damp finger. For a deep split, add a tiny amount of fresh clay, blend its edges, and let the repair settle; do not hide structural damage with water alone. Leave the wall slightly thicker rather than risking collapse.
Refine the Form and Surface
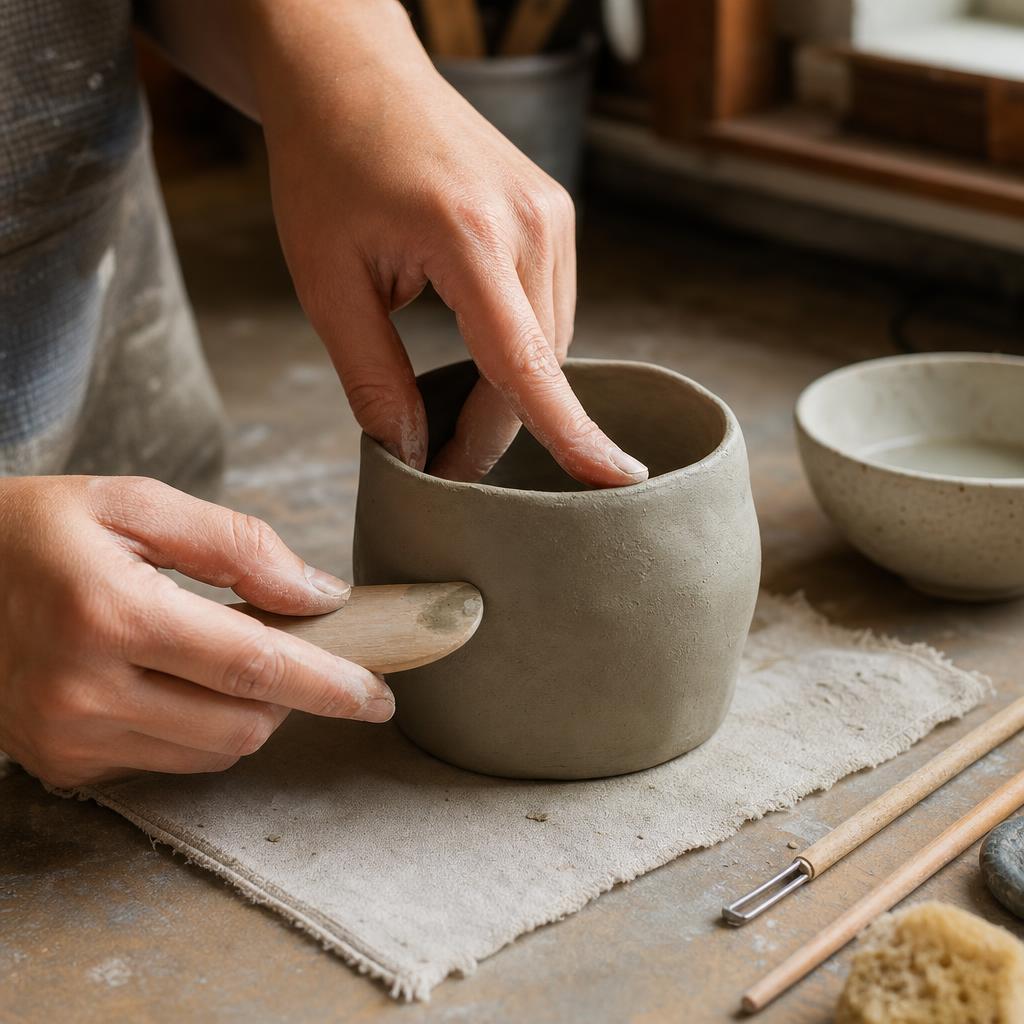
Choose the profile before refining: a straight-sided cup, a gently flared bowl, or a low dish. Support the inside with one hand and nudge the outside upward or inward in small arcs, rotating constantly so the pressure stays even. After one complete turn, set the bowl on the table and view it at eye level; the checkpoint is a stable footprint, a rim that does not lean, and a silhouette that looks balanced from every direction. Compress the lip gently between two fingers to round it, but keep enough material for strength. Soften ridges with a damp fingertip or blunt wooden tool, using only enough moisture to close marks without making the surface shiny or slippery. Add texture only after the rim and base are stable. Test a lace scrap, leaf, pencil end, or skewer on a clay offcut first, then press one shallow, repeating motif with light, even pressure. Leave a smooth band near the rim for comfortable handling, and blend any raised appliqué firmly at its edges. If the bowl spreads too wide, coax one section inward while supporting it, then rotate and repeat; never squeeze the whole wall at once. If fingerprints become worse, pause until the clay is leather-firm before smoothing. Remove crumbs from the base and confirm there are no soft puddles or wobbling points before drying.
Dry, Finish, and Protect
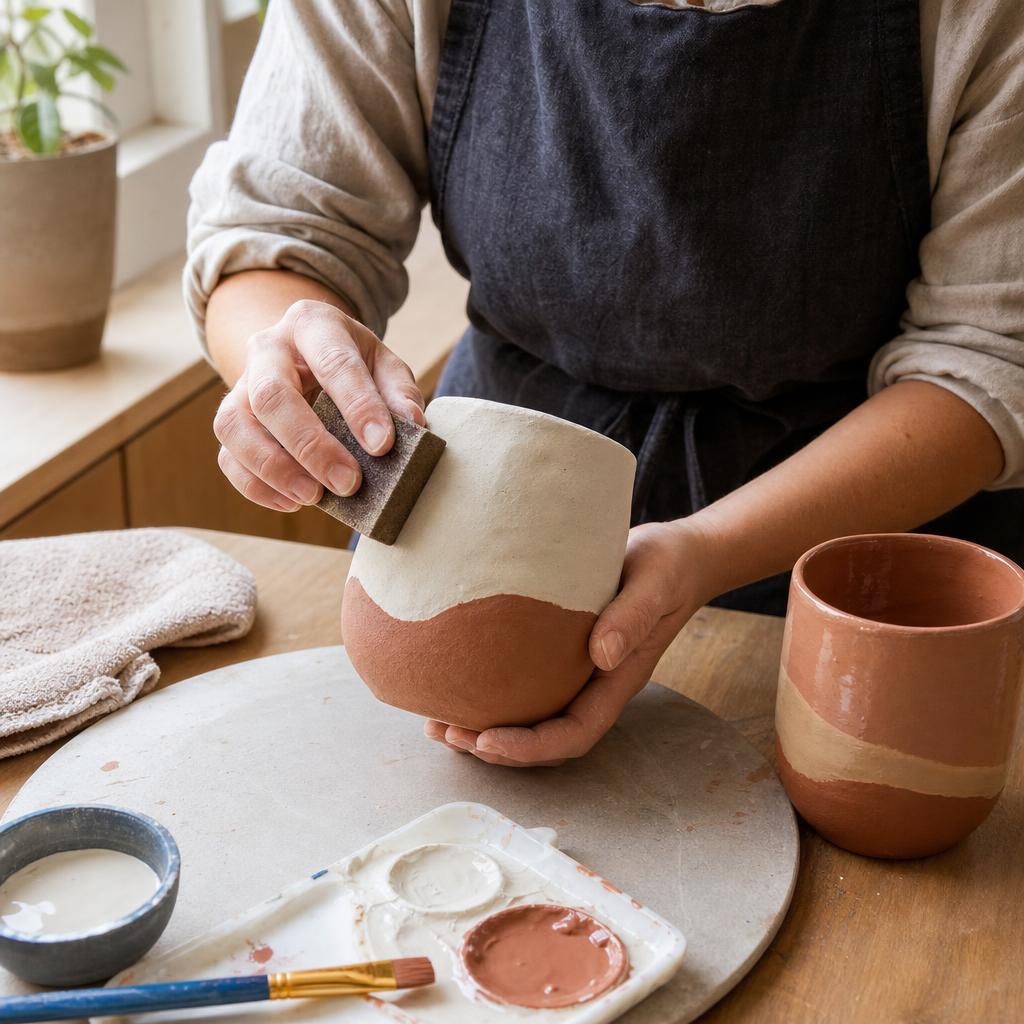
Set the shaped bowl on cardboard, wood, or another breathable surface, away from direct sun, radiators, heating vents, and a hot car. Let it dry slowly so the thicker base can catch up with the rim. A loose paper cover can moderate an especially dry room during the first day, but remove it if condensation appears. Turn the bowl only when the underside feels ready; do not force-dry it with a hair dryer. The checkpoint before finishing is a piece that feels completely hard, has no cool damp areas, sits securely, and shows no structural split. Fill only hairline surface marks with matching clay or lightweight filler, let repairs cure, then inspect again. Sand air-dry clay outdoors or over a protected surface with a dust mask and eye protection; use fine paper or a sanding sponge in gentle passes, and wipe dust with a damp cloth rather than blowing it around. Apply thin acrylic coats, letting each dry, and use a nearly dry brush around texture. If paint drags, allow more drying time instead of adding water. When color is fully dry, brush on a compatible water-based sealer in several thin coats, following its label. The sealer does not automatically make the bowl waterproof or food-safe, so use it for jewelry, keys, or wrapped items unless the product specifically approves other uses. Add a felt pad if it will rest on furniture.
Written by

Lily Andrews
Botanical & Nature Craft Artist
Lily forages, presses, and preserves the natural world. Her work bridges botanical science and handcraft, turning leaves, petals, and bark into lasting art.